Quantcast
Channel: CYCLINGABOUT.com
Viewing all 454 articles
Browse latest View live

The New 2016 Rawland Ulv and Ravn Adventure Touring Bikes

$
0
0

Rawland Cycles have been a unique breed since they started out eight years ago. They’ve built everything from monster cross 29ers, to rando bikes, to fat tyre road bikes and crazy single speeds. This year it’s all about “All-Road Enduro”. Their 2016 range of off-road adventure touring bikes looks fantastic and seems to again offer swiss army knife versatility, given the ability to run 2-3 different wheel sizes.

Both adventure touring bikes are made from 4130 double-butted steel tubing. They are optimised around drop handlebars, but given the relatively long top tube lengths could potentially be built for flat bars too. The bikes are littered with braze-ons so that you can use front/rear racks, fenders, 3x bidon cages, and many different front load configurations including porteur/rando racks and 3-boss cages. They use thru axles front and rear – 142mm on the Raven and 148mm “boost” on the Ulv.

These off-road touring bikes employ low-trail steering to ensure the bikes are stable with a front load. That’s achieved through a steep head angle and long fork rake. You’ll also notice they’re provided with rather wide tyres, designed to “float” over rough terrain.

Let’s take a closer look at Rawland Cycles latest offerings…

Rawland Ravn

Rawland Ravn 2016 Adventure Touring Bike 01

Rawland Ravn 2016 Adventure Touring Bike 02

The Ravn is a 26×2.2 (55mm) OR 650×43 adventure touring bike based around a 673mm outer wheel diameter. Rawland say you can even use 700×43 tyres sans-fenders if you’re happy to have a slightly high bottom bracket. The idea behind using 26″ wheels is that they’re stronger, lighter and more agile – especially with 2.00″ or wider tyres. 26 inch is not dead.

Rawland Ravn 2016 Adventure Touring Bike 03

Given the low-trail front end of the bike and the 26″ wheels – there is no toe-overlap on this model. In fact you can put fenders on the bike and still have clearance.

Rawland Ravn 2016 Adventure Touring Bike 05

The SRAM 1×11 drivetrain provides a good range for off-road riding without the constraints of a front derailleur, and the hydraulic STI levers give easy access to gear changes. Panaracer, WTB and Brooks have provided parts for this built, and Rawland have finished it off with their own bar, stem, seatpost and front rack.

Rawland Ravn 2016 Adventure Touring Bike 04

Rawland Ulv

Rawland Ulv 2016 Adventure Touring Bike 01

Rawland Ulv 2016 Adventure Touring Bike 02

The new Ulv is one very few 27+ bikes on the market. The 3″ wide mid-fat tyres give it the ability to ride where most bikes can’t – “Plus” wheels perform well in snow, sand and mud in particular. While Salsa, Jones and Surly have gone 29+, the Rawland Ulv is designed to be more fun on the singletrack, especially corners. Like the Ravn, this bike is versatile too. It can be built around 29×2.2 tyres for a faster and lighter, but less grippy ride.

Rawland Ulv 2016 Adventure Touring Bike 03

Rawland Ulv 2016 Adventure Touring Bike 04

You’ll find a SRAM 1×11 drivetrain, hydraulic brakes, Panaracer tyres, WTB rims and a Brook Cambium saddle on the Ulv. Rawland have finished it off with their own bar, stem, seatpost and front rack.

Rawland Ulv 2016 Adventure Touring Bike 05

These bikes will be available in the 2nd quarter of 2016 for US $2999.
It is TBD if they will be available as a frameset only.

Other Helpful Resources

All About Touring Bike Brakes
Frame Materials for Bicycle Touring
How to Select Touring Bike Gearing
Understand Bicycle Frame Geometry
What’s the Difference between Cyclocross and Touring Bikes?

Other 2016 Touring Bikes

Advocate Lorax
Basso Ulisse
Bianchi Volpe and Lupo
Bombtrack Beyond
Brodie Elan Vital
Cannondale T-Series
Cinelli Hobootleg Geo
Fuji Touring
Genesis Tour de Fer
Giant ToughRoad
Kona Big Rove
Kona Roadhouse and Sutra LTD
Kona Sutra
Marin Four Corners
Masi Giramondo
Niner RLT9
Salsa Deadwood
Salsa Marrakesh
Specialized AWOL
Traitor Wander
Trek 920, 720, 520 & CrossRip

The post The New 2016 Rawland Ulv and Ravn Adventure Touring Bikes appeared first on CyclingAbout.


Free Download: Bicycle Traveler Magazine Issue 10

$
0
0

Great news – Grace has just finished putting together Issue 10 of Bicycle Traveler Magazine! If you haven’t read it before, BTM is one of the only international bicycle touring magazines. Download your latest copy HERE.

This February 2016 issue includes stories from:
Belize
China
India
Uzbekistan

As well as the usual reviews, products and photo spreads. Here’s a tease… now get downloading! :)

Bicycle Traveler Magazine 10 01 Bicycle Traveler Magazine 10 02 Bicycle Traveler Magazine 10 03

The post Free Download: Bicycle Traveler Magazine Issue 10 appeared first on CyclingAbout.

Complete List of All-Road, Gravel Grinder & Adventure Road Bikes Including Pricing

$
0
0

All road, adventure road, enduroad, randocross, grinduro, gravel grinder – whatever you choose to call them – are a growing bike segment due to their ability to fit lightweight road tyres for a fast ride, or fat knobby tyres for a burn in the dirt. They tend to offer a wide gear range, a low bottom bracket and additional comfort over a regular road bike too.

My criteria for selecting a gravel, adventure all-road bike requires the following:
– Marketed as an all-road bike
– Ability to fit 700x35mm tyre
– Sold with gravel/slick tyres
– A road compact crankset / wider range than a CX bike
– Doesn’t quite fit in the touring / randonneur / cyclocross segments

This is a list of 100+ current models; I’ve tried to keep it as pure to the segment as possible. As this style of bike is often interchangeable with other segments, you may find a few CX, rando and light touring options in the mix. I’ve also included the max tyre sizes and fork trail measurements so that you can interpret how these bikes will handle.

Open Cycles UP. Image: TheRadavist

Open Cycles Unbeaten Path (UP). Image: TheRadavist.com

Carbon Adventure Road Bikes

Genesis Datum | 35mm tyre | 61mm trail | from US $2549
Giant AnyRoad Co-Max | 35mm tyre | 66mm trail | US $1900
GT Grade | 38mm tyre | 76mm trail | from US $2710
Jamis Renegade | 35mm tyre | 61mm trail | from US $2599
KHS Grit 440 | 38mm tyre | 73mm trail | US $2099
Ibis Hakkalugi Disc | 40mm tyre | 70mm trail | US $4199
Norco Search | 35mm tyre | 66mm trail | from US $2550
On-One Bish Bash Bosh | 40mm tyre | 62mm trail | from US $2059
Parlee Chebacco | 40mm tyre | 66mm trail | from US $4399
Pivot Vault | 38mm tyre | 66mm trail | from US $3599
Raleigh Roker | 42mm tyre | 64mm trail | from US $2499
Ridley X-Trail | 40mm tyre | 66mm trail | from US $2999
Salsa Warbird | 44mm tyre | 70mm trail | from US $3499
Santa Cruz Stigmata | 38mm tyre | 66mm trail | from US $3499
Scott Addict Gravel Disc | 38mm tyre | 68mm trail | US $3999
Specialized Diverge | 35mm tyre | 57mm trail | from US $3300
Tifosi Cavazzo | 35mm tyre | 66mm trail | from US $2050
Tomac Montezuma | 40mm tyre | 70mm trail | from US $1900
Van Dessel Full Tilt Boogie | 40mm tyre | 66mm trail | US $4499
Viner Strada Bianca | 40mm tyre | 70mm trail | from US $1650

Scott Addict Gravel Disc 2016

Scott Addict Gravel Disc. Image: RoadBikeReview.com

Aluminium Adventure Road Bikes

Bergamont Prime CX RD | 35mm tyre | 70mm trail | US $1899
Bianchi Allroad | 38mm tyre | 70mm trail | from US $1599
Brodie Revel / Ronin | 35mm tyre | 66mm trail | from US $1169
Bulls Grinder | 42mm tyre | 66mm trail | from US $1650
Cannondale Slate | 42mm tyre | 66mm trail | from US $2980
Canyon Inflite AL S | 35mm tyre | 61mm trail | from US $1549
Centurion Crossfire | 38mm tyre | 66mm trail | from US $1200
Devinci Hatchet | 40mm tyre | 74mm trail | from US $1100
Diamondback Haanjo / Haanjenn | 40mm tyres | 75mm trail | from US $900
Felt V Series | 35mm tyre | 68mm trail | from US $999
Focus Mares AX | 38mm tyre | 73mm trail | from US $1350
Fuji Tread | 35mm clearance | 63mm trail | from US $790
Genesis CdA | 40mm tyre | 66mm trail | from US $1049
Giant Revolt | 50mm tyre | 71mm trail | from US $1050
Giant Anyroad | 35mm tyre | 66mm trail | from US $1100
GT Grade | 38mm tyre | 76mm trail | from US $880
Jamis Renegade Exile | 35mm tyre | 61mm trail | US $839
KHS Grit 220 | 38mm tyre | 66mm trail | US $1349
Kona Rove AL | 40mm tyre | 66mm trail | US $899
Marin Gestalt | 35mm tyre | 63mm trail | from US $1099
Miele Svelto Grt | 42mm tyre | 73mm trail | US $1349
Mongoose Selous Expert | 38mm tyre | 66mm trail | US $1199
Niner RLT9 | 44mm tyre | 70mm trail | from US $2000
Norco Search | 40mm tyre | 66mm trail | from US $1150
Raleigh Willard | 42mm tyre | 66mm trail | from US $1399
Ridley X-Bow Allroad / X-Trail | 40mm tyre | 66mm trail | from US $1450
Rose Team DX Cross | 38mm tyre | 73mm trail | from US $2200
Salsa Warbird | 44mm tyre | 70mm trail | from US $1999
Specialized Diverge | 35mm tyre | 57mm trail | from US $850
Stevens Gavere / Namur | 35mm tyre | 73mm trail | from US $1299
Trek Crossrip / 720 | 38mm tyre | 66mm trail | from US $1099
Turner Cyclosys | 43mm tyre | 66mm trail | from US $3200
Van Dessel Aloominator | 40mm tyre | 66mm trail | US $3999

Cannondale Slate with a front suspension fork. Image: Bikepacking.com

Cannondale Slate with a front suspension fork. Image: Bikepacking.com

Steel Adventure Road Bikes

Advocate Lorax | 40mm tyre | 61mm trail | US $1799
Black Mountain Cycles Cross | 43mm tyre | 69mm trail | from US $2770
Breadwinner B Road | 40mm tyre | custom trail | from US $4200
Brodie Monster | 44mm tyre | 74mm trail | from US $1799
Charge Plug | 42mm tyre | 72mm trail |  from US $999
Co-Motion Klatch | 40mm tyre | 69mm trail | from US $4195
Franco Grimes Disc | 40mm tyre | 70mm trail | from US $2799
Genesis Croix de Fer | 40mm tyre | 66mm trail | from US $1299
Honey Allroads | 45mm tyre | 63mm trail | from US $3325
Jamis Renegade | 40mm tyre | 61mm trail | from US $1199
Kona Rove ST | 38mm tyre | 66mm trail | from US $1599
Masi CXGR | 38mm tyre | 66mm trail | US $1469
Niner RLT9 | 44mm tyre | 70mm trail | from US $2500
Raleigh Tamland | 42mm tyre | 66mm trail | from US $1749
Rawland Cycles Ravn | 55mm tyre | 40mm trail | US $2999
Ritchey Swiss Cross Disc | 38mm tyre | 66mm trail | US $3799
Salsa Vaya | 45mm tyre | 66mm trail | from US $1499
Shand Stoater / Stooshie | 38mm tyre | 64mm trail | from US $2749
Stinner Camino | 40mm tyre | 66mm trail | from US $5540
Surly Straggler | 45mm tyre | 67mm trail | US $1549
Traitor Ruben | 35mm tyre | 66mm trail | US $1399
Van Dessel Whiskey Tango Foxtrot | 52mm tyre | 68mm trail | from US $2199
Volagi Viaje XL | 42mm tyre | 61mm trail | from US $1600 

Stinner Camino custom build.

A Stinner Camino custom build.

Titanium Adventure Road Bikes

Charge Plug 5 | 42mm tyre | 70mm trail | US $3999
Enigma Ecroix | 35mm tyre | 65mm trail | from US $4100
Foundry Overland | 42mm tyre | 66mm trail | US $4295
Genesis Croix de Fer Ti | 38mm tyre | 66mm trail | US $4249
Litespeed T5-G / Ku:wa | 40mm tyre | 58mm trail | from US $4700
Lynskey Backroad | 45mm tyre | 61mm trail | from US $2750
Moots Routt 45 | 45mm tyre | 64mm trail | from US $3960
Sabbath September AR-1 Disc | 38mm tyre | 66mm trail | from US $3249
Salsa Vaya Ti | 45mm tyre | 66mm trail | US $4299
Stinner Refugio | 40mm tyre | 66mm trail | from US $6750
Van Nicholas Amazon Cross | 40mm tyre | 66mm trail | from US $3299
Volagi Viaje Ti | 42mm tyre | 61mm trail | from US $5370

A custom Enigma Ecroix build. Image: WindmillWheels.com

A custom Enigma Ecroix build. Image: WindmillWheels.com

Adventure Road Framesets

44 Bikes Huntsman Steel
Alchemy Konis Steel | US $2599
Alchemy Aithon Carbon | US $5999
Boo Bicycles SL-G Bamboo | US $4999
Box Dog Pelican Steel | US $1800
Caletti Cyclocross Steel | from US $3055
Caminade Gravel Steel | US $2100
Cielo Cross Classic Steel | US $1899
Curve Grovel CXR Ti | US $1899
Elephant National Forest Explorer Steel | US $1385
Grava Revenuer Steel | US $1635
Grava Maple Sally Carbon | US $1885
Gunnar Fastlane Steel | US $1650
Kona Rove Ti | US $1999
Mosaic GS-1 Steel
Mosaic GT-1 Ti
Nicolai Argon CX Aluminium
Open Unbeaten Path Carbon | US $2999
Sarto Gravel TA Carbon
Seven Evergreen Steel / Ti
Singular Kite Steel | US $799
Soma Double Cross Disc Steel | US $437
Soma Wolverine Steel | US $619
Soulcraft Dirtbomb Steel | US $2375
Twin Six Rando Ti | US $2200
Vassago Donnybrook Steel | US $1399
Vassago TKO Ti All-Road | US $2299
Velo Orange Pass Hunter Steel Disc | US $620
Zen AR45 Steel | US $1399

A Curve Grovel CXR Titanium custom build.

A Curve Grovel CXR Titanium custom build.

On CyclingAbout, you’ll also find…

A Complete List of Off-Road Adventure Touring Bikes with Pricing
A Complete List of Tandem Builders and Manufacturers
A Complete List of Touring Bikes Available in Australia
A List of XS Touring Bikes for Smaller Cyclists: 42, 44, 46cm
A List of XXL Touring Bikes for Tall Cyclists: 62, 63, 64cm
A List of Step-Through and Mixte Touring Bikes

The post Complete List of All-Road, Gravel Grinder & Adventure Road Bikes Including Pricing appeared first on CyclingAbout.

How Much Does Bike and Gear Weight Actually Slow You Down? Part Two (Results)

$
0
0

In the last part of this series I discussed in depth, the effect of weight on cycling speed. I inputted my body weight, bike weight, gear weight and average power into BikeCalculator.com and found that every kilogram added was contributing between 10 to 90 seconds over a 100km ride – depending on the quantity of vertical metres gained.

I’m back now, after spending the last month testing and assessing different loads on different courses.

Before I started this testing, I felt that the effects of weight were blown out of proportion. Some people spend huge amounts of money on lightweight bikes and gear with the idea that it will make their tours easier or faster. Some people even leave gear at home that can significantly improve the comfort of their bike trip.

The idea behind this testing is to quantify weight into time. That way we can be more rational about our gear choices!

Right-o, let’s get to it.

Pannier Weight Testing 01

The Experiment

I took my Surly Long Haul Trucker with two large panniers (mounted to my rear rack) on a 15.37km (9.5mi) long undulating route which offered 276m (905ft) of climbing. The day I chose was sunny, warm and dry. The circuit was very sheltered, significantly reducing any hindrances from the wind – no significant breeze was ever felt. The circuit was designed to mimic a day touring in the mountains, whereby almost 2000m (6562ft) of elevation was gained.

At the time of testing my body weight was 78kg (172lb) and my Surly touring bike was 15kg (33lb). I didn’t carry any water on the bike throughout the testing.

I conducted two test runs for each load – the first with 5kg (11lb), the second with 25kg (55lb) and the third with 15kg (33lb). These are pretty typical gear weights that people carry on bike trips ranging from guided to self-supported. My testing sequence was 5, 25, 15, 5, 25, 15kg.

I used a Stages crank-based power meter to measure my ‘power’ or ‘effort’. I tried my best to maintain 200 watts at all times, generally fluctuating between 180-220w (200 watts average). This power rate is one I know I can push all day. I kept my body position upright and in my hoods at all times, and kept my pedalling cadence to a consistent amount.

I drank half a bidon and ate one muesli bar (left at the start/finish) between each test run. I would expect that my body weight remained relatively consistent throughout the testing.

What about fatigue?
Here’s the deal; I got fatigued, but that didn’t affect the results. How? I picked a power that I knew I could push all day long, so even as I was getting gradually more tired after each test run, the pressure I put through the pedals remained the same from start to finish. As a result, pushing 5kg on my fourth run was more difficult than pushing 25kg on my second run!
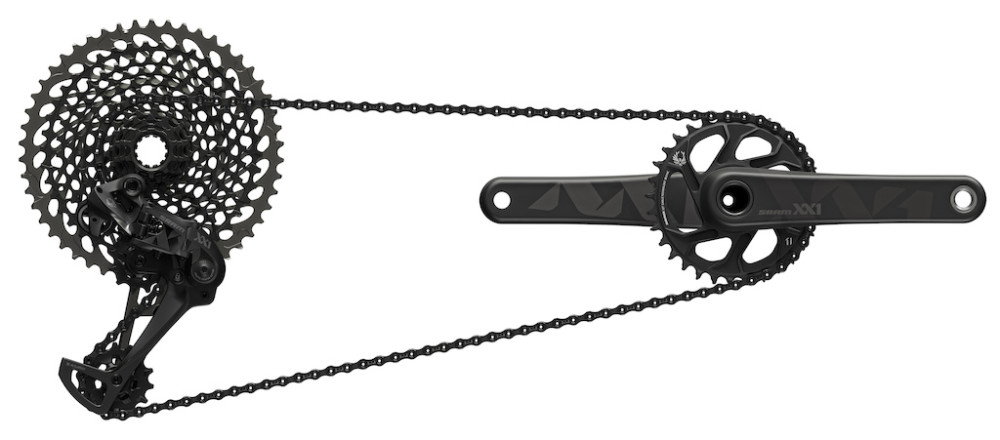
This is the power meter that I used to ensure my effort was consistent between all of my testing.

This is the Stages crank-based power meter that I used to ensure my effort was consistent between all of my testing.

Results

Carrying 5kg (11lb) on a 15.37km Circuit with 276m Climbing
Run 1: 39:55 (199w @ 23.10km/h)
Run 2: 39:25 (199w @ 23.40km/h)
Average: 39:40 (199w @ 23.25km/h) 

Carrying 15kg (33lb) on a 15.37km Circuit with 276m Climbing
Run 1: 41:26 (200w @ 22.27km/h)
Run 2: 41:22 (198w @ 22.29km/h)
Average: 41:24 (199w @ 22.28km/h) 

Carrying 25kg (55lb) on a 15.37km Circuit with 276m Climbing
Run 1: 42:40 (199w @ 21.61km/h)
Run 2: 42:24 (200w @ 21.75km/h)
Average: 42:32 (199.5w @ 21.68km/h)

Pannier Weight Testing 03

Now, let’s extrapolate the data I collected into a 100km ride:

Extrapolated Data for a 100km (62mi) Ride with 1796m (5892ft) climbing
5kg Load: 258.06 mins @ 23.25km/h
15kg Load: 269.28 mins @ 22.28km/h +11 mins (4.2% slower or 1:07/kg)
25kg Load: 276.78 mins @ 21.68km/h +18 mins (6.8% slower or 0:56/kg)

Average unit of time per extra kilogram carried
1:02 minutes

Analysis

The effect of weight throughout my testing was actually lower than initially predicted, and wow – the numbers are IMPRESSIVELY close to what the calculator spits out. The BikeCalculator ride time was within a few minutes of the test data over 100km, even with all of the variables involved.

The reason I feel it is reasonable to extrapolate the data is because my course was long enough to balance out many external influences. Doing the circuit twice, and getting within seconds each time, even after 40+ minutes riding – was reassuring of that fact. Should I have made the test course any longer, there would have been the risk of greater changes in the weather, which wouldn’t have provided a fair comparison between each of the loads that I was carrying.

If I adjust the BikeCalculator.com data from Part One to my 1796m climbing route
5kg Load: 251.75 mins @ 23.83km/h
15kg Load: 265.00 mins @ 22.64km/h +13 mins (5.0% slower or 1:20/kg)
25kg Load: 278.80 mins @ 21.52km/h +27 mins (9.7% slower or 1:20/kg)

Average unit of time per extra kilogram carried
1:20 minutes

The numbers are close, but why could there be a discrepancy?
There’s a reasons why the 15kg and 25kg loads in my testing are not consistent with the calculator. Two climbs on my circuit were rather steep, requiring more power than 200w for a short burst (as I ran out of gears!). The time period I was over 200w while carrying 25kg was slightly longer than with 15kg. The consequence is a slightly faster climb time, and a minor skewing of the numbers. I have no doubt that if I had the right gears, the time per extra kilogram would’ve crept up just a few seconds.

Pannier Weight Testing 05

Other Testing

Flat Course
I attempted to do some speed testing on a flat circuit, but found that it was too difficult to get any consistent results. The maths from the previous part of this series backs that up: it predicted about 10 seconds per kilogram extra over 100km. A slight change in breeze direction was going to muddy my results for that testing… so I scrapped it.

Aerodynamics
I did a couple of tests using some Ortlieb Front Roller panniers (12.5L) on my rear rack instead of the larger Back Roller bags (21L). Even just the switch to a bag with less frontal area dropped my lap time by 45 seconds (from 39:40 to 38:55 average on 2x course laps – carrying 5kg). Over 100km the aerodynamic advantage would’ve saved me about five minutes. That’s the equivalent of carrying 5kg LESS weight in the big panniers.

So is weight as significant as we think?

I came into the test with the feeling that a few kilograms here and there weren’t really going to affect my bicycle tours. The data that I’ve collected has confirmed my suspicions.

I’d like to reiterate a few things:

A little bit of extra weight isn’t that significant in terms of time.
A handful of kilograms is not going to impact your tour significantly. It will add a few minutes to your daily ride time only.

The flatter your tour route, the less weight matters.
Flat riding will make the weight of you and your bike quite insignificant. For me to carry 10kg extra on a 100km flat ride, I’ll arrive only 90 seconds later than without it.

The more distance you’re looking to travel per day, the more weight matters.
The time savings become more significant, the longer you’re on the bike each day. If I were to carry an extra 10kg on a hilly 300km ride, I’m looking at finishing over 30 minutes later than without that weight. A ride of that length would take me ~13 hours, and by that stage I’d really appreciate any time savings I can get!

Pannier Weight Testing 02

Aerodynamics = Key

If you care about speed, you should care about aerodynamics.

Aero savings are MOST important on the flat, given the higher average speeds. Adopting a slightly lower bike position, using tighter-fitting clothes and making use of bikepacking bags (or smaller panniers) will allow you to travel faster through the wind.

Better Reasons to Drop Weight From Your Kit

I still like to reduce my gear weight, for the following reasons:

In the pursuit of minimalism
I try not to bring things that aren’t used frequently, as they clutters up my bags and just generally feel unnecessary. If I’m not using it, I’ll post it home. Minimalism and simplicity are mantras that I tend to follow across the board in life.

To improve my bike’s handling
Less weight means better bike manoeuvrability. With a less loaded bike, you’ll be able to change your bike’s direction faster to avoid obstacles like pot holes.

To make flying with my bike cheaper
You are paying for every kilogram you fly with, so what better reason than to strip weight to make flying cheaper!

In order to reduce component stress
Dropping the weight of your gear will mean that you’ll put less stress on your frame and components, resulting in longer lasting gear. As you drop your gear weight, you’ll also be able to employ lighter weight bikes and components.

To make carrying my bags easier off the bike
When travelling by bike, it is often that you’ll need to carry your gear up and down stairs, onto trains and through people’s houses. By having less stuff, the off-the-bike carrying is MUCH easier!

Pannier Weight Testing 04

Wrapping Up

Now that you know that an extra kilogram over 100km is worth somewhere between 10 and 90 seconds, should you be less concerned about weight? I think so. If you’re deciding between a 2kg tent for $600 and a 3kg tent for $200 – don’t spend the extra money in the hope you’ll ride a lot faster. You’re much better off buying your gear based on functionality and value for money.

If you’d like to improve your riding speed, consider using more aerodynamic clothes and luggage setups. Bikepacking bags have less frontal area than panniers so you’ll be able to cruise along at considerably faster speeds.

My testing has confirmed that BikeCalculator is a very accurate tool for measuring speed. I was really impressed by the numbers it gave me, and have no qualms in recommending it to see how weight will affect YOUR time over the distances YOU travel.

If you don’t have access to a power meter, perhaps jump on a ‘spin bike’ at a gym. Most stationary bikes will give you a somewhat accurate power figure, and if you were to spin for half an hour at a pace you feel comfortable – you’ll have the critical data required for your own accurate BikeCalculator calculations.

If you missed Part One, head HERE for my initial calculations.

The post How Much Does Bike and Gear Weight Actually Slow You Down? Part Two (Results) appeared first on CyclingAbout.

Drop Bar Shifters: Gevenalle’s Simple Thumb Shifters With STI Convenience

$
0
0

Since 2011, Gevenalle have been making brake levers with a distinctive downtube shifter attached to the front. This allows users to get STI functionality – like shifting and braking at the same time or dumping lots of gears in one fell swoop – for a low cost. For bicycle travellers, the key advantage is surely the simplicity of the system; a great upgrade to a bike that comes with less-accessible barend or downtube shifters.

The Portland, Oregon-based business actually started life named “Retroshift”, which is apt considering the functionality and styling of their core product. But as the company grew, so did their product range and now Gevenalle – a name derived from two Dutch words that translates to “give all” – was their choice of branding.

Inventor Adam Clement says the idea to install the shifter in front of the brake lever came in 1993, at around the same time as the STI lever came out. Many of his friends crossed over to the integrated units, but Adam really liked the snappy feel and simplicity of his Simplex gear shifters.

Image: TheRadavist.com

Image: TheRadavist.com

There Are A Couple of Different Lever Options

GX – Shimano MTB 10 or 11 Speed DynaSys Derailleurs
HYDRAULIC – Shimano Road and MTB Shifters Complete with Hydraulic Brakes
UX – Shimano Alfine 8 Speed Internally Geared Hubs
CX – Shimano Road 9, 10 or 11 Speed Derailleurs for use with Road or Canti Brakes
CXV – Shimano Road 9, 10 or 11 Speed Derailleurs for use with V-Brakes and Disc Brakes
AUDAX – Friction Shifters for Road/Canti or V/Disc

Image: TheRadavist.com

Image: TheRadavist.com

Lower Gearing for Touring Bikes

Normally, it isn’t easy matching STI levers with mountain bike derailleurs due to differences in cable pull. But luckily, the GX levers have been developed specifically for MTB derailleurs! That means that your drop bar touring bike can use a full mountain bike drivetrain, complete with 11-42t cassette. One of a few great ways to achieve low gearing for easier climbing.

Image: SaddleUpBike

Image: SaddleUpBike

Simplicity With A Touch More Functionality

Barend shifters are a common specification for a dedicated touring bike, in fact six out of my eight favourite touring bikes come with them. Although barend shifters work well, I can’t help but feel that these Grevenalle shifters offer better functionality. The shifting is located in the same location as the brake, meaning no more taking your hands off the bars to change gears! This could be a great upgrade for your touring bike, especially for the less competent riders out there.

The Gevenalle brake/shifters retail for US $139-229 depending on model.

The post Drop Bar Shifters: Gevenalle’s Simple Thumb Shifters With STI Convenience appeared first on CyclingAbout.

Wolf Tooth Tanpan: Mix MTB Components with STI Road Shifters to Lower Your Gearing

$
0
0

Just days after we covered the JTek range of Road-to-MTB shift cable adapters, Wolf Tooth announced a product that works in the exact same way. Called the Tanpan, it uses a sealed bearing roller to adapt your cable pull ratio from 10 or 11 speed Shimano STI shifters to Shimano MTB derailleurs.

Due to the necessity of a matching cable pull ratio, road shifters will only work with road derailleurs. This can be an issue on a touring bike when the lowest road gear on offer is 34t (front) x 32t (rear). By using MTB components you’ll be able to get cassettes with larger than 42 teeth, and front chainrings with as small as 22 teeth – significantly reducing the gear inches of your lowest gear. That should get you up any climb worth riding!

Wolf Tooth Tanpan Cable Adapter

‘Tanpan’ loosely translates to ‘negotiator’ in Mandarin – Wolf Tooth like to think of this product as able to cross boundaries and break down walls – at least in the drivetrain world.

The Tanpan comes in two different models which are very straight forward:
SH10 – Optimised for 10 speed Shimano road shifters and 10 speed Shimano MTB derailleurs
SH11 – Optimised for 11 speed Shimano road shifters and 11 speed MTB derailleurs

Wolf Tooth say that it will also combine 10/11 speed SRAM derailleurs with 10/11 speed Shimano shifters, although they note that the shifting performance is ‘moderately decreased’.

WolfTooth Tanpan 02

The Tanpan is designed to slot perfectly into a Shimano MTB derailleur

The 17 gram Tanpan is CNC machined in the USA and finished with a barrel cable adjuster, stainless steel hardwear and a high quality steel cartidge bearing. You can get your hands on one for US $39.95.

Don’t forget to check out my Complete Guide to Road Shifter and Gear Hacks to Achieve Low Climbing Gears.

The post Wolf Tooth Tanpan: Mix MTB Components with STI Road Shifters to Lower Your Gearing appeared first on CyclingAbout.

Video: Riding Up Stairs On My Touring Bike!

Co-Motion Cycles Introduces the Divide Pinion: Is This My Dream Touring Bike?

$
0
0

Dear Co-Motion Cycles

I just noticed that you’ve been at the North American Handmade Bike Show (NAHBS) showing off some of your 2016 bikes. That’s pretty awesome – I’m sure you got lots of great feedback on the bikes that you put together for people.

I love that you attend handmade bike shows with your well-designed and superbly-constructed bikes, complete with a price tag. The majority of other builders seem to only produce one-off show bikes, with fancy paint and extra complexity that offers no real world benefits. There’s obviously a place for artisan bicycles – heck, they look amazing and I really appreciate the creativity, time and effort invested in them. But at the end of the day, it’s awesome that people can literally order one of the world’s best custom touring bikes from you… from the show floor. So props to you!

I’m pretty sure you’re well aware of my love for the custom tandem touring bike you built for me in 2013. Having ridden lots of tandems over the years, it’s safe to say that your Equator is the best I’ve swung a leg over – especially with a touring load. I went on to ride it over 20,000km through I don’t even know how many countries.

Other than shooting mad props your way, the reason I’m writing to you is that I’m concerned my bank balance could be jeopardised at any moment, and I have reason to believe that you’ll have something to do with it.

You see, it’s your all-new Divide Pinion…


Co-Motion Divide Pinion Touring Bike 01

You’ve been putting together steel touring bikes for almost 30 years, and you’re now using Reynolds 725 oversized tubing which I believe is exclusive to you. This exact tubing has provided me with an unbelievably stiff tandem – I’m only guessing you could load this Divide up with just about anything and still be able to ride it hard. You’ve even got new thru-axles front and rear which should reduce dropout flex and make the disc caliper pull up even better.

The in-house chainstay yoke looks to yield even more tyre clearance, so I could probably ride this bike on almost any road in the world, right? With 29er MTB wheels, I’d say so.

Co-Motion Divide Pinion Touring Bike 03

Co-Motion Divide Pinion Touring Bike 05

Image: BikeRumor.com

But it’s the Pinion gearbox that would probably provide the lethal blow to my bank account. Having used a Rohloff hub for 100,000km+ through over 40 countries, I really want to try out a Pinion gearbox. I hear the low-to-high gear range provides both an 18 gear inch low gear AND 115 gear inch high gear (636%). That’s awesome because I don’t think I’d need anything more! Those gears look to be spread over 18 gears with smaller gaps than my Rohloff too…

Co-Motion Divide Pinion Touring Bike 02

Image: BikeRumor.com

Don’t even get me started on your in-house stainless steel dropouts. They are such a nice touch. And Gates Carbon Belt Drive… can you read my mind? After riding over 30,000 silent kilometres before wearing out a belt, in addition to never having a greasy chain to maintain – I am certainly a belt convert, especially for long-distance touring bikes.

Co-Motion Divide Pinion Touring Bike 04

Image: BikeRumor.com

Just when I thought you’d done everything to take my money, you go and custom-make a Pinion 18-speed shifter to fit on a road handlebar. Here I was looking for an excuse to not need a Pinion drivetrain, and you provided a shifting solution without me even asking. That’s not fair!

I hope you’re able to bear the full responsibility of my health deterioration as I transition across to a two-minute noodle diet. Next time you’re planning on producing my dream touring bike, please stop and think about how it will affect my daily life. A little notice would be nice!

Yours sincerely,

Alee Denham 😛
Touring Bike Enthusiast

The Co-Motion Divide Pinion starts at US $6395 – the bike pictured is US $7100.
S&S couplers add US $700 and custom geometry adds US $350. 

For a Complete List of Pinion Touring Bikes available, click HERE

The post Co-Motion Cycles Introduces the Divide Pinion: Is This My Dream Touring Bike? appeared first on CyclingAbout.


Complete List of Pinion P.18 Speed Gearbox Touring and Trekking Bikes

$
0
0

The Pinion gearbox is becoming more and more common on premium touring bikes around the world, as brands start adopting the tooling to match this gear tech to their frames. Did you know that this 18 speed gearbox is now available on over 30 different touring bikes?

The system is ideal for bicycle touring for a number of reasons:
– It has a wider range of gears than almost any drivetrain (636%), giving you both small climbing gears and high gears
– The gear system is fully sealed away from the elements and is rated for over 60,000km use
– It’s easy to swap out entire system if there is a failure
– There’s small gaps between each of the gears
– You can run it with a Carbon Belt Drivetrain

Bikes with Pinion gearboxes aren’t cheap. And they’re still pretty limited to the European market. You’ll find complete bikes starting from €2799 (US $3100), but the €4000-5000 (US $4400-5500) price range is a more common price point.

You can read all the nitty-gritty details about the Pinion HERE

Aarios Adventure – €5890

Aarios Adventure

Aarios Adventure

AZUB Apus, Bufo, Mini, Six, Ibex or Max – from €3860

Azub Mini

Azub Mini

Belt-Bikes Pinion Trekking – from €3999

Belt-Bikes Pinion Trekking Touring Bike

Belt-Bikes Pinion Trekking

Böttcher Levante or Road Trip Pinion – from €3999

Bottcher Road Trip

Bottcher Road Trip

Co-Motion Divide Pinion – from US $6395 (Read my write-up on this bike HERE)

Co-Motion Divide Pinion Touring Bike 01

Co-Motion Divide Pinion

Cresta Sirius – from €3900

Cresta Sirius

Cresta Sirius

Einhorn Unicorn 123 – from €4999

Einhorn Unicorn 123

Einhorn Unicorn 123

Externum Habilita Tour – €4500

Externum Habilita Tour

Externum Habilita Tour

Falkenjagd Hoplit PI – from €6198

Falkenjagd Hoplit Pi

Falkenjagd Hoplit Pi

Gudereit SX-P 4.0 Evo – €3499

Gudereit SX-P 4.0 Evo

Gudereit SX-P 4.0 Evo

IdWorx oPinion – from €6500

Id Worx oPinion

Id Worx oPinion

Kocmo Pinio TR – from €5650

Kocmo Trekking R-5 Pinio Pinion Touring Bike

Kocmo Trekking R-5 Pinio

Koga World Traveller 29 – from US $5000

Koga World Traveller 29

Koga World Traveller 29

KTM Life Lontano P18 – €3399

KTM Life Lontano P18

KTM Life Lontano P18

MaxCycles Pinjan 18 – from €3799

MaxCycles Pinjan 18

MaxCycles Pinjan 18

Maxx Crossmaxx Pinion – from €3259

Maxx Crossmaxx Pinion

Maxx Crossmaxx Pinion

MTB Cycletech Papalagi P1, Tool P1, Andale P1, Amar P1 or Raw City P1 – from €3890

MTB Cycletech Papalagi P1

MTB Cycletech Papalagi P1

Patria Helios, Touros or Argos – from €4100

Patria Helios Pinion

Patria Helios Pinion

Poison Phenol, Ozon or Nitro – from €2799

Poison Phenol

Poison Phenol

Rennstahl Pinion 853 – €4590

Rennstahl Pinion 853

Rennstahl Pinion 853

Santos Travelmaster 2.9 – from €4999

Santos Travelmaster 2.9 Pinion

Santos Travelmaster 2.9 Pinion

Staiger Vermont – €3699

Staiger Vermont

Staiger Vermont

Stevens P18 Lite – €3799

Stevens P18 Lite

Stevens P18 Lite

Tour de Suisse Kettenlos Speed Pinion – from €4000

Tour de Suisse Kettenlos Speed Pinion

Tour de Suisse Kettenlos Speed Pinion

Tout Terrain Silk Road, Tanami, Metropolitan or Panamerica Xplore – from €4390

Tout Terrain Tanami Xplore

Tout Terrain Tanami Xplore

Van Nicholas Deveron – from €5600

Van Nicholas Deveron

Van Nicholas Deveron

Velotraum Cross 7005 Pinion – from €4125

Velotraum Cross 7005 Pinion

Velotraum Cross 7005 Pinion

VSF Fahrradmanufaktur TX-1200 – €3599

VSF Fahrradmanufaktur TX-1200 Pinion Touring Bike

VSF TX-1200

Custom Bikes

47 Grad Nord Sleipnir

47 Grad Nord Sleipnir

47 Grad Nord Sleipnir

Bendixen Pinion

Bendixen Pinion

Bendixen Pinion

HiLite Pinion Trekking

HiLite Pinion Trekking

HiLite Pinion Trekking

La Canard

La Canard Pinion

La Canard Pinion

Norwid Pinion 

Norwid Pinion

Norwid Pinion

Pilot Trekking Pinion

Pilot Trekking Pinion

Pilot Trekking Pinion

Portus Bolter

Portus Bolter

Portus Bolter

If you’d like to learn more about Pinion Gearboxes, click HERE

The post Complete List of Pinion P.18 Speed Gearbox Touring and Trekking Bikes appeared first on CyclingAbout.

Surly Releases the Porteur House 43L Front Bag for their Porteur Rack

$
0
0

Late last year, Surly announced they were producing steel porteur style racks which were capable of carrying a 15kg load. Although the racks only mount to Surly forks, they were pretty well received by folks who weren’t keen on panniers but still wanted to carry a decent load.

Surly have now dropped a new bag to match their 24-Pack rack, called the Porteur House.

Surly Porteur House Front Rack Bag 01

This roll-top bag measures in at 450 x 400 x 270mm which I’ve calculated to be around 43 litres – that’s a larger capacity than a set of Ortlieb rear panniers! It’s made from a nylon canvas which has received a PU coating to make it a bit more water resistant. A reinforced insert at the bag’s base gives it shape, and protects your gear from the elements. Eight Velcro straps hold the bag onto the 24-Pack rack, in the process allowing this bag to fit more than just Surly’s rack.

Surly Porteur House Front Rack Bag 03

Two front pockets allow you to stash and then access your essentials quickly. The Porteur House comes with three fluro nylon stuff sacks to protect your gear in each compartment that little bit more.

Surly Porteur House Front Rack Bag 02

With a 15kg load, the Porteur system will affect your bike’s handling more than other forms of front baggage due to its higher centre of gravity than, say, a set of low-riding panniers. Other disadvantages include the bag not being 100% waterproof, the fact that the bag interferes with drop handlebars and possibly even the velcro mounting system in the long term.

The Surly Porteur House retails for US $120. Matching it to a Surly 24-Pack rack will add US $150. Alternative products to this front porteur bag include the Swift Industries Polaris (20L), Freight Bags Porteur (19L) and the Chrome Duffle (40L).

Take a Closer Look at Surly’s New Racks by Heading HERE

The post Surly Releases the Porteur House 43L Front Bag for their Porteur Rack appeared first on CyclingAbout.

Video: A Slice of Life – One Year Cycling in Four Minutes

$
0
0

What do you experience in one year of bicycle travel?

Bertrand Dejean from A Slice of Life has spent the last year filming his experiences, on a journey that’s seen him cycle from France to Vietnam. He has recently stitched his clips together into this great video.

If this doesn’t make you want to go bicycle touring somewhere exotic… I don’t know what will! You can check out more of Bertrand’s videos on his YouTube page.

Thanks Bertrand.

A Slice of Life Bertrand Dejean Video

The post Video: A Slice of Life – One Year Cycling in Four Minutes appeared first on CyclingAbout.

Knog Oi Bike Bell: Is this the Classiest, Most Discreet Bell Ever Made? I Had to Try It!

$
0
0

Knog, most well known for their waterproof, rechargeable silicone bike lights – have just released a bell which appears almost invisible on your handlebars. The term ‘Oi’ is commonly used in Australia as a way to get someone’s attention; a quick ring on the bike path or footpath will do just that.

Knog have used their expertise in product design to move away from your typical circular ‘bulb’ shape, in the process reinventing the bike bell to take up the least possible space on your handlebars. Not only is it space saving, but it’s so discreet that you barely notice it’s even there. Knog tested and prototyped different widths, depths, materials, curvature, actuators, springs and more to arrive at their best design.

Knog Oi Bike Bell 05

Knog Oi Bike Bell 07

The Oi will be available in four different aluminium finishes: brushed, copper-plated, brass-plated and black. It’s also available in ‘treat yourself’ titanium – because, why not?

Unlike other bells, the design allows you to loop your brake and gear cables through the bell. No matter whether you have 31.8mm or 22.2mm handlebars, there’s a bell for you.

I recently popped into the Knog offices in Melbourne to have take a closer look at the prototype.

Knog Oi Bike Bell 01

Chris fitted a black aluminium number to my cyclocross bike for a test. The black is perfectly discreet on my dark coloured bike.

The bell ringer tells you exactly what it’s going to say – Oi!

The stack of the light is barely larger than the stem face plate.

The stack of the bell is barely larger than my stem face plate.

So basically, the product looks great and works well too. I’m told the production product will be even better after a few small changes. With only a few days left on their Kickstarter, you’re going to have to get in fast if you’d like to pre-order one.

The Oi starts for around US $20, and Knog will be shipping this product in August 2016.

The post Knog Oi Bike Bell: Is this the Classiest, Most Discreet Bell Ever Made? I Had to Try It! appeared first on CyclingAbout.

Video: Aspirations of the Pamirs on Bamboo Fat Bikes by Solidream

$
0
0

If you’ve watched some bike travel videos in your time, you’re likely familiar with ‘Solidream’. They’ve completed a three year journey around the world on their bikes, amongst other things. You should check out the rest of their videos on their Vimeo channel after you’ve watched this.

Solidream have recently got back from an adventure to Tajikistan, where they used French-made, bamboo fat bikes to complete over 3000km through the harsh conditions of this Central Asian country. They’re now in the process of putting together a film about their experiences.

You can pre-order their 52-minute DVD HERE.

Here is their trip route:

Solidream Pamirs 02

Solidream Pamirs 03

Solidream Pamirs 04

Solidream Pamirs 01

The post Video: Aspirations of the Pamirs on Bamboo Fat Bikes by Solidream appeared first on CyclingAbout.

SRAM Eagle 12 Speed: A Touring Bike Drivetrain With Only One Chainring Up Front?

$
0
0

While most of us ride with three front chainrings in order to achieve a wide gear range, SRAM has been doing its best to put the front derailleur to rest – at least on their mountain bike drivetrains.

It was 2012 when SRAM released their first 1×11 drivetrain to the world, using a 10-42 cassette in conjunction with a narrow-wide chainring profile to create drivetrain without a front derailleur. Amongst mountain bikers, 1×11 was labelled a ‘game changer’ and we’re slowly seeing 1x drivetrains on adventure touring bikes like the Rawland Ravn and Kona Sutra LTD.

SRAM Eagle 12 Speed Drivetrain 01

SRAM’s new 12-speed drivetrain has a 500% range.

What’s Special About 12 Speed SRAM Eagle?

The new SRAM Eagle 1×12 employs a huge 10-50t cassette, offering a range of 500% across the drivetrain.

To put that into perspective, a Rohloff hub offers 526% and a typical touring triple around 550%. If we’re talking gear inches, a typical touring bike could use a 38t front chainring with the Eagle cassette and get a 21-104″ range. That’s good enough for most climbs with panniers, but you will miss out on a few gears if you’re motoring down a hill.

What’s the Catch?

There are a few catches here. 

The first is the price of this drivetrain – it’s currently sky high. Considering that many of us cover some pretty serious ground, the 5000-10000km life expectancy of a US $360 cassette (yes, that’s three hundred and sixty dollars) is pretty hard to justify. It’s kinda fine for mountain biking where the terrain prevents you from riding far, but 5000km can equate to 2x month long tours for some people.

You will need to use a different freehub body on your wheel for the 10-50t cassette. It’s called an XD driver and it’s only available on some hubs. To complicate matters further, SRAM Eagle is also 12 speed; you won’t be finding any spares in shops for a while yet.

One other gripe could be that there are significant jumps between each gear. Sometimes you just want to modify your gear slightly for an uphill rise. The Eagle works out to be about a 16% average jump per gear, compared to 12% on a 11-34t touring cassette, or 14% for a Rohloff hub.

And finally, there is no 12-speed shifter for road handlebars. This drivetrain is limited to flat bar bikes only.

SRAM Eagle 12 Speed Drivetrain 02

SRAM Eagle XX1 12-speed Cassette. Image: PinkBike.com

Is There a Cheaper Way to Go Front Derailleur Free?

There sure is!

Shimano have recently announced an 11-46t cassette which will fit onto a standard drivetrain. It offers 418% range, so it won’t quite stretch to give you both the small and large gears, but it will get you a 21-89″ drivetrain which has you covered for hills. Or you could gear it to 27-114″ which will give you more top-end if that’s your thing.

Better yet – you don’t need a special hub driver, plus this XT-level cassette will likely be available for a QUARTER of the price of the SRAM Eagle (sub-$100). The only downside is that it will come with a significant weight penalty.

Shimano's 11-46t cassette will be much more affordable when it is available in an XT spec.

Shimano’s 11-46t cassette will be much more affordable when it is available in an XT spec.

Is SRAM Eagle A Good Touring Drivetrain?

Not right now.

SRAM Eagle is cost-prohibitive, it requires a specific freehub body and has rather large gaps between gears. That said, this kind of tech will filter down to lower level components which will make it more affordable in the years to come. SRAM’s NX level 11-42t cassette is available from just US $79 right now (full 1×11 drivetrain is US $310), if that’s any indication.

SRAM Eagle 12 Speed Drivetrain 03

SRAM Eagle XX1 12-speed Cassette. Image: PinkBike.com

SRAM Eagle Prices and Weights

XX1
Total group:$1,417; 1456 grams (not including BB)
Crankset: $425; 465 grams (with 32T chainring)
Chainrings: $99
Chain: $60-85; 250 grams
X-1299 Eagle Cassette: $420; 355 grams
Rear Derailleur: $289; 264 grams
Trigger Shifter: $162; 122 grams
Grip Shift: $148; 140 grams (including clamps, cables, and Jaws lock-on grip)

X01
Total group: $1,193; 1502 grams (not including BB)
Crankset: $390; 465 grams (with 32T chainring)
Chainrings: $99
Chain: $60-85; 250 grams
XG-1295 Eagle Cassette: $360; 355 grams
Rear Derailleur: $220; 276 grams
Trigger Shifter: $127; 126 grams
Grip Shift: $118; 143 grams (including clamps, cables, and Jaws lock-on grip)

The post SRAM Eagle 12 Speed: A Touring Bike Drivetrain With Only One Chainring Up Front? appeared first on CyclingAbout.

My New Book! The Touring Bicycle Buyer’s Guide Is The Most Comprehensive Bike Guide On Earth!

$
0
0

I’ve got some pretty exciting news: I’m halfway through putting together what I think is the best bicycle buyer’s guide on Earth!

I’ve been writing bike tech articles on CyclingAbout.com for quite a few years now, and seem to have ended up really specialising in touring bikes, parts and technology. I’ve been in contact with so many people who talk about touring bikes – both in the industry and right down to the consumer level. In this time I’ve test ridden so many bikes and built up so much knowledge that I think it’s time to share.

Bicycle Touring Buyer's Guide

How Will The Touring Bike Buyer’s Guide Work?

In the first section I will take you through everything from the different types of touring bike, to frame materials, wheel sizing, handlebars and tyres. You’ll get a great overview of the pros and cons of different touring setups.

I’ll get you to think about how relaxed (upright) or sporty (low) you’d like your bike to be and whether you want to use it for more than just touring. I will talk you through the components that are most important for hilly riding, dirt roads and tours through 3rd world countries.

You will then find out about the different types of touring bike, and what purposes they are most suited to. I will provide examples of bike tours that suit certain types of bike, so that you can determine the touring bikes that suit your purposes best.

With all this knowledge, you’ll be able to make the most of the next section, which I am super proud to announce!

IdWorx All Rohler Travel

One of the featured bikes is this IdWorx All Rohler.

Ok, So This Part is the Game Changer!

The second section of the book features some pretty groundbreaking information for a buyer’s guide. This database of technical information will allow you to compare over 80 different touring bikes based on their key characteristics. It will incorporate:

Virtual Sizing (Stack and Reach Measurements)
Stack and reach are the best measurements we have to compare bike brands and models. This virtual sizing tool allows you to test ride one bike, and then have the ability to determine what size is best for you in another brand based on these numbers… without even swinging a leg over it! This book will give you an indication of how much longer and higher the next size up is too.

For example, if you test rode a size 54cm Trek 520, this guide can tell you that a 53cm Jamis Aurora would have the same length and height proportions.

Body Positioning Measurements
When I analysed the stack and reach, I derived a stack/reach average ratio across all sizes within each model. This ratio is a great indicator of how upright each touring bike model is.

For example, this guide will tell you the Brodie Elan offers one of the most upright positions, while the Nashbar TR1 has one of the lowest. 

A Steering Speed Comparison
I’ve used fork ‘trail’ to determine how fast the steering is on a touring bike. This is a calculation that factors in the head angle, fork rake and tyre width. Without even riding a bike, you’ll have a good idea of how the bike will feel.

For example, this guide will tell you the Salsa Marrakesh and Surly Disc Trucker steer at the same speed, while the Novara Randonee will steer a bit slower.

Gear Ratios
I’ve worked out the gear ratios for every touring bike, so that you can know how capable these bikes are for going up hills. These are measured in ‘gear inches’ – the wheel diameter x front chainring / rear cog.

For example, this guide will tell you the Surly Disc Trucker has a lower climbing gear than the Specialized AWOL.

Maximum Tyre Widths
I’ve determined what the maximum tyre widths are that are permitted by touring bike manufacturers. This will let you know if you can run a wide knobby tyre for off-road adventures (or perhaps for additional comfort).

For example, this guide will tell you that you can use 10mm wider tyres on the Specialized AWOL than the Cinelli Hobootleg.

Current Photos + Pricing
It’s not a buyer’s guide without current year model photos and prices, right?

Salsa Fargo

One of the featured bikes is this Salsa Vaya.

What About When New Bikes Come Out?

I’m going to do FREE yearly updates on this book. That’s right – once all the latest photos, geometry data and specifications are out, I will make this book fully up to date.

I’m Excited!

This book is going to be awesome for everyone from new touring bike buyers (especially if you don’t have access to a test ride), to those who want to be updated yearly with the new tech and features of the latest touring bikes. It’s a pretty amazing tool for people in the industry too, as it provides a quick snapshot comparison between the most popular touring models on the market.

Keep up to date about this books release by joining our mailing list! There’s no spam. Just bikes. Promise. :)

The post My New Book! The Touring Bicycle Buyer’s Guide Is The Most Comprehensive Bike Guide On Earth! appeared first on CyclingAbout.


Video: Tadjikistan by CycloLenti (Around the World by Bicycle)

$
0
0

Tiphanie and Marco are currently on a trip from Europe to Asia and beyond. They’ve been documenting their travels on their website, YouTube channel and Facebook page.

This is an upbeat video of their time in Tajikistan. It actually wasn’t all fun and games for the CycloLenti crew on the Pamir Highway – Marco managed to fracture his shoulder along the way. Despite this, there was always time for a laugh!

Cyclolenti Bicycle Touring

The post Video: Tadjikistan by CycloLenti (Around the World by Bicycle) appeared first on CyclingAbout.

This Moonmen M10 Electric-Assist Tandem Titanium Fat Bike Is Out of This World!

$
0
0

I love custom bikes, and I love tandems.

When images of this Moonmen tandem first appeared on Facebook, multiple friends tagged me in the posts, knowing that this would be right up my ‘Alee’ (I’m no dad – but sorry, couldn’t resist!). Speaking of dads though, this bike was actually built for a dad and his son to use as an exploratory tool on the varied terrain in New Zealand. Anyway, my friends were right; this bike tickled me in places that I didn’t even know could be tickled.

The Moonmen M10 is pretty darn special. Firstly, because there aren’t too many fat bike tandems in the world; secondly, because there aren’t too many electric tandems in the world, and thirdly, because this tandem is littered with 100% custom parts.

The bike was constructed by Todd Heath at Moonmen Bikes. Todd raked up over 10 years of experience working with titanium at Black Sheep Bikes, before starting his own venture two years ago.

What Todd has managed to create here is a bike that blurs the lines between gorgeous metalwork and pure utility – let’s take a closer look.

Moonmen Fatbike Tandem 05

Up the front of M10 is a one-of-a-kind, triple clamp truss fork. The design is supposedly more compliant than a unicrown fork, and given the heavy capacity of the bike (two riders + gear), it should aid in preventing brake shudder. The fork crowns are CNC machined, reducing weight and adding a whole lot of cool. Every single component of the fork has been made in-house by Todd.

Don’t forget to admire the custom head badge fabricated by jewelry maker and cyclist, Jen Green.

Moonmen Fatbike Tandem 02

The M10 is built with custom titanium handlebars that have integrated ‘aero bars’ in the middle, allowing the pilot to switch up their hand positioning when they feel appropriate. The shape of the cockpit and accessories is incredibly pleasing on the eyes; it really is a work of art in itself. A centrally-mounted Bafang computer provides all of the metrics, including trip distance, speed and battery level.

Moonmen Fatbike Tandem 06

The mid-drive Bafang 750 watt motor operates not like a motorbike, but as a pedal ‘assistant’. It’s a pretty simple distinction really – there’s no throttle on the bike, so if you don’t pedal you’re not getting any help. In fact, torque sensors at the cranks work out exactly how hard you’re pedalling; the motor kicking in a proportionate amount of assistance. As soon as you reduce your leg power, the motor reduces or cuts completely. With all e-bike motors you choose how much assistance you receive – the more assistance, the less distance you’ll be able to cover with your battery.

Moonmen Fatbike Tandem 07

Todd set up this tandem as independent drive, so both riders don’t need to be pedalling at the same time. This is his own design with a freewheel built into one of the cranksets. Andrew the Maker joined forces to create a bag to house the Bafang battery in the lowest possible location (maximising the handling of the bike by dropping the centre of gravity).

Moonmen Fatbike Tandem 08

This tandem features an array of tube splitters to separate the bike into multiple sections. The whole tandem fits into two S&S hard shell bike cases, believe it or not. I’ve included pictures below for proof!

Moonmen Fatbike Tandem 09

The Mension chain tensioning system is a unique take on making sure your chain doesn’t drop off. It’s hard to make out (go HERE for a closeup), but incorporated in the chainstays are really cool turnbuckles to increase their length. The tensioners are actually dual purpose, as they can be used to separate the frame entirely to fit it in a box.

A 14 speed Rohloff gearbox hub provides all of the bike’s gearing needs, as well as ensuring minimal maintenance in the harshest terrain. The gears and cogs are all sealed away from the elements within the rear hub shell.

Moonmen Fatbike Tandem 10

Todd put together some custom titanium racks on the M10 so that this father/son combo can carry enough gear for multi-day adventures. You’ll also notice that there’s easily enough room for five inch wide tyres. The telescoping seatposts are just another of the custom parts to add to the list.

Moonmen Fatbike Tandem 04

Andrew the Maker sewed up some panniers to go along with the battery cover; the sandy brown material complementing the brown Brooks saddles and grips.

Moonmen Fatbike Tandem 03

The custom stems and handlebars are immediately obvious from the rear viewpoint. These wide titanium handlebars make slow speed technical riding a breeze given the additional leverage that they offer.

Moonmen Fatbike Tandem 01

Ok, you’ve been waiting for this – it’s the M10 in all it’s glory! That’s a whole lot of custom made, right there. Bravo Todd!

Moonmen Fatbike Tandem 11

And finally, as I briefly mentioned above, this fat tandem has been designed so that every component can fit into two S&S hard shell bike cases. That makes bike travel infinitely easier (and cheaper), and if you were to live in an apartment you could even store it in your wardrobe.

Right, I’m just going to go over here now and pick my jaw up off the ground… :)

The post This Moonmen M10 Electric-Assist Tandem Titanium Fat Bike Is Out of This World! appeared first on CyclingAbout.

Love Paper Maps? Life Ultralight Brings A 19g Bike Map Holder To Your Handlebars

$
0
0

Maps? I love maps!

So too do Joe and Devon from Life Ultralight who, having used clunky holders in the past – decided to design their own.

Life Ultralight Bike Map Holder 05

They’ve now announced a Kickstarter to run a production of plastic Bike Map Holders. These lightweight mounts attach to your handlebar via a rubber o-ring or two zip ties – and through their smart design, will hold your map firmly in place. The curved design prevents the map flapping about in the wind and you can even replace the map with one hand while you ride along.

You can pledge just US $11 to get yours. It may be $18-25 if you don’t get in quick. Happy mapping!

Life Ultralight Bike Map Holder 04

Life Ultralight Bike Map Holder 03

Life Ultralight Bike Map Holder 02

Life Ultralight Bike Map Holder 01


The post Love Paper Maps? Life Ultralight Brings A 19g Bike Map Holder To Your Handlebars appeared first on CyclingAbout.

Video: The Adventure Dispatch – Documentary Series Starts April 2016 (Trailer Inside)

$
0
0

I’m really looking forward to “The Adventure Dispatch” documentary series.

It looks like we’ll be privy to some awesome cinematography, storytelling and bikes! The first episode will be available on the 12th April 2016 and will be available HERE.

Here’s a glimpse into what may unfold:

The rules of adventure are simple: there are no rules. But for the inspiration to get out and explore, we’ve always found that by surrounding yourself with inspiring people, you can’t help but become inspired. With our new documentary series, The Adventure Dispatch, we’ll follow those that motivate us to get outside and push past the confines of the everyday, seeing what fuels their wanderlust passion. So come on the journey with us—it’s going to be one hell of an incredible ride.

The Adventure Dispatch Trailer

The post Video: The Adventure Dispatch – Documentary Series Starts April 2016 (Trailer Inside) appeared first on CyclingAbout.

Where to Best Carry A Load When Bicycle Touring: Front or Rear Panniers?

$
0
0

Front loading has recently become a popular way of carrying panniers. The setup has been made trendy by manufacturers like Specialized with their AWOL x POLER touring bike, or any number of the touring bikes featured on bicycle lifestyle website, The Radavist.

But is front loading a better place to locate your gear on a touring bike, or is it just fashion?

Front vs Rear Pannier Loading 06

Riding a rough dirt track with a front load.

Jan Heine and the crew from Bicycle Quarterly have been talking about the advantages of front loading for a very long time. Jan has found that bikes with “low trail” steering (a measurement derived from the headtube angle, fork offset and tyre width) handle front bags exceptionally.

Having spent some time on “low trail” bikes with a light/moderate load, I tend to agree that the sharp steering and front weight tend to cancel each other out somewhat. But that said, at a certain point (perhaps with 10kg or so) I’ve also found it simply doesn’t matter what fork trail measurement you have – handling with a front load feels very similar between bikes.

I’m going to steer away from the high vs. low trail discussion now, as almost all bikes that people conduct tours on (touring, gravel, hybrid, cyclocross, MTB) offer relatively “high trail” setups.

For my testing, I’ve used my Surly LHT touring bike to undertake different tasks, many of them practical – and I’ll try my best to describe how front and rear loading work under each of those circumstances. My testing has been conducted on short rides, long rides, city rides, dirt road rides, on climbs and on steep descents.

What you’re going to soon notice is that there are many factors at play: front vs rear loading isn’t just about handling.

Cornering as hard as I can with front panniers.

Testing front loading setups at warp speed.

Open Road Testing

Let’s take a look at how front and rear loading will affect your time on open roads. It’s safe to assume that this type of riding is going to be the majority of what bike travellers conduct. Here are my thoughts after thousands of kilometres of testing.

Handling
When it comes to handling at speed, it’s hard to pick a preferred setup. I got used to both a front and rear load within just a few minutes of riding. What I did notice was that there was a limit to how much weight you can put on the front wheel before it feels unstable – it’s about 10kg. In comparison, you can load up the rear with 20 or 30kg and you’ll find very little change in the handling.

Winner: Tie

Component Wear and Longevity
Given that the majority of our body weight is over the rear wheel when we ride our bikes, adding additional weight to the back of the bike tends to strain the back wheel more than the front. That is why if you’re using a lightweight bike (or lightweight wheels) it’s best to keep your load to the front. Your rear wheel will thank you for it.

Winner: Front Loading

No-Handed Riding
Riding with no hands is a great skill to have in your arsenal, as it allows you to stretch out your back and take strain off your neck/wrists at times. More practically, you can use the skill to open wrapped food, or even take photos. Either way, having weight on the front of the bike makes this task much more difficult than if the weight is over the rear wheel.

Winner: Rear Loading

Rider Steering Input
There is a certain amount of effort required to turn the handlebars on a bicycle. As soon as you add any weight to the front of the bike – steering effort increases. It’s sometimes nice having the feeling of heavy steering – on a long windy descent perhaps. But I’ve found it pretty hard to beat effortless steering in almost all circumstances.

Winner: Rear Loading

Front vs Rear Pannier Loading 02

Riding uneven dirt tracks with front panniers only.

Pannier Balancing
There is a great need to keep your bike’s front panniers ‘balanced’. If the bags are uneven you will experience speed wobbles from resonance frequencies coming up through the front wheel. I think it goes without saying that with front loading you will need to use both bags, whereas when rear loading, you can quickly adjust to the uneven load of a single pannier.

Winner: Rear Loading

Climbing Uphill
When it comes to steep climbs, front loading really shine – especially on the dirt. Front bag weight keeps the front of the bike firmly on the road at all times.

Winner: Front Loading

Steering Speed
I like to make small adjustments to my front wheel as I ride, in order to quickly avoid debris, puddles and bumps in the road. Most often it’s a last-second adjustment because I’m generally fixated on the world around me, rather than the pavement a few metres ahead. With the weight up the back, my bike turns super fast and I can avoid almost anything with only a fraction’s notice.

Winner: Rear Loading

Dirt Roads
Rougher surfaces tend to ride better with weight over the front wheel, especially on steep descents. This is because there is more weight over the front wheel, resulting in more front end grip. This grip will also offer you more confidence, allowing you to carry slightly faster speeds. As dirt roads are sometimes quite rough, it also makes sense to distribute your load more evenly across your bike (panniers up front, body weight up back) so that your front wheel takes its fair share of abuse!

Winner: Front Loading

Storage Space
Although front racks can be found with a top tray to offer storage above the panniers, a rear rack can comfortably take two large panniers, plus a racktop bag and whatever else you want to strap onto it. You’ll easily get 80L of storage on the back if need be.

Winner: Rear Loading

Heel Clearance
This one is rather obvious but worth discussing anyway. If you are not using a touring-specific bike and you have large feet, you could have problems with your heels striking your rear panniers. This is one of the very reasons why a touring bike has long chainstays (435mm minimum). With front panniers you can opt to use any bike you like with very short chainstays.

Winner: Front Loading

Front vs Rear Pannier Loading 03

Testing front panniers on the rockiest trail I could find.

Urban Testing

My urban testing was completed in the inner city areas of Melbourne. I rode along footpaths, roads, alleyways and bike tracks. I split traffic, completed many slow speed maneuvers and stopped/started a lot. Here’s what I’ve found.

Gutters & Ground Clearance
In urban areas, ground clearance is paramount. I often find myself wedged between the traffic and high gutters when I’m moving through built up areas. Front panniers reduce your clearance as they sit lower to the ground – I’ve found it’s much easier to squeeze between cars with the higher-sitting rear bags.

Winner: Rear Loading

Slow Speed Maneuverability
At slow speeds, you use your steering to balance from left to right. With your weight up the back, your steering is light – making it easier to balance your bike. Riding along a busy footpath is the perfect example of a time when slow riding is necessary.

Winner: Rear Loading

U-Turns
Given that the steering is faster and lighter with a rear load, it makes sense that a u-turn is best performed with this setup. Without front panniers affecting your line of sight, you can place your front wheel exactly where you’d like it to be too!

Winner: Rear Loading

Performing a tight u-turn with a rear load.

Performing a tight u-turn with a rear load.

Parking Your Bike
I’ve found that parking my bike with rear panniers is easy – it’s as simple as leaning my rear panniers up against a solid object. There’s no lifting or adjusting, and once leaned, the handlebars and front wheel are less inclined to want to swing about. If you’re a rear kickstand user, you’ll find that front loading tips your bike over because there’s a lack of weight over your rear wheel. Conversely, centre-mount kickstands like the Pletcher ESGE prefer having weight over the front, provided it’s balanced.

Winner: Rear Loading

Stairs
I seem to come into contact with stairs all the time on my bike tours! Most train stations, hotels and built-up areas use stairs to move people up and down levels. I’ve found the most effective way to get a touring bike up stairs is to drag it. With the weight on the rear, you can lift the front wheel slightly, and push the rest along. Front panniers on the other hand will hamper your efforts – you may even need to take them off entirely.

Winner: Rear Loading

It's much easier to push your bike up stairs with a rear load.

Pushing my touring bike up stairs with a rear panniers.

So What’s Best: Front or Rear Loading?

Although front loading excelled through some testing areas, I’ve found it more practical to use a rear rack and panniers (and a small handlebar bag) for a few reasons. On the open roads it’s nice to be able to see where your front tyre is travelling and make quick adjustments to the direction of the bike. I like not having to balance my bags every time I go shopping, and being able to strap whatever I want to the top of my rear rack (heavy or not). I like travelling with a single pannier, and riding effortlessly without my hands on the bars to stretch out my back.

Throughout my urban testing, rear panniers made my life easier across all tests – in particular for anything that required slow speed maneuverability, such as weaving through pedestrians or completing u-turns. As there’s more ground clearance, it’s certainly better to split traffic with a set of rear panniers too.

When Should You Front Load?

There are a couple of instances where I preference front panniers over rear.
– If I’m mostly spending time on dirt roads
– If my wheels aren’t particularly durable (on a non-touring bike for example)
– If my rear chainstays are short and I don’t have enough heel clearance

Front loading can be great. I really do like the setup on big, open, dirt roads – luckily my touring bike has the option of both setups. But while there’s currently a bit of a cult following around front loading, I will continue to use and recommend rear panniers on all but dirt road -specific tours. Happy riding!

Front vs Rear Pannier Loading 05

Jumping off a small lip with front panniers.

What’s Your Experience Been for Front and Rear Loading?

The post Where to Best Carry A Load When Bicycle Touring: Front or Rear Panniers? appeared first on CyclingAbout.

Viewing all 454 articles
Browse latest View live