Quantcast
Channel: CYCLINGABOUT.com
Viewing all 447 articles
Browse latest View live

The 2019 Ultra Endurance Bike Racing Manual – By Apidura


Video: Fighting The Wet Season // The Trans Ecuador Mountain Bike Route [EP.10]

$
0
0

This Trans Ecuador Mountain Bike Route (TEMBR) film is adventure-packed with crazy mud, hike-a-bike, river crossings, insane hills, loose af descents, navigation woes, a cooking segment and the reason why I don’t use a mountain bike on mountain bike trails.

Value my videos? Consider helping me recover the costs of my broken gear and upgraded equipment:
Patreon (with monthly rewards)
Paypal (one-off donation)

MY BIKE: Koga WorldTraveller-S
MY 24KG GEAR LIST: Here
MY ROUTE: Here
MY CAMERAS: Panasonic G9 + GoPro Hero 6

MUSIC: Clem Beatz DJ Set

trans ecuador mountain bike route

Pushing my bike on the Trans Ecuador Mountain Bike Route.

The post Video: Fighting The Wet Season // The Trans Ecuador Mountain Bike Route [EP.10] appeared first on CyclingAbout.com.

Photo Gallery: Trans Ecuador Mountain Bike Route – Southern Section

$
0
0

Enjoy my months’ photos from the Trans Ecuador Mountain Bike Route with crazy mud, hike-a-bike, river crossings, insane hills, loose af descents and navigation woes!

MY BIKE: Koga WorldTraveller-S
MY 24KG GEAR LIST: Here
MY ROUTE: Here
MY CAMERAS: Panasonic G9 + GoPro Hero 6

When you go on a multi-year adventure, the things you’re interested in will constantly change. Sometimes I’m fixated on history, other times its nature, culture or people. Sometimes I like writing, other times I prefer to film or take photos. Sometimes I like to explore cities, other times I prefer to explore small villages or remote areas. Sometimes I read a few books a month, other times I prefer to listen to podcasts or binge-watch YouTube. Variety is the spice of life, amirite?

Today it’s Christmas and I’ve honestly been given the greatest gift – I’ve got my wheels back on the road! For five weeks I stared at a pile of folded and snapped metal in the corner of my room. Unlike an accidentally dropped glass, this broken bike is an extension of me – it’s a core part of my identity. My bike is always there to help create the best memories. It’s also my golden ticket to freedom. As long as it looked hopeless, I felt the effects of this hopelessness too. It was a huge weight off my shoulders to see it in a rolling state, and it felt even better again to have the dynamo cabling re-wired, the steerer cut and the frame polished to perfection. My bike has survived and will now thrive as I roll to Ecuador (on one wheel 😂).

Not gonna lie, I’m quite nervous about getting out into the wilds tomorrow! That’s because I’ve now adjusted to the comforts and predictability of city life. For weeks I’ve had good food, a comfortable bed and a fast internet connection, but now it’s time to let all that go. Sure, it’s easier for me to make the first step than most, but trust me, there’s always a hurdle that I have to jump over too. I hope you didn’t think it was just you that needed to break down the comfort barrier — I take a deep breath and do it ALL THE TIME!

The ancient city of Chan Chan was constructed over 1000 years ago and is the biggest mud-brick city in the Americas, spanning 20 square kilometres. The Chimú people were conquered by the Inca in the 1400s and one hundred years later the Spanish swooped in and emptied their coffers entirely, including $5 million in gold.

Couldn’t have asked for a better New Years! I pitched my tent in a sandy canyon in the middle of nowhere but it turned out it was actually a 555 star hotel! I obviously watched all the shooting stars but I also listened to the insect musical ensemble, ate tropical fruit, and I even had a little owl friend swoop all around me, later landing on the roof of my tent! 🦉 I hope 2019 brings you all the adventures!

What’s your relationship with time? How do you spend it? Who do you spend your time with? I think about time regularly because I’m always trying to squeeze the most out my precious moments and opportunities. The best way to use time has got to be living a dynamic life where you try new things, go to new places and meet new people – it’s always the moments outside your routine that solidify into the best memories. If you’re into adventures, I can recommend scheduling them in at a regular interval – lock those dates away into your diary! Taking an overnight trip every month with family, friends or by yourself (solo trips are underrated 🤗) will tick a lot of boxes here and result in 120 new memories over a decade!

You know how I said I’d take it easy for a while? Turns out that was a lie. I’ve been getting rowdy in the cloud forests of the Trans-Ecuador instead. 🤘🏼

Ecuador! Delivering!!! I’m actually quite surprised how different it is here to Peru. There seems to be a much bigger middle class, measured by houses that are more refined, very well-kept gardens and people exercising in the parks. The Ecuadorians are more reserved in nature too, a bit more softly spoken and less likely to ask you questions from across the street. Interestingly, people are more interested in where I’m FROM rather than where I’m GOING (it’s normally the other way around). Also, the country must have got a nice discount on barbed wire fencing — every metre of every road is lined with the stuff, making it harder for me to wild camp where I *technically* should not. I don’t think Ecuador was prepared for this giraffes arrival though!

Almost everyone who has cycled Ecuador has warned me about the ultra STEEP hills. And boy, are they right!! I actually changed the gear ratios on my bike in anticipation for these gnarly gradients. The topography of Ecuador is extra undulating, and the roads definitely don’t follow the contours like Peru. Check out my body position trying to get some body weight on the front wheel – if I don’t do this I’m literally climbing while doing a wheelie!!!

How does this rich white tourist navigate the ethics of travelling through developing areas of the world? As a highly privileged human who spends time around people who have so much less wealth and opportunity, my initial feeling is always that of guilt. But over time I’ve realised that perhaps feeling guilty isn’t necessarily justified given it was really just dumb luck that made me who I am. I think, at a minimum, there are a few actions we can take to ethically justify travel. I believe we have an obligation to be interested in the local cultures, customs and people, even if it makes us feel uncomfortable. I think we need to treat local people how we’d like to be treated ourselves. And finally, I don’t think we can complain if one of our western comforts isn’t met. Essentially, it all about being a respectful human. Travelling on a bike typically requires these actions by default, and that’s one of the many reasons why I think bike travel is the ultimate way to see the world. I have overwhelming positive interactions with every person I meet, which seems to be mutually beneficial based on the size of the emanating smiles. To help frame my perspective, let me present the antithesis to my preferred style of travel – staying exclusively in resorts. What this signals to me is that you’re wanting to enjoy the resources of an ‘exotic’ place without having to confront life in that country. I don’t think I can find an ethical case for this.

Perfect trails for panniers in the Ecuadorian highlands! It might surprise you that I’ve only had a handful of occasions in South America where my front panniers have been in the way. The vast majority of trails are perfectly wide for my bike.

I love poring over topographic maps to visualise the terrain I’m cycling over. But it’s even better when I can climb a ladder into the sky and visualise it with my own eyes!

“There is no such thing as bad weather, just bad clothing choices”. I subscribe to this 100%. I’ve found that as long as you’re warm, you can have a pleasant day on your bike! My favourite wet weather item is my waterproof pants. I keep them in an accessible place and when the first drop hits I throw them on over whatever I’m wearing. They keep my legs toasty warm, but more importantly, my clothes DRY – even after the heaviest downpour. Plus they’re only 167 grams and about $20! Best investment ever!

giant tortoise

I made my first Attenborough-style documentary about the Galápagos Islands!! Found HERE. In this doco, you’ll learn about how these islands came to be, and find out about the really weird adaptations made by the wildlife to suit the otherworldly conditions. It was so much fun exploring the islands with my new camera, finding all these crazy animals! I’d love to know whether you think I should do more doco style films, or just stick to my cross-continental bike adventures?

I got sick for the first time in South America! Nothing major, just a chest infection, but how good was that run of 14 months?! Other travellers seem to get sick ALL the time here. I think my secret is that I prepare 99% of my own food, which is normally cleaned thoroughly. I also filter my water, eat super healthy and rest my body as soon as it starts feeling fatigued.

A few people are a bit perplexed why I prepare so much of my own food. It’s mostly through necessity! A lot of the routes I travel are away from people and restaurants. I also tend to snack all day rather than have a meal, and by the time dinner comes, I’m tucked up in my tent! So yeah, I don’t intentionally avoid local food, it just kinda works out like that currently. But I suspect this will also change as I get less remote in Central America. Also, I take EVERY invite to share meals and drinks with local people because food is undoubtedly the perfect way to socialise.

I’m super psyched on my new camera! I’m now using a Panasonic G9 which is pretty much taking the nice photos for me. Hopefully you’ll notice the extra crispness, nicer colours and if you watch my films, the extra stabilisation of my handheld videos! And if you were wondering, every shot I take is from a tripod. And yes, I have to ride back and collect my camera every time!

Who knew Ecuador could look this dry and baron? Before I arrived here, I pictured Ecuador to be super lush! But it’s definitely a mixed bag of terrain, even with the heavy rains of the wet season.

I camp anywhere. As long as the site is protected from the wind, is away from people, and is far from barking dogs and crowing roosters. As long as it provides shade in the morning if it’s hot, or sun in the morning if it’s cold. As long as the land is flat and dry and not prone to getting waterlogged by rainfall. As long as the ground cover is smooth and without any thorny bits to puncture my sleeping mat… ok, so maybe I won’t camp anywhere. 😂

Trans Ecuador Mountain Bike Route

Australia, is that you? It’s strange how all it takes is some red dirt and eucalyptus trees to make me feel at home. Despite how familiar the surroundings are, it’s probably the scent that launches me deep into Australia dreaming.

Trans Ecuador Mountain Bike Route

Insane road gradients and ultra red earth. This is Ecuador! Can’t wait to circumnavigate some conical volcanoes in the coming weeks.

Trans Ecuador Mountain Bike Route

It’s been pretty wild out here! I hiked my bike into a beautiful national park but then it rained and rained and rained. After a night of camping the mud was up to my knees! In fact, the mud was so thick that every time I tried to pull my feet up, it tried to steal my shoes!!

Trans Ecuador Mountain Bike Route

There are really some nice sections of Ecuador, but so far I’ve found it really hard to achieve the feeling of ‘remoteness’ which was so easy to tap into in Peru. There seems to be a very even spread of farms across the mountains, the people tending to livestock which is best suited to mostly cleared land. Even the national parks have had free-roaming cows! Don’t get me wrong, I still love cycling through the countryside, but I’m currently on the hunt for untouched nature and some long distances to the nearest human!

Trans Ecuador Mountain Bike Route

I got a new rain jacket! My previous jacket had the waterproof membrane separate from the fabric after six years of heavy use. This time I’m testing something ultralight (under 200g/7oz) to see if it can provide anywhere near the same daily use/abuse. The model I ended up with is a North Face Verto Storm. I like the compact size, deep pockets, high collar and hood fit under my helmet. The breathability of the fabric is poor though, but I don’t know any ultralight 2.5-layer jackets that perform well in this regard (apparently the Gore R7 Shakedry is a game changer for €299). I think this is compounded by the fact that the fabric is so shapeable – it sticks to your skin when wet, unlike heavier-duty fabrics which tend to ‘hang’. I’ve also noticed I need to wear an extra warmth layer underneath to get the same insulation as my heavier jacket – possibly making the weight savings negligible. This jacket is discontinued, so if you’re looking for something similar, check out the Montbell Versalite.

Trans Ecuador Mountain Bike Route

Elizabeth, Alex and their two-year-old brother discovered my tent shortly after 6am. I thought I was hidden well, but they know their farm like the back of their hand. They watched me make coffee, eat breakfast, pack up my sleeping gear and then helped me roll up my tent! My mother recently sent across some Australian souvenirs, so these curious humans ended up with a pretty sweet swag o’ gear! Next time I pass by, I’ll make sure to knock on the door and meet them as adults.

Trans Ecuador Mountain Bike Route

It was 8pm, dark and I was sitting under a flickering street lamp in a town the size of a large extended family. Out of the distance comes a man with two tiny puppies in tow. I offered him some biscuits while he asked the usual ‘where are you going’ type questions. The man had a long piercing stare and a really odd way of breathing. It was definitely creepy. Even when we ran out of things to say he stared at me in a really unusual way. I used the puppies as a distraction, giving them 100% of my attention, hoping that he’d get the message that we were done. He then took a step closer, made a strange comment about my legs, touched the material of my shorts and abruptly left. I camped about 1km out of town on the top of a ridge. It was pretty hard to hide in these endless farming fields. I was woken by tapping on my tent. It was the same man as the night before, wearing a traditional poncho and big gumboots, obviously off to work. He opened the fly and again awkwardly stared at me straight through the mesh of the tent. I gave him a brief tour of how I live in my tent and he kept going on about how it must be so cold sleeping inside there. He then came around to the other side of my tent. I opened the zipper so that I wasn’t being totally rude. He squatted right next to me and then started touching my mat, sleeping bag and clothes, exclaiming that I cannot possibly be warm with these items. While I was still in my sleeping bag, he asked if I wear trousers while I sleep, but before I could answer he started digging into my sleeping bag with his hand and took a big grab of my genitals!! He was laughing in a pretty manic way as I pulled his arm away. He then took off, after finally getting what he wanted out of me. Normally you’d feel anger in this situation, but it never came. I instantly felt really sorry for this man who obviously had homosexual tendencies but could never truly be himself in this tiny community. I still don’t really know what to think; I guess I didn’t ever imagine I’d have a farmers hand down my pants. 🤷🏻‍♂️

Trans Ecuador Mountain Bike Route

Sometimes you’ve just gotta take a leap of faith! This is over one of the many 2m/7ft deep ruts found up in the mountains of Ecuador in the wet season.

Trans Ecuador Mountain Bike Route

The wilderness areas of Ecuador. I found them. xx

Trans Ecuador Mountain Bike Route

What happens when you descend with slick tyres straight off the side of a volcano? Absolute chaos. Can’t wait to drop my next film with its dramatic-as-hell riding scenes!

Trans Ecuador Mountain Bike Route

You thought that Mt Everest was the closest point to space, didn’t you? Actually, it’s here! Because the planet bulges at the equator, Chimborazo volcano is technically the highest point on Earth… and I did a cooking show up there with my favourite touring recipe! Stay tuned for my next film…

Trans Ecuador Mountain Bike Route

Woahhh…. natural colour gradients! It was super nice to have had this view and road to myself as I took on the tourist-free backside of Chimborazo. (Lots of frolicking vicuñas, though.)

Trans Ecuador Mountain Bike Route

If you’ve been following my photos the last few days, you’ll have noticed how different the environments appear. The crazy thing is that these photos were all taken within 10km/6mi of each other. Chimborazo volcano creates all kinds of unique microclimates, making it a wonder to behold and definitely my highlight of Ecuador so far!

Trans Ecuador Mountain Bike Route

NEW VIDEO! Watch me fight the wet season in Ecuador HERE. 🥊 It’s truly adventure packed with crazy mud, hike-a-bike, river crossings, insane hills, loose descents, navigation woes, a cooking segment and the reason why I don’t use a mountain bike on mountain bike trails. Please let me know what you think – I love being able to use your feedback to improve these films.

Trans Ecuador Mountain Bike Route

Here’s some of my backstory. I’ve been travelling by bike for over a decade, but have been to over 80 countries since 2012, covering more than 100,000km. I started out with month-long tours, but it was always my dream to cross overland from Europe to Australia to experience the slow evolution of people and culture from the western to eastern worlds. I saved up heaps of money and sold everything I owned to ride a tandem bike on this 2.5-year journey with my ex-girlfriend. And it was the best thing I ever did – I was hooked on the adventure, fascinated by the learning experiences and I revelled in the randomness of nomadic life! Skip forward a few years and I’m still on the road, cycling up to Alaska. While the first big trip was all about understanding the people of the world, this trip is so much more about understanding myself and the natural world. I don’t really know what will happen when I finish this trip… but can you really cycle across five continents and then not visit the sixth? One thing is for sure: wherever the tailwinds lead me, you’ll be coming too.

The post Photo Gallery: Trans Ecuador Mountain Bike Route – Southern Section appeared first on CyclingAbout.com.

Ask Me Anything: Trailer vs Panniers, Rohloff vs Pinion, Stories of Theft, Injuries, Finding Parts In Remote Areas

$
0
0

Thanks for taking the time to submit your questions! I really enjoy answering them in more depth tha...

Hi there!

This page is only available to CyclingAbout Site Supporters. If you'd like to access this content as well as help to create more bike travel resources, feel free to sign-up HERE.

My main aim here is to take the quality of CyclingAbout.com to the next level. Your generous donations will go directly into writing resources and improving the design, layout, speed and overall operation of the website.

All the best from the road,
Alee

The post Ask Me Anything: Trailer vs Panniers, Rohloff vs Pinion, Stories of Theft, Injuries, Finding Parts In Remote Areas appeared first on CyclingAbout.com.

It’s Bike Pushing, Not Bike Riding: Techniques and The Ultimate Hike-A-Bike Setup

$
0
0

Some people spend a lot of time on bike adventures… but without actually riding their bike! Perhaps the most famous for this is the Iohan Gueorguiev who seeks out the most off-the-beaten tracks through the Americas. I’ve also spent my fair share of time pushing bikes around the world, so I thought I might be able to give you some insights into these crazy places.

But… why would you use a bike if you’re going to spend so much time pushing it?
Sometimes you just want to get to the world’s most remote areas. It may take a longer time to get through a hiking trail section with a bike, but guess what, you’ve now got wheels for when you get to the dirt road on the other side.

Let me share a few techniques, show you a few bike setups, and then give you an idea for how I’d optimise my luggage for a trip with hike-a-bike galore!

Hike-A-Bike Techniques

Trans Ecuador Mountain Bike Route

I rarely push my bike…
…I pull it. I pull it through the mud, through rivers and up the rocky trails. One hand sits on the bars for control and the other pulls behind the seat. The only time I push with both hands on the bars is when the ground is hard and completely flat (but normally you can ride those sections).

When it gets steep, I pull my bike from behind the seat tube.
Pulling from the seat is only good up until a certain gradient (20-25% in my experience). After that, you’ll then need to tuck your hand in the gap behind your frames’ seat tube. I also find lifting my bike from the seat tube is ideal.

I use my rear brake. A lot. (When it’s steep)
My hand that I keep on my bars is always hovering over the rear brake lever. I often move my bike a bit, grab the brake and use the stationary bike to pull myself up!

When it’s insanely steep, I take off my front panniers first. 
I’ve found that it’s easier to drag a heavy rear load than lift a heavy front one up crazy steep inclines.

Iohan Gueorguiev’s Fat Bike

The key feature of Iohan’s Fatback Rhino FLT is the removable 30-litre backpack. When Iohan needs his bike to be lighter and more manoeuvrable for the steeper hike-a-bike sections, he is able to carry a decent percentage of his gear on his back. Otherwise, he is carring equipment in a Cleaveland Mountaineering framebag, massive Sea-To-Summit front drybag and multiple Blackburn cargo cages on the frame and fork.

You can read more about Iohan’s Fatback Rhino FLT HERE.

Sylvain St-denis’ Surly Troll

If I recall correctly, Iohan was inspired by Sylvain’s rear rack backpack when they were travelling through Peru together. Sylvain uses a Surly Troll with a similar-sized backpack to Iohan, strapped to the rear Surly rack. To carry the rest of his gear he’s using full frame bag, front drybag and a few cargo cages. More recent photos of Sylvain’s bike show a front rack to support a small and large drybag.

Ryan Wilson’s 44 Bikes Maurauder

Photography wizard, rmdub, uses a custom 44 Marauder bike with Pass and Stow front rack to support a removable camera backpack for the hike-a-bike sections. Ryan keeps his electronic gear in this padded bag – camera gear, laptop, hard drives etc. Rather than a heavy rear load, the majority of Ryan’s weight is off the rear wheel. He’s using front Ortlieb panniers, two stem bags, a few cargo cages, a Porcelain Rocket frame bag and Porcelain Rock seat pack.

It’s worth taking a closer look at Ryan’s bike and gear on the Radavist. Great article.

How Would I Optimise My Luggage For Hike-A-Bike?

hike-a-bike

There are a few key principles here:
– Most of the weight is found in the centre-to-rear as it makes lifting the front of the bike easy.
– Weight can be removed from the bike easily. By using a backpack and drybag you can easily take 10kg/22lbs off the bike.
– Waterproof everything. This goes without saying, I have no time for anything else!

Front Top Rack w/ 30-Litre Waterproof Backpack
– The backpack would ideally have 5-7kg inside it while riding and could be combined with the separate rear drybag to remove over 30% of the bikes weight.
– I’d probably keep my electronics (laptop etc) in this bag.

Fork Cargo Cages
– These would stay on the bike when pushing and would allow the bike to be light enough to lift, even on a steep incline.
– No more than 2kg/5lbs of gear each side – probably a tent and sleeping gear as it packs well.
– Easily removable from the bike (I like the Dom Gorilla Cage system) for camping.

Full Framebag
– Heaviest items go in here, along with food and tent poles.
– Space for water storage down low in the bag for optimal bike handling.

Rear Panniers
– These waterproof bags would store clothes, toiletries, cooking gear, spare parts, shoes etc.

Rear Drybag + Straps
– The drybag would be able to be removed and strapped to the backpack when the hike-a-bike got serious.

Have You Got Any Setup Tips For Hike-A-Bike Sections?

The post It’s Bike Pushing, Not Bike Riding: Techniques and The Ultimate Hike-A-Bike Setup appeared first on CyclingAbout.com.

Gates Carbon Belt Drive: Everything You Ever Need to Know

$
0
0

Carbon Belt Drive has been developed over the last 30 years. It’s a power transmission technology used to run the blowers on 10,000 horsepower racing engines, the powertrains of 150 horsepower motorbikes, and more recently, the drivetrains of many bicycles.

The belts themselves are a series of nylon teeth that are reinforced using multiple carbon fibre cords. Belts are then paired with stainless steel cogs and durable alloy chainrings, which results in a super tough chain alternative that will handle temperatures ranging from -65°F (-53°C) to +185°F (+85°C).

Belt drive is a great alternative to a chain because it’s very low maintenance and it offers 3-4x the service life of a chain. The reason it’s not more widespread in the bike industry is that it cannot be used with derailleurs; instead, it’s limited to internally geared hubs such as Rohloff or Shimano, or crank-based gearboxes like the Pinion P1.18.

I’ve been using belt drivetrains paired with Rohloff 14-speed gear hubs since 2010. This has included a 31,000km (19,000mi) bike ride between Europe and Australia, my current 40,000km adventure from Argentina to Alaska and lots of multi-month tours in between. I started playing with belts on a modified Surly touring bike, later building up a custom Co-Motion tandem and am now riding a Koga WorldTraveller-S touring bike.

Note: This article was originally published May 2012 but has been completely overhauled Feb 2019.

Why Use Belt Drive?

belt drive

Belt drive combined with a Pinion gearbox on a Hilite bicycle.

Belts Have A Long Service Life
You can expect a regularly cleaned belt drivetrain to last upwards of 30,000km/19,000mi. Additionally, belts will not rust if you leave them in the rain for long period of time.

Belts Require Little to No Maintenance
You don’t need to lubricate or degrease your belt. The most maintenance you’ll have to do is get a toothbrush and give the belt a scrub from time to time.

Belt Drivetrains Are Silent
You know when your chain is freshly cleaned and lubed and running perfectly silent? That’s a belt drive all the time.

Belts Are Marginally Lighter Than Chains
You can expect a weight saving of around 100 grams when compared to chain drive.

Are There Any Downsides?

Belt drive on a custom Surly Troll. Take a close look at this build HERE.

You Need A Belt Compatible Frame
As belts are one-piece, your frame will need to be designed with ‘belt splitter’ in the rear triangle. The frame will also ideally be ‘stiffness test approved’ – but more on frame stiffness below.

Belts Are Less Efficient Than Chains
As belts require a high tension, they’ve been tested to be less efficient (likely somewhere in the 1-5 watt range) than a perfectly lubed chain drivetrain, but may have the advantage when the conditions get nasty.

Replacement Parts Are Not Often Found In Shops…
… that said, with the high service life, you won’t need to obtain replacement parts often. It’s prudent to carry a spare belt (87 grams) to get you out of trouble on a bike trip (they fold up nice and small). I’ve never carried a spare chainring or cog as they’re very unlikely to be damaged even on a multiyear bike tour.

There’s A Higher Upfront Cost…
… but provided you get the full mileage out of your belt drivetrain, I’ve estimated you’ll go about 125km per dollar. This is the equivalent of a chain drivetrain costing you about $60 per 7500km (typical max distance for a chain).

Gates Belt Drive Models

CDX: High-Performance
The CDX High-Performance belt drivetrain is the most common belt option. You’ll find this model on almost all touring and adventure bikes. This system now has 16 belt lengths, 7 front sprocket sizes and 8 rear cog sizes to give you the most drive ratio options.

CDX: EXP
Gates more recently released an oversized version of the CDX drivetrain with 25% more surface area. This product is designed to get an even better range and durability, but still isn’t commonly found on touring bikes. There are currently five front sprockets and 4 rear cogs available.

CDN: Urban
The budget belt drivetrain from Gates is CDN Urban. The idea is to bring belt drive to city bikes in the €500 complete price range. These products are designed for the ‘casual rider’ and are not approved for use on mountain bikes, mid-drive eBikes, fixed gear bikes, or high mileage trekking/touring bikes. From what I’ve heard, people have had a few problems with the CDN rear cog, but they’ve all been upgraded to a cross-compatible CDX stainless cog.

Belt Drive Frames: Rear Triangle Stiffness

belt drive

Gates CDX: High-Performance on a Koga WorldTraveller-S.

I’ve found that one of the most important factors for a belt drivetrain is that it is paired with a particularly stiff rear frame triangle – this is particularly important when carrying luggage on your bike. On my older belted touring bikes I was able to generate enough flex through my frames to make the belts skip under load. But no matter how much power I put through my pedals on my Koga WorldTraveller-S, I cannot get this to occur, indicating a higher degree of stiffness.

Gates offer a ‘stiffness test approved’ label to frames which pass their standard. But it’s worth noting that this is a minimum stiffness level, so some touring manufacturers do a better job than others to keep their rear triangle stiff. I recommend hunting for frames that use oversized tubes for the chainstays/seatstay section (my detailed article on frame stiffness is HERE).

You can find a list of every Gates approved frame HERE.

Belt Drive Frames: Belt Tensioners

belt drive

The Bushnell eccentric bottom bracket on a Van Nicholas Amazon touring bike.

A belt drivetrain requires a way to tension the belt. There are a three different frame features that allow tensioning, each with their pros and cons.

EBBs: Eccentric bottom brackets allow you to move your crankset around 13mm forwards and backwards. The design also gives you the option to run your crankset high (nice for off-road) or low (better for the road). I’ve found EBBs a bit ‘creaky’ on long bike trips (more maintenance required) and additionally, they can get water in them, making them sometimes hard to adjust (again, maintenance required). The main upside is that companies like Koga have tested EBBs to offer the stiffest rear triangle possible.

Sliding Dropouts: Sliding dropouts offer about 20mm of adjustment and are a great option because they are very easy to adjust. Like EBBs, you do not need to tension your belt every time you take your wheel out; it simply drops out and then slots back in at the perfect tension. The downside to these dropouts is that some lower-quality frames have the propensity to move forward using belts, resulting in inadequate tension.

Horizontal Dropouts: Belt frames with horizontal dropouts are rare. They’re not recommended by Gates as you need to set the belt tension every time you take your wheel out. That said, if you are using belts and horizontal dropouts, you’ll need a minimum of 10mm left in the dropout before the belt is tensioned – this space is required to get the belt onto the chainring.

Belt Drive Frames: Splitters

belt drive

Can you make out the frame splitter just above the dropout on this Ahearne?

Unlike a chain, belts are one-piece, so a split in the frame’s rear triangle is essential. Splitters can be found in the seatstay, dropouts or sometimes even the chainstay. The most common splitters are integrated into the rear dropout, but some manufacturers have tested seatstay splitters to produce the stiffest possible rear triangle.

In the past, frames have been modified with splitters so that people can upgrade to belt drive. I no longer recommend making this modification because you simply can’t guarantee that your rear triangle will be stiff enough for a belt. Plus, there are so many dedicated belt frames out there nowadays which are similarly priced to the cost of a frame mod and re-spray.

If you still want to get this modification made, make sure to contact a reputable frame builder. I’ve used Ewen Gellie for my work in Australia. Cycle Monkey in Northern California (USA) can also make this modification.

Belt Drive and Rohloff Hubs

Belt drive combined with a Rohloff hub is a dreamy setup, but there are a few conditions attached. Not adhering to these may result in the partial loss of guarantee and warranty cover for your hub. But don’t worry, it’s easy to meet these conditions!

Firstly, your frames rear-triangle must withstand a minimum stiffness level. In short, bike manufacturers must prove frame stiffness levels on a specialist testing jig in order to be considered ‘stiffness test approved’. You can find a list of every approved frame HERE.

And the second condition is that you use a ‘belt snubber’. This product prevents the belt from walking off the cog under high load (or insufficient belt tension). When the belt lifts onto the top of the cog it can compromise the internal carbon fibres in a belt, so it’s recommended to use a snubber in any case.

Previously, belt cogs screwed directly onto Rohloff hubs, but now there is a much more user-friendly ‘splined carrier’ (part #8540L) with three splined belt cogs available (19t, 20t, 22t). This carrier makes cog changes much easier. There was a known issue for the 1st-generation splined carriers, but this was fixed mid-2018 (and warranty parts sent out), so won’t be an issue going forward.

Belt Lines and Frame Clearance

page street cycles

Pinion+Belt Drive on a Page Street Outback. See the build HERE.

A straight ‘chain line’ or ‘belt line’ is absolutely essential for a properly functioning belt drivetrain (+/-1mm). The location of the rear cog is often fixed, so the majority of the adjustment will be at the crankset.

Belt Lines of various drivetrains:
– Alfine Di2: 39.8mm
– Alfine 8 or 11: 43.7mm
– Nexus 8: 44.35mm
– Nexus 7: 43.05mm
– Pinion C-Line: 52mm
– Rohloff 148mm, splined carrier: 51.7mm
– Rohloff 135/142mm, splined carrier: 54.7mm
– Pinion P-Line: 56mm
– Rohloff 170/177/190/197mm: 72.2mm

You’ll need to look up the chain line of the crankset you’re planning to use with your belt drivetrain. A triple 104BCD crankset has a 55mm chain line (when the chainring is mounted on the outside location), making them popular for Rohloff belted setups. It’s worth noting that Gates make their own cranksets with different beltlines to suit most belt drivetrains: 39.8mm, 43.7mm, 45.5mm and 54.7mm.

The other thing to mention is chainring clearance, in particular with Shimano hubs. As the gear selector on Shimano hubs is external and on the drive side, it results in a very narrow chain line. If a frame has inadequate chainring clearance at the chainstay, it may be incompatible with a Shimano hub. It’s worth getting in contact with a frame manufacturer to check on chainring clearance if you’re planning on using a Shimano hub with belt drive.

Gear Ratios

You might think that having fixed belt lengths reduces the ability to get your gear range right. But it’s worth noting that there are eight belt lengths and quite a few chainring and cog sizes, so the jumps between drive ratios aren’t large.

The Gates Calculator is a great tool to help determine which chainring and rear cog to use (this calculator is also available as a smartphone app). I find that if you plug in your optimal chainstay length (eg. 460mm) and hit ‘Find Solutions’, it will come back with the different combinations that will suit your frame first and foremost. You now just need to narrow down your ‘Gear Ratio’ options so they best suit your terrain. This will need to be done in accordance with the chainrings/cogs that are available for your Rohloff/Shimano/Pinion etc.

As mentioned above, if you are using belt drive and horizontal dropouts, you must have a minimum of 10mm left in the dropout before the belt is tensioned.

Belt Drive and Tandems

Belt drive is great for timing belts on tandem bikes. This saves you about 250 grams over the equivalent chain and chainrings. In order for belt drive to work on your tandem, your frames boom tube must be 724mm between bottom brackets. You’ll also need to be using 130BCD cranks. It is possible to run belts on both the drive and non-drive side of your tandem but the latter is recommended.

Maintenance and Cleaning

belt drive

Belt drivetrains are almost maintenance-free. Cleaning is often as simple as rinsing the belt/cogs using a water bottle and an old toothbrush. No degreaser. No chain cleaner. No dirty hands.

The amount of work you do to maintain a belt will depend on the conditions you’re cycling through. In the driest, dustiest regions of the world, I’ve needed to apply a silicone lubricant to my belt every couple of days. Other times, its months between any maintenance or cleaning. While the belt system seems to do a pretty good job of removing mud and grit, you’ll want to keep the teeth of your belt as clean as possible to get optimal mileage.

Silicone Lubricant: I use a general purpose silicone spray when I hear the first squeak from my belt. My current spray bottle was purchased from an automotive store in rural Bolivia, so I have no doubt similar products can be found all over the world. Gates recommend THIS heavy duty silicone lubricant, in particular.

Hanseline Belt Drive Care Stick: This product has been designed to keep your belt running nicely. It is undoubtedly the most compact product to carry on a bike trip too, but I haven’t yet had the chance to test it.

Handling Belts

You have to be careful with how you handle belts, as misuse can lead to internal carbon fibre damage… and trust me, you don’t want a snapped belt. The main thing is to ensure you don’t stress the fibres in any direction. If you’re storing a belt for a long time, it’s best to leave it fully open.

When installing your rear wheel, it is essential that you do not ‘crank’ the belt back on like you may with a chain. Instead, simply put the belt onto the chainring and cog, then slide your wheel into the dropout.

The great thing about belts is that they coil up nice and small so that you can easily carry them as spares. I generally tuck my spare belt into the pocket of one of my panniers. You’ll need to be careful folding and unfolding your belt – make sure you don’t force it, it should coil very naturally. When it’s folded correctly it should naturally sit in a loop which folds three times.

Tensioning Belts

Gates Carbon Drive tension will vary depending on whether you use a singlespeed or internally geared hub, and how powerful you are as a rider. There are a few different ways to get your tension to what Gates recommend.

Smartphone App: You can download a simple app which will measure how much tension your belt has with your smartphone microphone. Simply hold the phone next to the belt and give it a few plucks and it will quickly give you an average frequency rating.

Gates Tools (Sonic Tension Meter, Krikit Gauge): More accurate tension gauges can be found at specialist bike shops, but I’ve never needed to use these products.

Tension variation (tight spots) may occur when the crank is rotated, so Gates recommends taking several tension measurements at different crank arm locations to find an average. Around a 10lb or 15Hz variation is considered acceptable. If significantly more variation exists, Gates recommends centring the chainring on the crank spider.

Cost

belt drive

Belt drive on a Hilite fat bike using a Pinion gearbox.

CDX: High Performance
Chainring: US $70-110
Rohloff Cogs: US $93-105
Alfine Cogs: US $120-125
Pinion Chainring: US $154
Pinion Cogs: US $128-140
Belts: US $80-105

Kit Total Rohloff: from US $243
Kit Total Alfine: from US $270
Kit Total Pinion: from US $362

Belt Drive Touring Bike Manufacturers

Koga World Traveller

Like the sound of belt drive? I’ve compiled a list of touring bike manufacturers HERE. For those wanting to do a custom build, my list of touring frame manufacturers is found HERE. Expect to spend more than US $1000 / €1000 on a complete belted bike and a minimum of US $500 / €500 on a belted frameset.

If You Have Any Further Questions, I Will Try My Best To Answer Them Below

The post Gates Carbon Belt Drive: Everything You Ever Need to Know appeared first on CyclingAbout.com.

Video: EL PÁRAMO | Bikepacking Trails On My Touring Bike [EP.11]

$
0
0

In biogeography, the páramo is a tropical alpine ecosystem with a predominance of scrubby vegetation. Páramo made up the majority of my ride this month, so it seemed like an appropriate name for this film! This episode is particularly special because it features Michael Dammer, one of the Trans Ecuador route designers who provides lots of insight into bikepacking across Ecuador.

Value my videos? Consider helping me recover the costs of my broken gear and upgraded equipment:
Patreon (with monthly rewards)
Paypal (one-off donation)

MY BIKE: Koga WorldTraveller-S
MY 24KG GEAR LIST: Here
MY ROUTE: Coming Soon
MY CAMERAS: Panasonic G9 + GoPro Hero 6

MUSIC: Jazz Hop Cafe Mix

Paramo

The post Video: EL PÁRAMO | Bikepacking Trails On My Touring Bike [EP.11] appeared first on CyclingAbout.com.

Photo Gallery: Quilotoa Lake, Cotopaxi Volcano and the TEMBR To Quito

$
0
0

This month I cycled some of the crazy sections of the TEMBR trail between Quilotoa Lake, Cotopaxi Volcano and Quito. I made a film about the experience which you can check out HERE.

MY BIKE: Koga WorldTraveller-S
MY 24KG GEAR LIST: Here
MY CAMERAS: Panasonic G9 + GoPro Hero 6

tembr

I’ve been complaining about the rain all wet season, but you know what, the last two weeks have dried up dramatically! Can’t wait to hit the road again and show you the northern section of the Trans Ecuador Mountain Bike Route.

tembr

I tell the story about how I narrowly avoided getting robbed at knifepoint on my Ask Me Anything page this month! I do these regularly for fans of my videos and supporters of CyclingAbout.com. It’s essentially a way to offset the costs associated with video production and the operation of a large website (I’m lucky to break even on these things – but I do them ‘cos I’m passionate about them).

tembr

3, 2, 1… DROP IN! Don’t think I’ll be topping this moment anytime soon…

tembr

I wish I could show you more, but this has been my view the last few days. Inside I’m burning up a little knowing that I’m climbing massive mountains (with amazing views) but never actually reaping the rewards. Let’s hope the weather fines up soon!

tembr

How do you defeat Alee D? Still not sure, but sticky mud and 20% gradients will get you close. 😅

tembr

I was about to open a gate into another grassy field when two cowboys approached on horseback. I explained that I was following a track back towards civilisation after spending the last week high in the mountains. They then jumped off their horses and began talking amongst themselves. I was told to follow one cowboy to a different gate while the other cowboy jumped up high on the fence and started waving his hat. Then out of the distance, a bull was charging straight at him! The bull stopped a metre from the fence and started scraping its feet on the ground while massive amounts of stream were pouring through its nostrils. It looked pissed. Real pissed. While the cowboy was distracting the bull, I followed the other cowboy through a different gate into the same field as the bull. But our plan backfired when the giant animal noticed… and charged straight at us!! I dropped my bike and climbed the fence in a split second while the cowboy somehow manoeuvred the raging bull through the gate into the field where we’d just come from. Not sure how this situation would’ve played out without the two cowboys there to help, but I can’t imagine it would’ve been great.

tembr

In the high mountain areas, I’ve been waking up at 5:30am every day just to ride through the morning mist. If I’m on the bike by 7am, the sun will cut beautifully through the mist to create shots like this.

This is a road, but it’s only fit for cycling, horse riding and walking. It’s my favourite kind of road thanks to the incredible viewz & endless solitude, but a side benefit is that there’s also a 0% chance I’ll get run over by a car.

Ever wondered how I get extra ground clearance when I need it?!? Koga Denham handlebar horns delivering the goods.

What you’re looking at is an expert snacker. He is on the go from sunrise to sunset with no big meals or breaks! He thrives on short stops which include stuffing his mouth with nuts (yeah, not those nuts), dried fruit (prunes por favor), Lupin beans (an Ecuadorian speciality), breads (wraps preferred), avocados (with hot sauce), peanut butter (the calorie king), potato chips (his vice) and coconut biscuits (pictured 🤤).

Descending the black volcanic dirt behind the second tallest mountain in Ecuador (5897m/19347ft). Only some flowing lava would make this experience better!

10/10 camping on the Ecuadorian Páramo. Not a tree in sight!

FML 😫 My next film drops in a few days though! It’s a special one because it features Michael Dammer who is one of the route designers of the Trans Ecuador. He provides insights on the history, geography, ecosystems and experience of crossing Ecuador on a bike! Note: this road is not the TEMBR, it’s an Alee-route. 🙄😅

I still can’t get my head around how the weather is so consistent here. There seem to be so many variables involved with the weather, yet in the mountains every day there is a big thunderstorm within 10 minutes of 3PM, without fail. Anyone actually know how/why this weather phenomenon occurs???

I’ve explored some very wild places recently, but not everyone survived the journey with me! The most secluded places of Ecuador have been particularly hard to access (check my latest film to see the madness). But in many countries, this isn’t the case. For example, in Australia or Peru, I can cycle on dirt roads less than 100km and get to some places just as remote.

People often comment on how calm I am through adversity. This is a behaviour I’ve taught myself since I was a teenager. I almost remember the precise moment I decided to be a calm person. It was after an interaction with a car driver that had cut me off and verbally abused me while cycling. I was filled with rage, and it ruined my day. I didn’t want to have this happen again, so I trained myself to take a more philosophical view on life which involved controlling what I could and letting the rest wash over. Living this way has allowed me to prosper in high-stress situations, enjoy more things, not dwell on the past and maintain an overall more positive mood!

The post Photo Gallery: Quilotoa Lake, Cotopaxi Volcano and the TEMBR To Quito appeared first on CyclingAbout.com.


One More Year, Please: I’m Extending My Bike Ride From Argentina to Alaska!

$
0
0

I’ve been CyclingAbout The Americas for 16 months now, covering around 25,000km across eight countries. The journey so far has taken me up the highest road in the world (5815m/19078ft), across deserts, salt flats and along the Peru Divide, my favourite touring route in the world.

I have fallen 30 metres off a cliff, pushed my bike across Ecuador’s toughest terrain, waited days for the snow to stop falling on my tent and nearly been killed by hundreds of trucks in Brazil. I have slept hundreds of nights under the stars, hiked the world’s most iconic trails and made more friends than I could possibly count.

After all of these great adventures, I’m very far behind my original schedule for this trip. I think I could still make it to Alaska sometime this year, but I’d have to skip through Central America at a pace much faster than would do the countries justice.

So I’ve decided to extend my trip for a full year!

Why?
1. I’m having a really good time out here!
2. I’ve been travelling on the smallest possible roads which are making my progress slower.
3. My big accident in Peru set me back a few months.
4. I’m spending a lot more time per month making films and sharing photos than I originally anticipated.
5. KOGA like the idea of me testing their WorldTraveller-S into 2020!

Here’s My Revised 2019/2020 Schedule

I’ll be continuing this journey on my trusty KOGA WorldTraveller-S touring bike. More on the bike HERE.

April to July 2019 // Colombia
August 2019 // Panama and Nicaragua
September 2019 // Honduras and El Salvador
October 2019 // Guatemala and Belize
November 2019 // Cuba
December 2019 // Mexico
March 2020 // USA
June 2020 // Canada
August 2020 // Alaska

You Can Follow My Adventures In A Number Of Ways

Daily photo updates are available on my Instagram page
Stories, links and photo updates on my Facebook page
Monthly videos by subscribing to my YouTube channel

If You Enjoy My Resources and Videos, Consider Supporting My Work!

I take a lot of time out of my life to share everything I know about bike travel. I also try to make top-notch films and share all the photos and stories from the amazing places I travel to. If you value my work, you can support what I do generally via a one-off donation, or become a CyclingAbout Site Supporter (goes into maintaining this website) or a Patreon (supports my film making).

See You In Alaska in 2020!

The post One More Year, Please: I’m Extending My Bike Ride From Argentina to Alaska! appeared first on CyclingAbout.com.

11 Reasons To Tour With A Pinion Gearbox (And 8 Reasons To Not)

$
0
0

In 2010, the first Pinion gearbox was fitted to a bike that was cycled across the Himalayas. By 2012, the world’s biggest bike trade show, Eurobike, had a handful of bikes built around the 18-speed Pinion P1.18 gearbox, impressing bike travellers – myself included. Today, over one hundred bike manufacturers build their frames around the seven different models of Pinion gearbox.

A Pinion gearbox is a fully sealed oil bath of cogs located at the crankset which offers 6, 9, 12 or 18 different gears covering a wider gear range than most 2x and 3x drivetrains. The Pinion system bolts directly onto frames designed to accommodate the technology, meaning there is no chance for a retrofit to your current frame.

How Does It Work?

Pinion Gearbox

The Pinion Gearbox is integrated with the crankset and inside are two gearing sub-transmissions. When you pedal, energy first travels along the lower crankshaft before transferring to one-of-six cog sets in the 1st sub-transmission. The energy is then sent along the upper shaft to the 2nd sub-transmission which offers a high, medium or low version of the initial six gears (6 x 3 = 18 speed). The energy then makes its way back down to the crankshaft again where it can be sent directly to the outside chainring (these three output cogs are free-floating on the crankshaft). The job of the gearbox is to change the chainring speed based on the gear selected, meaning the chainring always spins faster or slower than the crankset. Pretty cool! If this description made no sense to you, check out THIS video describing the process in much more detail, or THIS series of diagrams on the Pinion website.

In this resource, I’ll be discussing the pros and cons of the Pinion gearbox, then I’ll compare it with the Rohloff hub, and lastly, I’ll be nerding out on everything else you can possibly know about this engineering marvel!

Note: This article was originally published in September 2012 but has been completely overhauled April 2019.

11 Reasons To Travel With A Pinion Gearbox

Belt Drive Touring Bike

A Rennstahl 931 stainless steel touring bike equipped with Pinion gearbox.

1. The Ultra Wide Gear Range
The key feature of the Pinion P1.18 gearbox is its 636% gear range. Compared to any other drivetrain, you’ll have easier gears for the steep mountain roads (4km/h) while also having harder gears for the high-speed descents (50km/h+). In comparison, other gearboxes available like the Rohloff 14-speed gear hub measure in at 526% and the Shimano Alfine 11-speed hub at 409%. A 30-speed derailleur drivetrain is the only option that can get close to this range (620% maximum).

2. The Sealed Gear Unit
Pinion gearboxes are a fully sealed gear system, making them impervious to mud, grit, dust, snow and sand. If you spend a lot of time riding in harsh conditions, these gearboxes may just be your savior.

3. The Maintenance-Free Design (Almost)
The only maintenance that you need to complete to the gearbox is a 60ml oil change every 10,000km (or every year, whichever comes first). This job is easy enough to do yourself in remote areas as long as you carry the appropriate syringe, line and oil.

4. The Sturdiness
Pinion drivetrains have very few parts that are susceptible to external damage. You’ll find no exposed derailleurs, delicate hangers or brittle cassettes on a Pinion-powered bicycle.

Pinion gearbox

5. The Minimal Drivetrain Cleaning Required
Getting the brushes between your cassette teeth, derailleur pulleys and chainrings is time-consuming and annoying on a bike trip. You can avoid almost all of this nuisance with a Pinion gearbox, especially if you pair it with a carbon belt drivetrain.

6. The Ability To Shift Your Gears Without Pedalling
This is a particularly handy feature for a loaded touring bike. For example, you can pick your gear before you take off at the traffic lights, or select the appropriate gear for starting on an incline.

7. The Ability To Change Many Gears At Once
Thanks to the Pinion gearboxes twist shifter, you can change multiple gears in one go; the limitation is the range of motion in your wrist. You should be able to change about eight gears at once, which I’ve had to do under rapid deceleration on sandy roads.

8. The Equally Spaced Gear Ratios With Small Gear Steps
There is a constant 11.5% jump between each gear, making gear changes very predictable. These gear steps are also very small, allowing you to fine-tune your pedalling cadence at whatever speed you are travelling (P1.18). In comparison, the Rohloff hub has a slightly bigger jump between each gear (13.6%).

Belt drive combined with a Pinion gearbox on a Hilite bicycle.

9. The Instant Gear Changes With No Chance Of Gear Skipping
As soon as you change the gear at the shifter, the gearbox is instantly engaged in the next gear and ready to go – there’s no dilly-dallying around here! As the Pinion gearbox doesn’t require tuning like a derailleur, there’s no chance of gear slipping either.

10. The Straight Chain/Belt Line
The chain line on a Pinion drivetrain is perfectly straight, resulting in less chain wear. This equates to a longer chain life; I know people who’ve toured for 10,000km+ with a single chain. Choose carbon belt drive with your Pinion gearbox and you’ll likely achieve 20,000km+.

11. The Near Zero-Dish Wheel Build
The Pinion gearbox allows you to use a single speed rear hub design. As the cassette body section of a single speed hub is shorter, it allows hub manufacturers to offer a wider hub shell, resulting in a near zero-dish wheel build. What this means is that you’ll have extra wheel strength and durability thanks to the more even tension across the spokes.

8 Reasons To Not Tour With A Pinion Gearbox

Pinion Gearbox

The two shifting cables connect to the non-drive side of the Pinion gearbox.

1. The Gearbox Design Is Heavier Than Most Drivetrains
The Pinion gearbox adds 200 to 700 grams when compared to the equivalent Rohloff hub, and 600 to 1100 grams when compared to a 3x touring drivetrain (the weight variance depends on the gearbox model). The Pinion-specific frames also add a few hundred grams. But remember to keep these numbers in perspective; when you consider the weight of a bike loaded with luggage, food and water, these figures are rather insignificant. My precise drivetrain weight analysis can be found HERE.

2. They Are Less Efficient Than Derailleur Gears and Rohloff Hubs
The Pinion has additional frictional losses when compared to other drivetrains. I’ve actually estimated it to lose 3-4 minutes per 100km when compared to a Rohloff hub or derailleur gear system. You can read my full analysis HERE.

3. The Price
There’s no beating around the bush here – Pinion gearboxes are the most expensive drivetrain you can buy. Expect to pay a minimum of €3000 for a bike complete with a P1.18 gearbox. You can somewhat justify the cost of buying a bike with a Pinion gearbox knowing that you won’t need to replace anywhere near as many cassettes/chains/chainrings – but you’ve got to ride your bike for many years to get that payoff. Luckily the gearbox will probably last as long as you do!

Pinion gearbox

A bare Santos frame showing the six mounting points for a Pinion gearbox.

4. The Dedicated Frame
While an internal gear hub can be fitted to almost any frame, Pinion gearboxes require a dedicated frame design that’s specific to its six-bolt design. This essentially means that you can’t change your mind and go back to derailleurs (or an internal gear hub) down the track.

5. The Need To Send The Gearbox In For Repair
In the event of some kind of mechanical failure, you will need to ship your Pinion gearbox to Germany for repair. I can understand that this may be a deterrent for you if you spend a lot of time in remote locations. That said, many people have already travelled to some of the hardest-to-access parts of the world with Pinion gearboxes, and the consensus is that complete failure is highly unlikely. I know a few people who’ve had oil leaks on their bike trips (luckily this probably won’t stop you being able to ride), and there were some early issues with the crank arms working themselves loose. But year-on-year the Pinion gearboxes are getting more reliable.

6. The Spare Parts Need To Be Shipped In
Need a new cog, some cables or some gearbox oil? You can’t just go to any old bike shop to pick them up. Most of the time you’ll have to plan ahead of time and order any replacement parts online or through a dealer.

pinion gearbox

Pinion offer their gearbox with a neat twist shifter, but there are also aftermarket options available (more below).

7. The Twist Shifter
The twist shifter divides people; I personally love twist shifters as I can dump many gears at once. The good news is that if you use flat bars you can now switch to some aftermarket trigger shifters. And for those with drop handlebar bikes, there are a few nice aftermarket shifter options for you too!

8. The Fact You Can’t Shift Under Load
While it’s not best practice to shift under load on any drivetrain, a derailleur has a much higher tolerance for it. There is a technique to shifting with a Pinion gearbox where you’ll need to back off on your power for a split second to make the shift. This takes a bit of time to master but becomes second nature in no time.

Pinion Gearbox VS Rohloff Speedhub

pinion gearbox

Don’t know whether to go with Pinion or Rohloff? Why not combine both so you can have 168 individual gears! *this is a joke*

Pinion 18-Speed P1.18 Gearbox
– Pinion gearboxes have a wider gear range at 636% compared to 526% for a Rohloff hub.
– Smaller gear steps at 11.5% compared to 13.6%.
– Five-year warranty compared to two-years with a Rohloff hub.
– It runs silently in all gears whereas the Rohloff makes a whirring sound in gear 1-7
– 10,000km oil changes (or one-year) compared to 5,000km with a Rohloff hub.
– In the case of repair/maintenance, you can quickly unbolt the gearbox and send a Pinion gearbox away, rather than a whole wheel. Easy to swap out the entire system if there is a failure (compared to dismantling/rebuilding a Rohloff wheel)

Rohloff 14-Speed Internally Geared Hub
– The numbers suggest the Rohloff hub is more efficient in terms of energy transfer than a Pinion gearbox.
– Rohloff frames are a touch lighter to build. The hub itself is 700 grams lighter than the equivalent Pinion P1.18 gearbox too.
– Rohloff bikes are around €700-1000 cheaper (that’s US $1000+).
– Gear cable changes are much easier.
– Compatible with mid-drive eBike motors.
– With over 20 years in production Rohloff have had more time to iron out any kinks in the product (Pinion have been producing gearboxes for eight years in comparison).

Click HERE to read my article 16 Reasons To Tour With A Rohloff Hub.

Pinion Gearbox Models

P-LINE
The P-Line is most commonly found on touring and bikepacking bikes as the gear range and gear steps are unparalleled by any other drivetrain type (P1.18). In addition, the extra weight of this gearbox is almost insignificant by the time you add equipment, food and water to your bike.

P1.18 // 18 gears. 636% range. 11.5% gear steps. 2700 grams. Best for touring and bikepacking bikes.
P1.12 // 12 gears. 600% range. 17.7% gear steps. 2350 grams. Best for mountain bikes.
P1.9XR // 9 gears. 568% range. 24.3% gear steps. 2200 grams. Best for e-bikes.
P1.9CR // 9 gears. 364% range. 17.5% gear steps. 2200 grams. Best for urban bikes.

C-LINE
The C-Line may have a slightly reduced gear range and larger steps between each gear, but these gearboxes have the advantage of a 250-gram weight saving due to the magnesium body, plus they’re 8mm narrower between the pedals (q-factor).

C1.12 // 12 gears. 600% range. 17.7% gear steps. 2100 grams. Best for mountain bikes and off-road bikepacking bikes.
C1.9XR // 9 gears. 568% range. 24.3% gear steps. 2000 grams. Best for e-bikes.
C1.6 // 6 gears. 295% range. 24.3% gear steps. 1800 grams. Best for urban bikes.

P1.18 VS C1.12
Weighing up between these two gearboxes? For touring/bikepacking, it’s recommended to go for the P1.18 as the gear steps are much smaller. This allows you to keep your pedalling speed (cadence) much more constant with gear changes (most noticeable when cycling on the flat). If you’d like to get a feel for what each of the 17.7% gear jumps would be like, you can shift from the 36-42t on a mountain bike cassette or 11-13t on any other cassette.

Pinion Gearbox Frames: Tensioners

Pinion Gearbox

Sliding Dropouts
The most common form of chain/belt tensioner is sliding dropouts. By incorporating a small adjustable retaining bolt, you’re able to ensure the wheel is perfectly aligned when setting up, and it makes wheel installation/removal a breeze. Pictured is a lovely stainless steel dropout manufactured by Co-Motion Cycles.

Eurobike 2018

Eccentric Gearbox Mount
Tout Terrain offer belt/chain adjustment up front via an eccentric gearbox mount which is super neat. A small dial makes any fine tuning very simple.

Santos Travelmaster

Belt or Chain Tensioner
A handful of companies use a roller at the gearbox which is said to maximise the rear triangle stiffness for belt drivetrains. Pictured is a belt tension designed by Santos Bikes.

Pinion Gear Ratios

Belt Drive – Gates Carbon Drive
A 32 tooth front sprocket can be combined with 20-34 tooth cogs in two-tooth intervals (eg. 20, 22, 24). A common drive ratio for Pinion gearbox touring bikes is 32-28t as that can have you pedalling at 5km/h with a decent cadence for climbing, and 53km/h in the top gear on the downhills. The closer you get to 1:1, the steeper the hills you will be able to cycle.

Chain Drive – Pinion Longlife
Pinion has a series of sprockets/chainrings for travelling in extreme conditions. The teeth of the ‘Longlife’ series chainrings are 1mm wider and are designed for use with their extra wide X101 chain. The front chainrings are available in 30 teeth, and the rear sprockets are available in 30 or 26 teeth. A recommended setup for touring would be 30-26t, which matches very closely to a belt drivetrain running 32-28t.

You can calculate your gear inches, or speed at certain cadences HERE.

Belt Drivetrains

pinion gearbox

Belt drivetrains, when combined with Pinion gearboxes, will decrease your drivetrain maintenance significantly.

You’ve probably already noticed that the majority of Pinion touring bikes are combined with belt drivetrains. That’s because belt drive offers:
– An extremely long service life of 20,000km+
– Little to no maintenance other than a spray with your water bottle (and maybe some silicone spray)
– Silent engagement similar to a perfectly lubed chain
– A marginally reduced weight when compared to a chain

You can find out everything you ever need to know about Gates Carbon Belt Drive HERE.

Pinion Gearbox Fat Bikes, Tandems and Recumbents

Fat Bikes
Pinion have created a special offset spider and extra-wide crank arms so that you can mount their gear system to a fat bike. Pictured above is a Centurion, but you can also find Pinion fat bikes from Mi Tech, Nicolai, Ventana, Carver and Hilite (pictured).

pinion gearbox

Tandems
Wondering why there is only one Pinion tandem in existence? Well, it requires some custom machined parts plus three belts to pull it off – and Co-Motion Cycles did just that! The difficulty is that you cannot fit the gearbox at the rear crankset (stoker) because Pinion does not offer a tandem crankset. And you cannot locate the gearbox at the front crankset (pilot) because the Pinion chainring spins at a different rate depending on the selected gear (therefore, it can’t be used as a tandem ‘timing chain’).

Pinion Gearbox

Recumbents
Pinion gearboxes are becoming more and more popular on touring recumbents. Pictured above is a dual suspension Azub Mini with red Pinion P1.18 gearbox.

Shifters

Cinq5 have just released these neat trigger and road shifters for the Pinion gearbox.

Along with the stock grip shifter, there are a few aftermarket products available, including the:
Cinq5 Shift:R Road shifter & hydro brake levers for drop bars
Cinq5 Shift:R Tour thumb shifters for flat bars
Co-Motion Twist Shifter for drop bars
Van Nicholas Divisible handlebar to fit the standard Pinion shifter to drop bars

Rear Hubs

pinion gearbox

While you can use any cassette hub with a Pinion gearbox, single speed hubs are the most ideal because the distance between hub flanges is wider, resulting in stronger wheel builds. Top-notch single speed hubs include the Pinion H2R with 120 engagement points, Industry Nine Hydra with 690(!) points of engagement and the Chris King ISO with 72 points of engagement.

Electric Bikes and Pinion Gearboxes

pinion gearbox

Santos uses GoSwissDrive hub motors for their Pinion eBike builds.

As the Pinion gearbox occupies the space of a mid-drive electric motor, it means front or rear wheel motors are the only compatible options. While many excellent rear hub motors are available, it’s worth noting that the mid-drive motor design is often regarded as the ‘best’ motor type overall. This is because mid-drive uses your bike’s gears, resulting in optimal torque in a variety of situations (eg. climbing or on the flat). Mid-drive motors tend to be both a bit more efficient (better range) and effective (especially on hills).

You can read all about electric touring bikes HERE.

Cost

pinion gearbox

The Co-Motion Divide Pinion is custom made for you from US $6715. In comparison, the Rohloff version tallies up to US $5560.

Pinion gearboxes are only available for bike and frame manufacturers. Touring bikes with Pinion gearboxes start at €1999 for a P1.9CR model and €2949 for a P1.18 model, while most premium bike brands offer builds in the €4000-5000 range. Framesets with Pinion gearboxes are often in the €2000-3000 price range.

When comparing complete bike prices between Pinion and Rohloff builds, most manufacturers charge a premium of €700-1000 for a Pinion P1.18 equipped bike, with all other components equal.

Pinion Touring Bike Manufacturers

Belt Drive Touring Bike

The IdWorx oPinion aluminium touring bike.

There are more than 30 bike companies that produce touring and bikepacking bikes with Pinion gearboxes. You can find a complete list of the bikes available including pricing HERE.

Have You Travelled With A Pinion Gearbox? How Are You Liking It?

The post 11 Reasons To Tour With A Pinion Gearbox (And 8 Reasons To Not) appeared first on CyclingAbout.com.

The New 2020 KOGA WorldTraveller S 2.0 Touring Bikes

$
0
0

KOGA has just announced a big update to its premium touring bike range. The 2020 KOGA WorldTraveller S 2.0 now offers a new welding technology, new sizing, new drivetrain option, 200 new paint options and a new entry-level price point.

The ‘S’ in the model name refers to KOGA’s Signature program, which offers every WorldTraveller-S bike as a custom build. You choose from a huge range of proven touring parts, pick your colour and can even get your name painted onto on the top tube. The online bike configurator for the WorldTraveller is the best in the business, with live changes to the bike image, weight and price.

The frames are painted in the Netherlands in a colour of your choice, and once the paint is dry, a certified mechanic constructs your bike from start to finish. The time from placing your order to receiving your bike is six weeks, including global shipping.

I made a film about the KOGA factory when I visited; you can see how the bikes come together HERE

The 2020 KOGA WorldTraveller S 2.0

2020 Koga WorldTraveller-S

The 2020 KOGA WorldTraveller S 2.0 in Madagascar Jaguar Orange. Yep, this is the villain car colour from the latest 007 film!

NEW: Super Smooth Welding
Looking at the frame, the first thing you’ll notice is that there are no visible welds. That’s because KOGA has changed the welding style on their aluminium touring frames. The welds have been tested to be just as strong, but with a more elegant finish than ever before.

NEW: Sizing
The length of the headtube has been increased by 25mm (1-inch) on most sizes. This decision has been made based on many years of comments from KOGA riders. I use exactly 25mm of spacers on my frame, so this will be a welcome change for when I eventually update to the new frameset.

2020 Koga WorldTraveller

NEW: Derailleur-Ready Frames
Previously the WorldTraveller-S frame was designed for Rohloff hubs exclusively. The 2.0 update brings derailleur compatibility to the Signature-level touring bike, allowing for a lower entry price to the KOGA Signature program.

NEW: Lower Pricing
The KOGA Signature touring bikes start from €2600 for a Shimano XT T8000 touring bike complete with dynamo lights. KOGA ships their bikes worldwide, so if you order a bike outside the EU you’ll save 21% on VAT. However, once you factor in the shipping and landing costs it’ll likely end up in the same ballpark in US dollars, more or less. It’s also worth noting that KOGA covers 50% of the shipping costs of their bikes, so shipping to your country may not be as expensive as you think! You can find out the exact shipping cost to your country in KOGA’s online bike configurator.

NEW: More Paint Options
KOGA has always offered 10 standard colours for their Signature range touring bikes. But they’ve just stepped it up a few notches with their custom colour program. For an additional €200, you have the ability to request any ‘RAL’ colour number; by my calculations, that’s about 200 colour options! Even special requests like the Madagascar Orange (seen above) can be entertained.

Configuration Choices

2020 Koga WorldTraveller

Choice of Frame Design
You can choose between a ‘traditional’ or ‘mixed’ frame design, both in five different sizes. The Dutch have the tallest average height of any country – 184cm for men and 170cm for women. So naturally, KOGA constructs mixed frames to suit riders up to 190cm/6ft3 and traditional frames for riders over 200cm/6ft7. On the other end of the spectrum, the smallest mixed frame will suit riders around 150cm/4ft11.

koga worldtraveller

Choice of Wheel Sizes
The frame has been designed to fit both 700x50C (29×2.0″) or 27.5×2.4″ with fenders. Removing the fenders boosts that those maximum tyre widths even higher. If you’re spending most of your time on sealed roads, you’ll be happiest with the 700C option which keeps rolling resistance to a minimum. If you’re seeking dirt roads or simply want the extra comfort, 27.5″ will offer all that, plus more.

Rohloff or Derailleur Gearing
There are two gearing options for the WorldTraveller. You can choose the top-of-the-line Shimano touring groupset which is called T8000. This is the most simple gearing option as you can get spare parts from any bike shop in the world. The Rohloff gear hub is an engineering marvel, storing 14 gears within the confines of a fully sealed hub shell. These hubs are sturdy, efficient, long-lasting, maintenance-free (almost) and very well proven for world bike travel. You can read the pros and cons of choosing a Rohloff HERE – this upgrade adds €900 to the bike’s price.

Belt or Chain Drive
You may not have seen belt drive bikes before. They’re popular for touring in particular as they can last 3-4x as long as a chain. They also require no lubrication, are grease-free and require very little cleaning. They’re the ultimate drivetrain for bike travel, in my humble opinion! You can read all about the pros and cons of belts HERE. Belt drivetrains add €300 to the price of a KOGA WorldTraveller-S 2.0.

Disc or Rim Brake
While most bikes outside Europe are only available with disc brakes, KOGA still offers a rim brake option. If you go with disc brakes you’ll achieve more braking power, better braking performance in wet/muddy conditions and much better mileage out of a set of brake pads. Disc brakes also do not wear out your rims over time. I’ve found Shimano XT disc brakes to be reliable and repairable at any shop that sells mountain bikes – they really are the superior brake type. But for those who still like the idea of rim brakes, KOGA offers Magura hydraulic or Shimano XT rim brake calipers, with the latter being the easiest to repair yourself.

Bike Features

2020 Koga WorldTraveller

Internal Cable Routing
All of the cables are hidden away inside the WorldTraveller frame, including the cable for the rear dynamo light. Inside the downtube are long cable channels (PIC) to ensure there’s no rattling around on bumpy roads. The internal routing not only looks neat but also keeps the cables tucked away from water, mud and dust.

Steering Limiter
Inside the headtube is a feature unique to KOGA touring bikes – a steering limiter. This stops the handlebar from being able to twist into the top tube. It also ensures that your front wheel cannot turn too far when you deploy the kickstand.

2020 Koga WorldTraveller

Paint Details
One of the highlights of the WorldTraveller Signature is the detail of the paint. Throughout the bike are contour lines and other intricate details. You can also get your name or a message/quote painted on the top tube. KOGA use a powder coat finish which is the most durable paint option for touring.

Super Stiff Frame
One of the most noticeable things about the WorldTraveller-S is the super stiff frame design. KOGA use an eccentric bottom bracket so that they can make the rear triangle as stiff as possible for a belt drivetrain. You can learn more about frame stiffness and why it’s important for touring in my resource HERE.

KOGA Denham Bars
Obviously, the best feature of the new WorldTraveller is that it’s available with the handlebars that I designed! The bars are nice and wide, giving you a lot of control over your loaded bike. There are also many hand positions for comfort including an inboard bullhorn position (like a drop handlebar) which allows you to tuck in your elbows, making you much more aerodynamic in the headwinds. You can see the KOGA Denham Bar drawings HERE.

After Sales Care
From KOGA: “Our mission is never to leave any Signature customers stranded anywhere in the world. Together with our partners and suppliers, and the customer’s willingness to cooperate – we always strive to find a solution to get our customers on the road again ASAP!” Ask any bike traveller about the KOGA after sales care – they’re famous for it. For example, my friend Pascal had cycled over 30,000km before his rim cracked. This was a special 40-hole rim that wasn’t available locally. Rather than just sending a replacement rim, they built up an entirely new wheel and shipped it to Australia so he could get on the road without fuss.

How Does The KOGA WorldTraveller-S Ride?

Disclosure: KOGA is my personal bike sponsor for my ‘CyclingAbout The Americas’ bike tour from 2017-2020, so I have lots of experience riding the WorldTraveller platform. Despite my connection to the company, I can attest to the above information being accurate, and frankly, all quantifiably measurable or explained.

I have been really happy with my KOGA WorldTraveller. The WorldTraveller has a near-identical frame geometry to one of my favourite touring bikes, the Surly Long Haul Trucker, so the handling was straight away very familiar to me. The bike steers nice and quick with the wide flat bar and is also super stable on descents thanks to its long wheelbase. To be honest, I’m not sure I could design the frame geometry to be much better (I’m pretty critical in this regard). But perhaps I’d increase the top tube lengths in the larger frame sizes and add a bit more ‘toe clearance’ across the size range.

The most noticeable difference between the WorldTraveller and many other touring bikes is the lateral frame stiffness – the KOGA experiences less front-end ‘shimmy’ or wobbling at high speeds, especially with a heavy and potentially uneven load up front. This is something I’ve always been critical of with the Long Haul Trucker (and many other touring bikes) as you can never have enough lateral stiffness, in my opinion!

Despite many people’s preconceptions that aluminium is ‘harsh’, I find the WorldTraveller rides just as comfortably as steel bikes. That’s because most of the comfort of a bicycle is made up from the tyres, seatpost and saddle which deflect and flex far more than a frame can.

Otherwise, my hydro disc brakes have been running nicely, with only a rear brake bleed in the last 16 months. I really like the 29×2.0″ Schwalbe Almotion tyres, which roll super quick, and I have had zero punctures in the last year! The Rohloff hub + belt drivetrain has always been easy and maintenance-free for me. The kickstand is so bloody practical; I thought I’d take it off after a while but now I can’t believe I’ve previously toured without one.

Want To Compare The KOGA WorldTraveller With Dozens of Others?

Check out The Touring Bicycle Buyer’s Guide which compares touring bike steering, sizing, gear ratios, specification, pricing and more. This guide is updated annually with the latest models at no extra cost!

Bicycle Touring Book Sample Page 74-75

The Touring Bicycle Buyer’s Guide helps you compare touring bikes, side-by-side.

Helpful Resources

All About Touring Bike Brakes
Frame Materials for Bicycle Touring
How to Select Touring Bike Gearing
Understand Bicycle Frame Geometry
What’s the Difference between Cyclocross and Touring Bikes?

Touring Bikes Overview

2016 Advocate Lorax
2018 All City Gorilla Monsoon
2016 Basso Ulisse
2016 Bianchi Volpe and Lupo 2016
2016 Bombtrack Beyond
2017 Bombtrack Beyond
2018 Bombtrack Beyond
2018 Bombtrack Arise Tour
2019 Bombtrack Beyond
2016 Brodie Elan Vital
2016 Cannondale Touring
2016 Cinelli Hobootleg Geo
2018 Co-Op ADV 4.2
2017 Curve Grovel V2
2017 Diamondback Haanjo EXP Carbon
2016 Fuji Touring
2017 Fuji Touring
2018 Fuji Touring
2018 Fuji Touring Disc
2016 Genesis Tour de Fer
2016 Giant ToughRoad
2017 Giant ToughRoad
2018 Giant ToughRoad and ToughRoad GX
2016 Jamis Aurora and Aurora Elite
2019 Jones Plus SWB
2016 Kona Big Rove
2016 Kona Roadhouse and Sutra LTD
2016 Kona Sutra
2017 Kona Sutra
2018 Kona Sutra
2018 Kona Sutra LTD
2019 Kona Sutra and Sutra LTD
2016 Marin Four Corners
2017 Marin Four Corners
2018 Marin Four Corners
2016 Masi Giramondo
2018 Masi Giramondo
2016 Niner RLT9
2016 Rawland Ulv and Ravn
2016 Salsa Deadwood
2017 Salsa Fargo
2018 Salsa Fargo Ti Frameset
2018 Salsa Journeyman
2016 Salsa Marrakesh
2017 Salsa Marrakesh
2018 Salsa Marrakesh
2017 Salsa Vaya
2019 Salsa Warbird
2016 Specialized AWOL
2017 Specialized AWOL
2017 Specialized Diverge
2018 Specialized Diverge
2019 Specialized Diverge
2017 Specialized Sequoia
2018 Specialized Sequoia
2019 Specialized Sequoia
2018 Surly Bridge Club
2017 Surly Troll
2016 Traitor Wander
2019 Trek 520
2016 Trek 920, 720, 520 & CrossRip
2017 Trek CrossRip
2018 Trek 920
2018 Trek 1120

The post The New 2020 KOGA WorldTraveller S 2.0 Touring Bikes appeared first on CyclingAbout.com.

Designing The Ultimate Touring & Bikepacking Handlebars, the KOGA Denham Bars!

$
0
0

It was late-2017 and I was in the final stages of planning my 3-year bike adventure from Argentina to Alaska. I was chatting to Aloys from KOGA who was interested in what the ultimate touring handlebar would look like to me. I told him they’d have to be optimized around the three most important characteristics for touring: bike control, comfort and speed – but we left it at that.

With lots of ideas buzzing around my head, I started sketching. I was notably inspired by the Velo Orange Crazy Bars that I’d been using for the two years prior to this trip – in particular, I liked the combination of the drop bar and flat bar features. I was sure this design was on the right track, but the angles and widths didn’t quite gel with me. The 45° rearward bar sweep put my hands diagonally across the grips, which resulted in hand numbness if I didn’t wear my gel-padded gloves. And the bullhorns worked out to be too long for comfort and not optimized in terms of ergonomics.

After a few weeks of thinking about and testing various handlebar styles, I was ready to unleash the ultimate handlebar design. I submitted my drawings to KOGA and waited for them to do their magic…

The KOGA Denham Bars

koga denham bar
KEY INFORMATION:
• 34° sweep at the grips
• 15° inward bend at the bullhorns
• 8° sweep at the bar tops
• 711mm width
• 25.4mm stem diameter
• Barend shifter compatible
• Black colourway
• 400-450 grams
• $80 / €70 / £65 RRP

Creating The Perfect Handlebar

KOGA Denham Bars

Steering Leverage & Optimal Bike Control
Fitting a wide handlebar to my touring bikes is the most important modification I’ve ever made. That’s because wide bars increase the steering leverage up front, which allows you to maintain a light steering feel, even with a front load. As a result, you can expect better bike control at high speeds (thanks to the quicker steering inputs) and low speeds (thanks to the micro adjustments you can make to help with your balance). This is most noticeable when you’re climbing slowly up a hill, or when you need to quickly avoid something on the road while travelling at speed. Oh, and the bar width I’ve chosen suits smaller riders too – for comparison, standard bars fitted to extra-small women’s mountain bikes are actually a touch wider (720mm).

Maximizing Aerodynamics
If you’ve been following this site for a while, you’ll know I have a keen interest in aerodynamics. In fact, I once spent a whole day riding around a velodrome to determine the precise speed differences between various luggage setups. The key aero feature of the Denham Bars is the 40cm wide ‘bullhorn’ section which mimics the brake hoods of a road handlebar (see pic below). When using this position your elbows will naturally tuck in to reduce your body’s frontal area, granting you the ability to go faster with the same pedalling effort. In fact, my experience is that the ‘bar tops’ are more aerodynamic than the bullhorns as this narrow/sweptback section allows you to naturally lean further forward! I haven’t measured the actual speed difference between the hand positions on the Denham Bars, but given your body is a big wind sail – the difference is certainly noticeable. And even if you don’t intend to cycle anywhere fast, by putting your body in a more aerodynamic position you’ll be able to better tackle those pesky headwinds.

Denham Bar

Optimizing Comfort
These handlebars not only increase your bike control and aerodynamics, but they’re also supremely comfortable for a few reasons. Firstly, there are three distinct hand positions that give you the opportunity to change the pressure points on your hands. As the positions are quite varied, you will also make use of different muscles in your arms, back and neck with each position change – resulting in less muscle loading throughout the day. The 34° rearward sweep at the grips is perfect for any bike setup where the handlebars are approximately level with the saddle or higher. My handlebars are actually about 8cm lower than my saddle, which I would consider the limit for this amount of sweep – any lower and you’ll be better off with a bar in the 20-30º sweep range (perhaps I’ll design a ‘performance’ version of this bar in the future). In addition, the bullhorns are super short and have been angled inwards by 15° to give you a really snug fit, and the ‘bar tops’ offer a gentle 8° backsweep to pull your shoulders in on the open road.

Handlebar Reach
A very important aspect of these handlebars is the usability of each of the hand positions. By cleverly optimizing the widths and angles, I’ve been able to create a handlebar that offers a very similar effective ‘reach’ from saddle to bullhorn, bar top or grips. In short, your body won’t be excessively stretched when using any of the hand positions, allowing you to comfortably ride for long periods of time wherever your hands prefer.

Trans Ecuador Mountain Bike Route

Suitable For Drop Bar Frames
As the handlebar ‘reach’ is not all that different between hand positions, the cool thing about these bars is that they can be retrofitted to almost all touring bikes! By switching from drop bars to Denham Bars, you’ll still have your hoods position and bar tops, but you’ll also be able to take advantage of the steering leverage too. I’ve got a few other reasons for making the switch HERE.

Suitable For Mountain Bike Frames
These bars are also a nice upgrade to an off-road touring bike like the Surly Troll or Ogre. If you’re coming from a typical flat bar or Jones Loop bars you can fit the Denham Bars without a stem change. The Surly Moloko is a bit different as the effective ‘reach’ is longer in all hand positions, so in order to maintain the same body positioning, you’ll need to add a few centimetres to your stem length if switching to the Denham Bars.

Appropriate Stiffness
KOGA have minimum standards when it comes to handlebar stiffness and strength. A high degree of handlebar stiffness is important for safety, but it’s also about getting the right steering ‘feel’ – make them too stiff and you reduce rider comfort. In my opinion, the Denham Bars are spot on in terms of stiffness, comfort and feel.

Handlebar Bag and Bikepacking Bag Compatible
One of the biggest differences between the Denham Bar and a Jones Loop or Surly Moloko handlebar is that it fits a handlebar bag. I like to keep my DSLR camera in a handlebar bag because it best protects my camera from shock and vibrations. I also keep other valuables in this bag (passport, money etc), allowing me to take it off my bike in seconds and run into a supermarket, for example.

Grip and Bar Tape Recommendations

My favourite grips for bike travel are the ESI Chunkys ($16 on Amazon) as they dampen vibrations like nothing else. I’ve also heard great things about the Ergon GC1 grips ($26 on Amazon) which are optimized for rearward-swept handlebars and distribute pressure better across the whole palm. I plan to fit a set of GC1s soon, so I’ll let you know how they go!

For the bullhorns and bar tops, I’d recommend a nice thick bar tape (or even a double wrap!) as it will dampen more vibrations. Check out the gel cork bar tape from Cinelli ($16 on Amazon) for something nice and comfortable.

Buying The KOGA Denham Bar

2020 Koga WorldTraveller

As KOGA is a bicycle company first, their components are exclusively available through their dealer network only (much like Giant or Specialized parts and accessories). I know that Vakantiefietser (NL) keep these in stock and ship internationally, and so does CycleSense (UK). If you know of other dealers that ship internationally, please let me know.

Alternatively, you can spec a KOGA Denham Bar with your WorldTraveller 2.0 custom build! You can read all about the recently released WTS 2.0 HERE.

2020 Koga WorldTraveller-S

For a €2530 upgrade, you get a KOGA WTS 2.0 touring bike with your Denham Bars! 😎

Do You Have Any Questions About The KOGA Denham Bars?

The post Designing The Ultimate Touring & Bikepacking Handlebars, the KOGA Denham Bars! appeared first on CyclingAbout.com.

Video: Mission Colombia // A Wild Ride from the Equator to Death Road [EP.12]

$
0
0

This month was the toughest yet! I rode through snow on the equator, along aqueducts, up river roads, down insane hiking trails and across the Colombian border to the Death Road.

Value my videos? Consider helping me get my hands on a professional-level drone:
Patreon (get these films a week early, plus Q&As)
Paypal (one-off donation)

MY BIKE: KOGA WorldTraveller-S
MY 24KG GEAR LIST: HERE
MY ROUTE: HERE
MY CAMERAS: Panasonic G9 + GoPro Hero 6

MUSIC: Jazz Hop Cafe Mix

The post Video: Mission Colombia // A Wild Ride from the Equator to Death Road [EP.12] appeared first on CyclingAbout.com.

Saddle Comfort for Cyclists: The Best Bicycle Touring Seats

$
0
0

Is your saddle comfortable?

Over the years, I’ve experimented with, sold and met people with all kinds of different saddles. Unfortunately, there is no ‘go-to’ saddle because we all have different riding positions, different levels of flexibility and variations in our sit bone widths.

All of these factors rule out a wonder-saddle that we can just pull off the shelf and fit on our bikes. Instead, we have to know a bit about seats and how comfort works, and after that, we can narrow our options right down to just a few.

I’ve compiled a list below of 30 saddles that have worked for many riders. But first, let’s learn about discomfort, body positioning and saddle characteristics so you can optimize the saddle shape and style for your needs.

This article was originally published Sep 2015 but has been updated in May 2019.

UrbanVelo Image

Selle Anatomica Saddle. Image: Urbanvelo.org

Why Do We Get Saddle Discomfort?

Arteries and Nerves of the Pubic Rami

Saddle pain is mostly linked to nerve and artery compression, but can also come in the form of saddle sores. Discomfort is recognised through acute pain, numbness and tingling. If you experience any of these, you’re likely putting excessive pressure on sensitive nerves and arteries running along your pubic rami. Pressure here reduces blood flow, stymieing oxygen delivery to tissues and in turn, may lead to broader medical issues. In general, women are more susceptible to direct perineal pressure given their wider subpubic angle which exposes more of their pubic rami.

Saddle discomfort can be eliminated with a more suitable body position, and/or more appropriate saddle for your needs.

Saddle Sores

These skin irritations are mostly due to the continuous pressure and friction between your skin and bicycle seat, but can also be attributed to hair follicle infections and chaffing. You can eliminate saddle sores through a good riding position, a suitable saddle, chamois cream and a good pair of cycling shorts.

I got into much more detail on how to prevent and treat saddle sores HERE.

pelvic-bone-diagram-bicycle-saddle-contact-points

Bike Fit

Have you had your bike fitted by a professional?

One of the biggest factors in saddle comfort is bike fit and positioning. First, you’ll need to make sure you have the correct saddle height and position in relation to your pedals. If you’re up too high or too far back, the chances are that your optimal saddle won’t be working the way it should.

You’ll next need to check how your bike fit is dictating your pelvic positioning by going for a ride. Unless you’re riding in a performance position, you’ll want to be sitting towards the rear of your saddle. That’s the widest, flattest part of the seat, and the best place to support your weight. If you find yourself sitting on the front of your saddle constantly, that’s often a sign that something is wrong with your positioning. This may be based on your bike setup or even your flexibility.

Lower Back Flexibility

People with flexible lower backs tend to be able to rotate their pelvis up, and use their sit bones more effectively. If you’re less flexible, you’ll rotate your pelvis forward and experience pressure on your nerves and arteries. If this is the case, a bike fitter will raise your handlebar height and give you a saddle which can take pressure off your pubic rami.

Trek Precision Fit

Body Position and Riding Style

What pressure zone are you?

Your body position on a bike has a big impact on how you use your saddle. Bicycle saddles are often designed to minimise pressure, resulting in all kinds of different padding types, profiles, curvatures and widths.

The Bontrager diagrams below are fantastic for mapping pressure zones in different riding positions. A good way to determine what position you ride in is to get a friend to take a photo of you while you’re riding along.

In general:
– Comfort/upright body positions require saddles with more padding, more width and a flatter top to support your sit bones.
– Performance body positions require saddles that are lightly padded, curved and narrower to support your pubic rami.

bontrager-biodynamic-saddle-posture-comparisons bontrager-biodynamic-saddle-posture-transition bontrager-biodynamic-saddle-posture-profile bontrager-biodynamic-saddle-posture-curvature

Sit Bone Width

Everybody has a natural variation in sit bone width. In my experience, you want to measure your sit bone width and add about 20mm to get a suitable saddle width. If your saddle is too wide for your pelvis you’ll experience excessive rubbing. If it’s too narrow you’ll find your sit bones are not cradled well.

In general, the more upright your position is, the wider the saddle you should use. You’ll find saddle widths ranging from about 125 to 180mm. You can measure your sit bones by heading into a bike shop and using a sit bone sizing tool. These are available from Trek, Specialized, WTB and more.

Trek Inform Sit Bone Tool

Bontrager Inform Sit Bone Tool. Image: BikeRumor.com

Saddle Firmness

When you’re travelling by bike, you’ll find yourself sometimes doing long days. A general rule is that the further you ride, the firmer you’ll prefer your saddle. Miles Smith is currently attempting the year record (400km every day!) using a plastic saddle with minimal give (it’s simply the right shape). Doing just 80km on a soft gel saddle, you’ll find your sit bones moving about, resulting in undesired chaffing.

Best Bike Seat

Miles Smith is currently doing over 400km per day, for 365 days on this saddle!

Saddle Shape

Bicycle saddles have a ‘nose’ for both balance and bike control; the benefits of the nose are often most noticeable when descending. Some brands forgo a saddle nose in order to reduce pubic rami pressure, but the reason they aren’t widespread is due to the importance of bike control when riding a bike!

Noseless Saddle

Women’s Specific Saddles

Women have different downstairs regions. We know that. But how different are women’s saddles?

Women’s saddles are often wider than male offerings, but interestingly the difference between male and female pelves isn’t actually that significant. If you compared bell curves of pelvic widths for males and females, you’d find a huge overlap. The major differences found in anatomy are almost all soft tissue related.

Cutouts to the saddle nose are generally more important for women who employ a performance position on their bike. This is due to the subpubic angles of their pelves which are wider in women, making soft tissue compression more of a risk.

If your bike offers an upright/comfort position, you’ll experience less soft tissue pressure and don’t need to limit yourself to just women’s specific saddles.

SMP Dynamic Lady Saddle

Cycling Without Padded Cycling Shorts

Padded cycling shorts are not mandatory, and can certainly be left at home if you set up your touring bike accordingly. You’ll need to employ an upright/comfort body position, putting more of your weight on your sit bones and less on your pubic rami. Couple this with a slightly wider saddle with a bit of ‘give’, and chamois-free riding may be possible!

The more performance-oriented your position, the more likely you’ll need a set of padded shorts to help you out.

The Best Bicycle Touring Saddles and Seats

Here’s where I’d start for a universally comfortable saddle:
Best Performance Mens – WTB Rocket V – $53 on Amazon
Best Comfort Mens – Brooks B17 – $76 on Amazon // Serfas RX – $56 on Amazon
Best Performance Womens – Selle Italia Lady Gel Flow – $116 on Amazon
Best Comfort Womens – Brooks B17 Imperial S – $106 on Amazon // Serfas RX – $56 on Amazon

Brooks Bicycle Touring

If you think these saddles may not suit you, I’ve met a lot of people who’ve had success with the following:

Performance Men (Posture 1, 2 or 3)
Bontrager Montrose – Popular MTB saddle
Brooks Cambium C17 Carved – Firm saddle that flexes with your sit bones – $83 on Amazon
Charge Spoon – Popular MTB saddle – $32 on Amazon
Fizik Aliante – Popular upright road saddle – $99 on Amazon
Prologo Zero II – Popular road saddle – $89 on Amazon
SDG Belair – Popular MTB saddle – $35 on Amazon
Selle Italia Gel Flow Man – Popular upright road saddle – $108 on Amazon
SMP Pro – Mark Beaumont’s favourite saddle for his around the world records – $239 on Amazon
Specialized Phenom – Often good for both men and women
Tioga Spyder – Miles Smith’s year record saddle – $84 on Amazon
Velo Race 3D FC / Senso Sport IIO – This is my personal touring/bikepacking saddle of choice
WTB Rocket V – Popular MTB saddle, more padded than the Silverado – $53 on Amazon
WTB Silverado – My personal MTB saddle of choice – $35 on Amazon

Upright/Comfort Men (Posture 4 or 5)
Brooks B17 – The most common bicycle touring saddle for men – $76 on Amazon
Brooks Flyer – A sprung B17 for a little extra comfort – $105 on Amazon
Rivet Cycle Works – Leather saddle available in three widths 
Selle Anatomica X2 – Another widely popular leather touring saddle – $159 on Amazon
Selle Italia FLX Gel – This Italian saddle manufacturers upright riding option – $27 on Amazon
Serfas RX – Very good value and widely comfortable – $56 on Amazon

Performance Women (Posture 1, 2 or 3)
Bontrager Ajna – Popular road saddle with minimal padding
Selle Italia Lady Gel Flow – A little extra padding, but still designed for performance positions – $116 on Amazon
Specialized Ruby – Highly popular road saddle with minimal padding

Upright/Comfort Women (Posture 4 or 5)
Brooks Imperial B17S – A common leather touring saddle for women – $106 on Amazon
Rivet Cycle Works – Leather saddle available in three widths
Selle Anatomica X2 – Another widely popular leather touring saddle – $159 on Amazon
Selle Italia FLX Gel – This Italian saddle manufacturers upright riding option – $36 on Amazon
Serfas RX – Very soft saddle with a long cutout – $56 on Amazon
Terry Liberator / Butterfly – Soft saddles with cutouts – $72 on Amazon
WTB Deva – Padded saddle that’s good for men and women – $49 on Amazon

Summary

You should now be armed with enough knowledge to make an informed decision on which type of saddle will suit you best.

Remember that body position, sit bone width and your lower back flexibility will hugely dictate optimal saddle shapes. For upright body positions, you’ll need to employ a saddle that’s a bit wider with more padding. Firmer saddles are often better for distance riding in sportier positions when coupled with padded shorts. Before you start making saddle changes, make sure to optimize your saddle height and bike fit.

If you’ve got a saddle that you love and think people should know about it, drop a comment below.

Head HERE For My Article On How To Prevent And Treat Saddle Sores

The post Saddle Comfort for Cyclists: The Best Bicycle Touring Seats appeared first on CyclingAbout.com.

Seatposts: Often Overlooked Yet Critical For Your Comfort (Lab Testing)

$
0
0

A good seatpost is the key to achieving a comfortable ride. That’s because along with your tyres, seatposts actually make up the bulk of your bike’s comfort – in fact, a well-designed carbon seatpost flexes at a rate 7x greater than a steel frame!

The Ergon CF3 carbon seatpost requires 69N of force to flex one vertical millimetre (0.04″). To put that into context, the CF3 will flex 7mm (0.3″) when you simply sit in your saddle. In comparison, a typical bike frame requires more than 500N of force to flex one vertical millimetre, demonstrating how much a seatpost (and how little a frame) plays in the comfort equation.

In short, flex seatposts are a great way to achieve a super comfortable ride as they:
(a) Reduce high-frequency road vibrations, and;
(b) Take care of the bigger impacts (think rough dirt roads) thanks to their 20mm+ (0.89″) of vertical flex.

In this article, we will discuss the different seatpost types and materials, before looking at the difference between vibration damping and seatpost deflection. We’ll then check out some of the lab testing that’s been completed and will finish up with my seatpost recommendations.

Note: This article was originally published July 2015, but has been updated in May 2019.
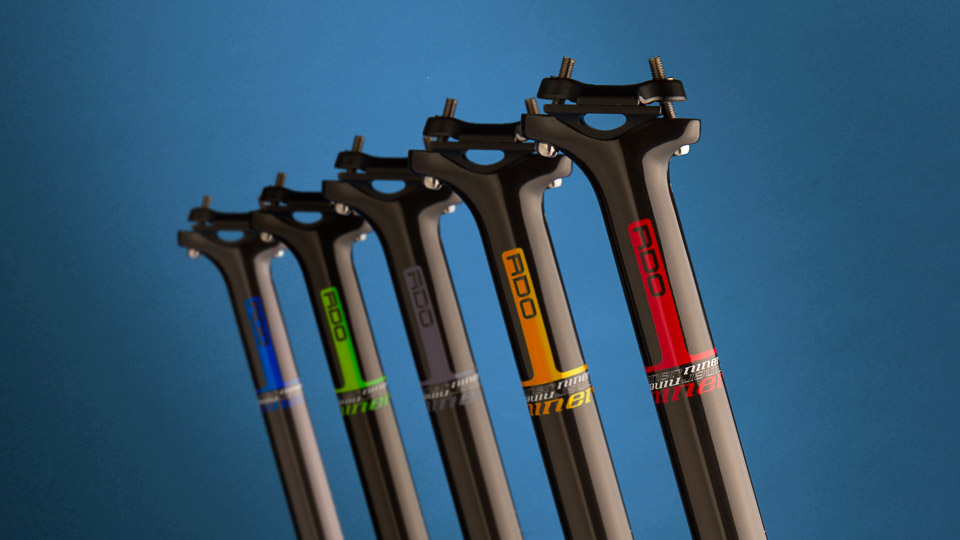
Niner Seatposts

The Most Overlooked Bike Component

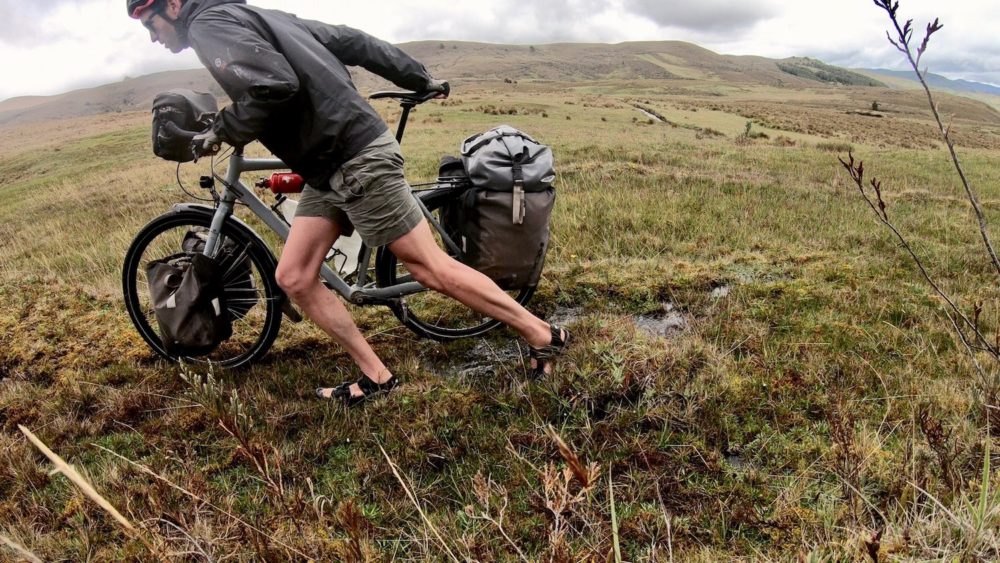
Very few people think about the ride quality of a seatpost, which is precisely why I think they’re the most overlooked bike component. They’re arguably even more important for bike travel as touring and bikepacking bikes are usually set up with higher handlebars, resulting in a larger proportion of our body weight on our saddles (normally 80%+). Couple that with our penchant for seeking rough roads, and seatposts really are the key to unlocking all-day comfort on your bike.

Bikes fitted with narrower tyres have the most comfort to gain from using a flex seatpost. This is because a larger proportion of the overall shock and impacts will need to be taken up by the seatpost. Bikes with wider tyres still have a lot to gain too, as flex posts help to take the edge off bigger impacts.

Trek’s IsoSpeed Decoupler allows the seat tube to flex independently of the top tube.

Over the last decade, bike manufacturers have been optimizing their bikes around comfort, and the seat tube has been the main focus. Trek have developed what they call an ‘Isospeed Decoupler’ which is integrated into their seat tube, offering around 20mm of vertical compliance. Giant created a unique seatpost shape called D-Fuse which will flex around 12mm underneath you. And Cannondale has stuck with something a bit more traditional, using a smaller-than-usual seatpost diameter paired with a flat-section carbon layup to achieve a super comfortable ride.

The good news is that you don’t need to buy a fancy new bike to achieve a high degree of comfort. A handful of aftermarket seatposts can match the vertical flex and vibration damping of the Trek, Giant and Cannondale designs, allowing you to transform whatever you ride into something that rides ultra smooth.

The Different Types of Seatpost

Carbon, Aluminium and Titanium Seatposts
Seatposts are manufactured using three different construction materials. The majority are made from aluminium which is lightweight, reliable and very cheap to manufacture. Titanium seatposts are much less common and are typically paired with titanium frames for a nice aesthetic. Carbon seatposts are lighter and more expensive, but more importantly, they can be optimized using different layering techniques to achieve an unparalleled ride quality.

Suspension Seatposts
There is a handful of suspension seatpost manufacturers, but perhaps the most common is Cane Creek. The advantage of a suspension seatpost is that it will help absorb big hits and other impacts from the ground below, allowing you to pedal through bumps while also reducing the fatigue on your body. Suspension seatposts have been measured to be multiple times more effective than any rigid seatpost. The main disadvantage is the increase in weight.

Elastomer Seatposts
Specialized has been incorporating elastomers into their flex seatposts for over a decade so that they can achieve their desired ride characteristics. The latest-generation carbon elastomer post (pictured on the right) is said to offer 18mm of vertical flex, is reasonably lightweight and is also reliable as there are no moving parts.

Straight and Setback Seatposts
Seatposts are available in different offsets ranging from 0 degrees to 35 degrees. A setback post puts you further behind your crankset and a straight seatpost moves you closer. The amount of setback or offset is best determined through a basic bike fit at a participating bike shop. They will look at the relationship between your knee and pedal axle, as well as your hip angle/mobility and will determine how far you should sit behind your crankset. You can read more about bike geometry HERE and about getting a personalized bike fit HERE.

Seatpost Damping

Microbac Laboratories’ test jig for comparing the different characteristics of seatposts. Image: BikeRadar

Damping is the speed at which a seatpost will move over repeated bumps, and it’s the most important characteristic for cycling on smoother surfaces.

A seatpost that dampens vibrations effectively will insulate a rider from much of the road buzz coming up through their bike. Seatposts with the best damping characteristics have been tested to be more than twice as effective than those which perform poorly.

We currently have two damping lab tests to draw some conclusions from:

Seatpost Damping

Velo Magazine’s damping test results with 14 different 27.2mm seatposts.

Velo Magazine’s 2012 test results show that:
– Almost all carbon seatposts performed better than the aluminium or titanium options.
– Straight seatposts (carbon, titanium & aluminium) are worse at damping shock than setback seatposts.
– The Cane Creek suspension seatpost was surprisingly not as effective at mitigating road buzz as two carbon seatposts.

Microbac Laboratories collected data on many of the newer flex seatpost models. This test includes the Ergon CF3, Ritchey WCS Carbon Flexlogic, Canyon S13 VCLS, Specialized CG-R and Syntace P6 Hi-Flex. Image: BikeRadar

The Microbac Laboratories’ 2016 test results show that:
– The Ergon CF3 leaf-sprung seatpost absorbs 2-3x more shock than other flex carbon seatposts.
– The only aluminium seatpost in the test (Thomson) is simply no match in terms of damping.
– The Specialized post is somewhat underwhelming on the road considering its radical design.

There is a caveat here! This data only applies to bikes without luggage fitted. Why? Rear panniers and bikepacking seat packs are highly effective at mitigating vibrations, so you won’t notice a huge difference between a carbon or aluminium seatposts when travelling with luggage.

Seatpost Deflection

Deflection is the total movement that a seatpost will move after an impact.

A seatpost with more deflection will reduce the fatigue on your body as it protects you from harder jolts like unexpected potholes or dirt road corrugations. It’ll also allow you to pedal through bumps on rougher terrain.

When testing seatpost deflection, two axes of measurement are usually taken – vertical and horizontal – but they almost always track proportionately. The Velo Magazine lab test data shows that under the specific force applied, some seatposts were able to deflect twice as much as others.

Seatpost Flex

Velo Magazine’s deflection test results with 27.2mm seatposts.

The results are a bit hard to read, so let me type that out:
1. Cane Creek Thudbuster ST (13.7mm, 19.3mm)
2. Ritchey Carbon Straight (5.8mm, 4.8mm)
3. Ritchey Carbon Setback (5.5mm, 5.0mm)
4. Cannondale Carbon (5.4mm, 4.3mm)
5. Zipp Straight Carbon (4.9mm, 4.2mm)
6. Ritchey Setback Aluminium (4.8mm, 4.5mm)
7. Specialized FACT Carbon (4.8mm, 4.4mm)
8. FSA Straight Carbon (4.8mm, 4.2mm)
9. Thomson Straight Aluminium (4.8mm, 4.2mm)
10. FSA Setback Carbon (4.3mm, 4.2mm)
11. Moots Straight Ti (4.3mm, 4.2mm)
12. Moots Setback Ti (4.2mm, 4.0mm)
13. Zipp Setback Carbon (3.9mm, 4.0mm)
14. Thomson Setback Aluminium (3.5mm, 3.6mm)

The conclusions we can draw from the Velo Magazine test:
– The best performing regular seatposts offer 50-60% more flex than the worst performing.
– Carbon is able to deflect more than both aluminium and titanium.
– Setback seatposts tend to be worse performing, making up places 10, 12, 13 and 14 in this test.
– In another league altogether is the Cane Creek Thudbuster suspension seatpost which offers 3-4x more flex than a regular seatpost. It’s also worth noting that this is under half of what it can flex (33mm).

seatpost

The Microbac Laboratories deflection test using the minimum and maximum seatpost insertions at different rates of force.

The conclusions we can draw from the Microbac Laboratories test:
– There is a linear relationship between deflection and force (for a small range), helping us to predict flex at different force rates.
– Lighter riders are better suited to the Ergon/Canyon seatposts and heavier riders the Syntace/Ritchey.
– The minimum (high seatpost) and maximum insertions (low seatpost) affects the amount of deflection by 1.5-2x.
– The Ergon CF3 is the king again, outperforming all other seatposts at the maximum and minimum insertions.
– The Ritchey and Syntace seatposts rely on a high seat height to achieve their flex (2x greater flex).
– The Specialized CG-R was again quite underwhelming, flexing under half as much as the Ergon CF3 and Canyon S13 VCLS.

Do You Want More Damping or Deflection? Or Both?

If you’re looking for a firm ride on the road (less saddle movement), you’ll want to select a seatpost with a lower deflection but a higher damping ability. According to the Velo Magazine results, that’s something like the FSA K-Force or Zipp Service Course SL, while the Microbac Lab results suggest the Ritchey WCS Flexlogic is the go. That said, this information is applicable mostly to road riding – you’ll find a bikepacking seat pack or rear panniers will dampen road vibrations appropriately with whichever seatpost you choose.

For dirt road use, deflection is king. Straight carbon seatposts offer the highest degree of vertical flex on big bumps, however, they tend to be a bit more jarring on the high-frequency small bumps. Suspension seatposts are simply on another level in all regards, with lots of deflection as well as excellent damping abilities.

Seatposts and Rider Weight & Height

Carbon seatposts are tuned with set spring rates.

For example, at 300lb force, the Ergon CF3 would theoretically flex its maximum amount of 20mm while the Specialized CG-R will only be halfway through its travel. Essentially, lighter riders will be far better suited to the Ergon or Canyon seatposts, while heavier riders should look towards the Ritchey, Syntace or Cannondale options.

Riders with less exposed seatpost will also benefit from the Ergon or Canyon seatposts, as they are shown to flex twice as much at the maximum seatpost insertion. But then again, seatpost height reduces the deflection by half, so a suspension seatpost is a great option for riders with less seatpost exposed. But more on that below.

Tyre Width & Seatposts
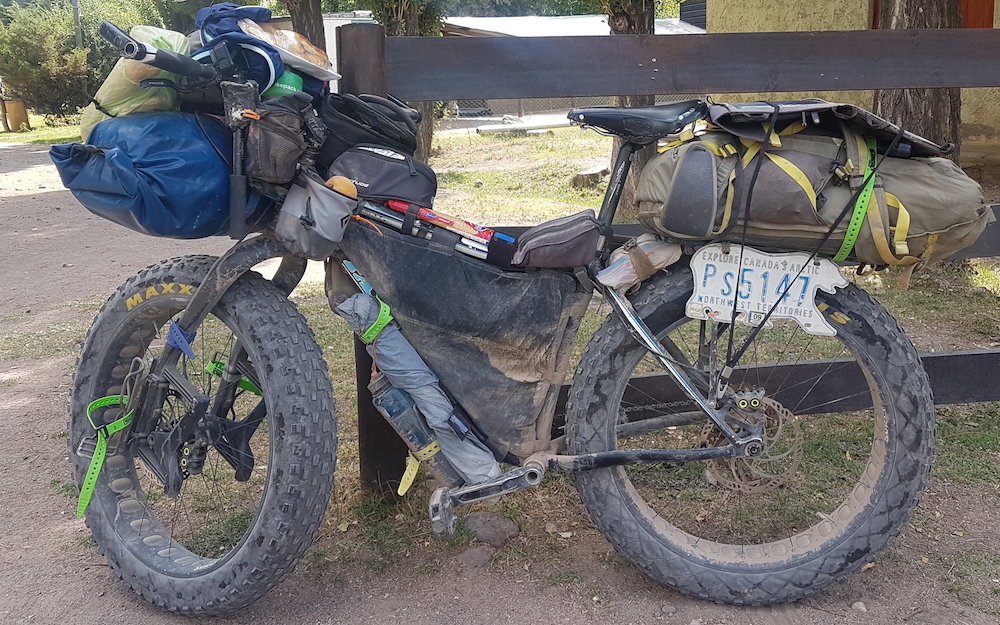
best bikepacking bikes

There is little need to fit a flex seatpost to a fat bike because the tyres absorb the majority of the overall shock.

Tyres do an exceptional job of damping vibrations and absorbing bigger hits.

In the wider widths, tyre sidewalls can flex as much or even more than the best seatposts. If you’ve got tyres that are narrow (30mm to 50mm wide), you’ll benefit a lot from a seatpost with more flex like the Ergon CF3 or Canyon S13 VCLS. Between 2.0″ and 2.5″, flex posts are still really effective but you can usually get away with a little less flex if you like (eg. Cannondale SAVE or Ritchey WCS Flexlogic). The comfort effects start to diminish once you get into the plus-size tyre range (3.0″) or wider (4.0-5.0″) where the tyres are absorbing so much that aluminium posts work fine.

One cool thing about a flex seatpost (and matching Redshift Shockstop stem) is that it allows you to use narrower tyres without sacrificing any comfort. The benefit of this setup would be that you could reduce your rolling resistance and overall bike weight while still travelling in comfort.

Carbon vs Suspension Seatposts

The Cane Creek eeSilk is a touch heavier than a carbon seatpost yet has five different spring rates available.

Ok, so both carbon and suspension seatposts are sounding pretty good here. But how would you go about choosing between the two?

There are two disadvantages to using a carbon post:
– There is only one spring rate available, and;
– The comfort is dependent on the amount of seatpost sticking out of your frame.

By having a set spring rate, a heavier rider will enjoy a more comfortable ride, while a lighter rider will feel more vibration and big hits. Carbon seatposts also perform much better with more exposed seatpost (2x more flex), which hands the better performance to taller riders.

A suspension seatpost is able to solve both of those issues. Most of the suspension options have four or five different spring rates, which allows both light (45kg/100lb) or heavy (150kg/330lb) cyclists to achieve the equivalent ride feel, no matter the seatpost height. With a suspension post, you can also tune the ride quality based on the surfaces you ride: a stiffer elastomer/spring for the road, or a softer one if you like rougher terrain. Most suspension seatposts have an adjustable pre-load too, which allows you to change the amount of force required to make the saddle start moving.

The main downside to choosing a suspension seatpost is the weight. Most of them tip the scales between 450-550 grams (1.0-1.2lb) which is more than twice the weight of most carbon seatposts available. That said, there is one truly lightweight suspension seatpost…

The Cane Creek eeSilk is perhaps the ultimate seatpost. At 295 grams, it’s barely heavier than many of the carbon offerings. With five different spring rates, riders of any weight can tune it to achieve the perfect ride quality. And it will work just as effectively whether set high or low in your frame. The price isn’t cheap – it’s around US $300, but then again, that’s the same price as a top-end carbon seatpost.

Flex: How Much Is Too Much?

There is certainly a point where you’ll find excessive seatpost flex, but that will depend on the terrain you ride, your body weight, your seatpost height and your personal preferences.

If you have a good amount of seatpost exposed, have an average body weight and want a flexible but firm ride, three suitable seatposts come to mind here: Cannondale SAVE, Ritchey WCS Flexlogic or Syntace Hi-Flex P6. These posts will still flex between 5-15mm on impact but are otherwise tuned to be reasonably firm.

For lighter or shorter riders, a seatpost with a lighter spring rate will yield similar amounts of deflection. That’s where the Ergon CF3 and Canyon S13 VCLS are great. These posts are also suitable for taller/heavier riders that prefer more flex rather than less.

On particularly bumpy surfaces it’s fatiguing on your body to cycle for long periods of time. That’s why I fit my Cane Creek suspension seatpost to my bikes when I know the terrain will be rough – the extra 10-20mm of deflection is sometimes a godsend.

My Seatpost Picks For Comfort

Flex Post w/ Wider Tyres: Cannondale SAVE (208g/7.3oz)
I’ve used a Cannondale post in my mountain bikes for years, and think it provides the perfect amount of flex across all types of terrain, from smooth roads through to bumpy gravel roads. I think it’s the pick particularly if you’re using 40mm or wider tyres. If you’re coming from an aluminium seatpost, it will completely transform your ride! The SAVE is somewhat firm compared to a suspension seatpost, but it really does a great job of taking the edge off everything. Highly recommended for $199 on Amazon.

Flex Post w/ Narrower Tyres: Ergon CF3 or Canyon S13 VCLS (both 220g/7.8oz)
If you’re using narrower tyres (eg. 700x30c to 700x40c), it’s worth picking up a seatpost with a bit more flex to make up for the fact your tyres don’t deform as much. The Ergon CF3 (US $299) is certainly the best performer here as it has 20mm of vertical flex and weighs just 220 grams. A ‘flip head’ kit is available for the Ergon post, giving you the option to increase or decrease the setback to suit your needs. The Canyon S13 VCLS performs almost as well and is substantially cheaper (US $170), so it had to make the list too.

Vibration Absorbing Post: FSA K-Force Light (210g/7.4oz)
For something that offers a firm ride but still does a great job at absorbing road buzz, you can’t go past the FSA K-Force seatpost. This is the perfect upgrade for a road bike without any bike luggage attached. You can find the K-Force Light for $199 on Amazon.

Suspension Post: Cane Creek Thudbuster ST (454g/1.0lb)
My Cane Creek seatpost performed flawlessly on my big bike ride from Europe to Australia! While 250 grams heavier than a carbon post, you can take advantage of more than twice the vertical travel, plus five different spring rate options so you can tune your ride from soft to firm. It works out lighter than all comparable suspension post options and is also great value at $143 on Amazon.

Carbon Seatpost Options

Cannondale SAVE – My overall pick, a great performer for both vibration damping and absorbing big hits – $199 on Amazon
Canyon S13 VCLS – 2nd best deflection results, good at max insertion, great for lighter riders – US $170
Canyon VCLS 2.0 – Best deflection/damping results, great at max insertion, well-suited to lighter riders – US $299
Ergon CF3 – The same post as the VCLS 2.0 as it’s a shared product between companies – US $299
FSA K-Force – The Velo Magazine best-tested seatpost for vibration damping, great for road riding – $199 on Amazon
Ritchey WCS Carbon Flexlogic – Decent deflection results, great at damping vibrations, lightweight – $199 on Amazon
Specialized CG-R – The Specialized CG-R may be the go for heavier riders with its heavy spring rate – US $199
Syntace P6 Carbon Hi-Flex – 3rd best deflection results, but doesn’t perform well at max insertion – $198 on Amazon
Zipp Service Course SL – Like the FSA seatpost, this offers great vibration damping for the road – $133 on Amazon

Suspension Seatpost Options

Cane Creek eeSilk – 20mm of suspension travel, five spring rates, 295g – $310 on Amazon
Cane Creek Thudbuster ST – 33mm of suspension travel, five spring rates, 454g – $143 on Amazon
Cane Creek Thudbuster LT – 67mm of suspension travel, five spring rates, 540g – $127 on Amazon
Kinekt 2.1 Aluminium – 35mm of suspension travel, four spring rates, pre-load adjustment, 525g – $249 on Amazon
Kinekt 3.1 Carbon – 35mm of suspension travel, four spring rates, pre-load adjustment, 471g – $329 on Amazon
Suntour NCX – 50mm of suspension travel, two spring rates, pre-load adjustment, 765g – $114 on Amazon
Redshift ShockStop – 35mm of suspension travel, eight spring rates, pre-load adjustment, 497g – US $199

The post Seatposts: Often Overlooked Yet Critical For Your Comfort (Lab Testing) appeared first on CyclingAbout.com.


The 16 Best Bikepacking Bikes In 2019

$
0
0

I’ve spent the last few months writing a new book on bikepacking bikes! The Bikepacking Bike Buyer’s Guide takes a close look at the best bikepacking bikes, including their frame features, steering speeds, tyre widths, gear ratios, weights and more. It’s designed so that the front section of the book informs you about the key bike characteristics, then I teach you how to size up a bike, compare the different bike models using a few tools, and at the end, you’ll find the bike listings section.

I thought I’d share my personal bike picks based on the extensive research and time I’ve put into mulling over the data. There are more than 180+ bikes across six categories to compare in the Bikepacking Bike Buyer’s Guide; I’ve broken this article into the same six categories.

The categories include:
Gravel & All Road Bikes – with 700C Wheels
Gravel & All Road Bikes – with 27.5″ Wheels
Off-Road Adventure Bikes – with 29″ Wheels
Off-Road Plus Bikes – with 3.0″ Tyres
Full Suspension Bikes – with 2.2-3.0″ Tyres
Fat Bikes – with 4.0-5.0″ Tyres

Without further ado, here are my picks for the best bikepacking bikes of 2019.

best bikepacking bikes

Selection Criteria

Capability
Factors in the frameset features including the geometry and mounts available. Also accounts for the maximum tyre width, the gear ratios and the weight of the bike.

Price
All the bikepacking bikes that I have listed represent very good value for the performance and features that they offer.

Availability
What’s the good in a great bike that’s impossible to buy? The bikes I’ve selected here are often available in multiple regions of the world.

Best Bikepacking Bikes: Gravel & All-Road 700C

2019 Cannondale Topstone

Cannondale Topstone Sora // ~10.5kg and US $1050
When you factor in price, the 2019 Cannondale Topstone undoubtedly comes out on top in the gravel and all-road category. The aluminium frame features a threaded bottom bracket shell (big tick), rear rack mounts, internal cable routing in the downtube, routing for a dropper seatpost, 3x bidon cage mounts, a cargo cage mount and top tube bag mount. The frame is able to accommodate 700 x 42c tyres and probably 650B x 47c too. The fork is full carbon (unheard of at this price) and thanks to the sub-compact crankset and wide range cassette, the climbing gear ratio is 24 gear inches. If you need lower gears, the 9-speed Shimano gearing makes it very easy to retrofit a mountain bike derailleur and cassette for tackling even steeper climbs. The only downside is the lack of fork mounts, but there are many cargo cage options these days which will fit a regular carbon fork. Oh, did I mention a Topstone Sora is just a thousand bucks??

best bikepacking bikes

Fuji Jari 1.1 // 9.5kg and US $2149
Stepping up to $2149 gets you a lot of bike! The aluminium Jari 1.1 is equipped with Shimano’s second-tier road groupset, Ultegra, along with an FSA 46-30t adventure crankset to achieve a 24″ low gear. The frameset will clear 700 x 45c tyres but that number can stretch to 47c if you throw in a 650B wheelset. There are 3x bidon mounts on the frame, 2x on the carbon fork and there’s also space on the top tube for a direct mount bag. The Jari also has a particularly broad size range with frames in seven sizes from XXS to XXL.

Best Bikepacking Bikes: Gravel & All-Road 27.5″

best bikepacking bikes

All-City Gorilla Monsoon // 13.2kg and US $2099
I really like what All City have done with the Gorilla Monsoon. This is a bike that can accommodate 27.5 x 2.4″ rubber, or alternatively 650B x 47c slicks with full fenders. That makes this steel bike incredibly capable on the dirt, and with a quick tyre change, you could also be motoring along the road with a wide set of slicks. It has a super cool twin-plate fork crown and the mounts for Surly-8 and 24-Pack rando-ish racks. The All City is fitted with a 1x drivetrain with a 24-94″ gear range which is a little overgeared for steep off-road terrain, but will be good for most occasions. Should you want lower gears, the wider-than-usual 73mm threaded bottom bracket shell makes fitting MTB front derailleurs and MTB cranksets very easy (eg. 48/36/26t or 42/28t). The cherry on top is the dropper seatpost which allows you to reduce your centre of mass for steep descents.

carbon touring bikes

Bombtrack EXT-C // 9.6kg and €2999
The lightweight alternative to the Gorilla Monsoon is the EXT-C. This carbon bike tips the scales at just 9.6kg, yet will still squeeze in 27.5 x 2.1″ mountain bike tyres (or 700 x 45c slicks). The frame features a relatively upright geometry, space for 3x bidon cages and has front and rear rack provision. The fork will mount 2x cargo cages while the Hunt Adventure Sport wheelset tips the scales at just 1549 grams, giving the bike a light feel thanks to its low rotating mass. The gear range is a touch high with a 26″ low gear, but that’s easily changed either with a smaller chainring or a larger cassette.

Diamondback Haanjo EXP

Diamondback Haanjo EXP // 9.7kg and US $1999
This carbon bike is a unique fusion between proven touring components and modern materials. You’ll find a 27-speed touring groupset with a super low gear of 21 gear inches, barend shifters, TRP cable disc brakes and a threaded bottom bracket shell. These well-proven touring parts are blended with an ultralight carbon frameset that clears 27.5 x 2.0″ tyres, resulting in a sub-10kg build. This bike has 3x bidon mounts on the frame and provision for front and rear racks. It also has a particularly low sticker price when you consider the weight and specification.

best bikepacking bikes

Masi Giramondo // ~12.5kg and US $1349
The Giramondo is another really overlooked bike. It’s not the lightest, but it’s a super sturdy steel build with provision for lots of bidon cages, as well as rack and fender mounts. I particularly like the 3x touring groupset which achieves a very wide gear range of 19-111 gear inches, which is perfect for all riding conditions. It’s also running reliable and field-servicable parts including TRP cable disc brakes and barend shifters. This bike should be capable enough on rougher trails given the 27.5 x 2.1″ tyres that come fitted.

Best Bikepacking Bikes: Off-Road Adventure 29″

best bikepacking bikes

Breezer Radar Expert // 12.9kg and $1069
This is perhaps the most underrated bikepacking bike available! For a touch over a thousand dollars, you get a steel dropbar bike that will clear 29 x 2.2″ mountain bike tyres. It has 5x bidon mounts on the frame and fork, along with a 46-30t adventure crankset to achieve a climbing gear of 24 gear inches. If that’s not low enough, I suspect the long-cage Deore rear derailleur should be able to squeeze in a SunRace 11-40t cassette with a few adjustments. The only downside is that the Radar Expert is a bit on the porky side, but that was always going to be the case for a bike at this price.

best bikepacking bikes

Ghost Fire Road Rage // 9.6kg and €2599
Here’s another bike you may not have seen before, but it’s wild! This full carbon bike is under 10kg with 29 x 2.0″ mountain bike tyres. It has more mounts than a Surly, including a neat cargo cage mount under the top tube. It comes stock with moderately low gearing (25″ climbing gear), but the nice thing with SRAM components is that you can easily fit a wider range cassette and mountain bike derailleur if steep off-road riding is your jam.

best bikepacking bikes

Salsa Fargo Tiagra // 12.7kg and US $1999
In 2009, Salsa released the first drop bar 29er to the market, and it took years for other manufacturers to catch up. These days the Fargo is still one of the most capable drop bar bikes, offering 29 x 2.6″ tyre clearance, 27.5+ wheel compatibility and the ability to fit a Rohloff 14-speed hub and belt drivetrain. The Fargo geometry is super upright and stable with its long wheelbase and slow steering, so this bike will undoubtedly offer a super comfy ride. I particularly like the Tiagra model which is under $2K with the Firestarter carbon fork (4x cargo cage mounts!), TRP cable disc brakes and a 2x setup. Lastly, Salsa EXP framebags are available for the Fargo in all sizes!

Best Bikepacking Bikes: Plus Bikes 2.8″ to 3.0″

best bikepacking bikes

Kona Unit X // ~14.1kg and US $1299
When it comes to 27.5+ hardtails with a trail geometry, the Unit takes the cake. It offers the same SRAM NX drivetrain (19″ low gear) and hydraulic disc brakes as many of its rivals, but easily undercuts them on price. The Unit X is also a pretty economical way to complete a Rohloff build, as it’s fitted with sliding dropouts to get the job done. If you’re attempting steep technical descents or just want to squeeze more capability out of the bike, I recommend fitting a suspension fork to make it slay even harder. Given its long reach, short stem and slack head angle, it will handle technical terrain particularly well.

best bikepacking bikes

Surly Bridge Club // 14kg and US $1200
The Surly Bridge Club is one of my favourite flat bar bikes. It’s just US $1200, it has a 17 gear inch climbing gear and it can fit 27.5 x 2.8″, 26 x 3.0″ or 700 x 47c tyres. It has also got all the braze-ons you need for touring, including mounts for the Surly-8 and 24-Pack rando-ish racks. Fit some fat slicks (Schwalbe Super Moto X) and fenders and you can take this bike on a long road tour too.

best bikepacking bikes

Tumbleweed Prospector // ~15kg and US $4300
Here’s another bike you might not have heard about. The Tumbleweed Prospector is designed around a 14-speed Rohloff hub but can fit derailleurs too. There’s room for 26 × 4.0″ fat bike tyres, 27.5 × 3.25″ plus tyres or even 29 × 2.6″ rubber. The front and rear axle spacing is the same width, allowing you to fit a rear wheel on the front at a pinch. The frame will also allow you to fit a suspension fork, front and rear racks, cargo cages and full fenders – all of these details make it incredibly versatile. It’s not cheap at US $4300 for a complete Rohloff build, but the frame has some really nice finishing touches and the internally geared hub elevates the price by at least a thousand dollars too.

Best Bikepacking Bikes: Full Suspension

Scott Spark 950 // 13.9kg and US $2899
This rig has everything you want out of a full suspension trail bike. A slack 67-degree head angle, long top tube, short stem, wide handlebars, dropper post and clearance for 29 x 2.6″ tyres. It’s running a Fox fork and shock and Scott’s suspension lockout system which stiffens everything up using a single lever on the bars. The vertical shock arrangement provides ample space for a custom framebag which will lower the bike’s centre-of-mass on the trail. The bike’s weight is also quite decent considering it’s running 120mm front and rear travel, a dropper post and a sub-3K sticker price.


Canyon Lux CF SL 6 // 11.8kg and US $2999
If weight and speed is your priority, it’s hard to go past this carbon race bike. For US $2999 you get a bike that tips the scales at just 11.8kg/26.0lb, is fitted with mid-range RockShox suspension and uses a wide 1x gear range with 50t bailout gear. The horizontal shock arrangement leaves a very generous space for a large framebag too. To travel faster, you can switch the Maxxis tyres out to some Vittoria Mezcal or Continental Race Kings which have a reduced rolling resistance.

Best Bikepacking Bikes: Fat Bikes 3.8″ to 5.0″

best bikepacking bikes

Salsa Mukluk Deore // 14.7kg and US $1899
The Mukluk offers everything you want out of an ultra-capable fat bike. It’ll squeeze in 4.8″ rubber on 26-inch rims, and the cool thing is that these tyres are a similar overall diameter to 29 x 3.0″, giving you the option to run a faster wheelset if you like. The frame has full-length internal cable routing which keeps the cables hidden from the elements, and the Alternator dropouts allow you to fit a Rohloff 14-speed hub. The aluminium Mukluk comes with a carbon fork, 1x drivetrain (20″ low gear), hydraulic brakes and ample provision for bidon and cargo cages. The Mukluk is also available with a carbon frame which sheds 900 grams off the bike’s weight, EXP framebags are available for all sizes too.

best bikepacking bikes

The Rocky Mountain Suzi Q bikepacking bike.

Rocky Mountain Suzi Q 70 // 11.5kg and US $3199
With a bit of extra cash, you can get a carbon bike that sheds 3kg from the typical weight of a fat bike. The Rocky Mountain is running 27.5 x 3.8″ tyres which have the same diameter as a 29 x 3.0″ wheelset, giving you the option for a faster ride. The crank q-factor (distance between pedals) on the SuziQ is just 10mm wider than a regular mountain bike, which is considered to offer a more optimal biomechanical fit (most fat bikes have cranks that are 30mm+ wider). The SuziQ comes with a carbon fork, a 1x drivetrain, Shimano hydraulic brakes and multiple cargo cages on the frame and fork.

Want To Compare The Best Bikepacking Bikes?

bikepacking bike

Check out my new book, the 2019 Bikepacking Bike Buyer’s Guide which compares steering speed, sizing, gear ratios, weight, pricing and more. This guide is updated annually with the latest models at no extra cost! It’s currently on pre-sale for 25% off and will be launched on June 25 this year.

THE CHAPTERS INCLUDE:

What is a Bikepacking Bike?
Frame Material and Construction
Bike Weight
Optimizing Overall Weight
Bike Positioning
Comfort – Handlebars
Comfort – Saddles
Comfort – Components
Gear Range
Gear Shifting and Parts
Pedals and Clipping In
Brakes
Tyres
Wheels – Size Options
Wheels – Components
Suspension
Full Suspension
Dropper Posts
Important Upgrades
Mounting Luggage
Price and Value
Different Types of Bikepacking Bike
Narrowing Your Options

bikepacking bike

YOU THEN HAVE THE TOOLS TO COMPARE BIKEPACKING BIKES:

How to Best Use This Guide
How to Size Up and Compare Bike Sizes
Advanced Sizing Factors
Comparing Steering Feel
Comparing Gear Inches

THERE ARE 180+ BIKE LISTINGS:

50+ Gravel & All Road Bikes – with 700C Wheels
40+ Gravel & All Road Bikes – with 27.5″ Wheels
20+ Off-Road Adventure Bikes – with 29″ Wheels
30+ Off-Road Plus Bikes – with 3.0″ Tyres
20+ Full Suspension Bikes – with 2.2-3.0″ Tyres
15+ Fat Bikes – with 4.0-5.0″ Tyres

The post The 16 Best Bikepacking Bikes In 2019 appeared first on CyclingAbout.com.

Drivetrain Efficiency: What’s The Difference In Speed Between 1X and 2X?

$
0
0

The most efficient bicycle chain runs in a perfectly straight line, in fact, a drivetrain without gears (singlespeed) can operate with 97% efficiency. The result is that 97% of the power that you put into the pedals goes into driving your rear wheel. When we add derailleur gears to a bike, the chain has to bend in a number of ways as it moves through the cogs on the cassette, increasing the frictional losses and reducing the overall drivetrain efficiency.

With the advent of wide-range rear cassettes (eg. 10-42 or 10-50t) we have been able to eliminate the front derailleur while maintaining a similar gear range. 1X drivetrains are a great way to drop some weight from your bike and reduce the amount of maintenance required. We have also been able to design bicycle frames with greater tyre clearance when we don’t have to accommodate for front derailleurs.

One of the bigger disadvantages of 1X is that it requires the chain to bend at a greater angle to access the biggest and smallest rear cogs. This not only increases the chain wear but also results in additional frictional losses. In comparison, a 2X drivetrain allows you to maintain a straighter chainline as you can pair your small chainring with larger cassette cogs, and large chainring with smaller cassette cogs.

So, how much higher are the 1X frictional losses when compared to a traditional 2X drivetrain?

In May 2019, VeloNews and CeramicSpeed tested the frictional differences between 1X and 2X drivetrains. Let’s take a look at their testing protocol, their results and then I’ll do some number crunching to determine how these frictional losses will affect your cycling speed.

The Test

drivetrain efficiency

The CeramicSpeed test machine set up with the 1x drivetrain. Image: VeloNews

VeloNews/CeramicSpeed tested two different drivetrain setups:
– The 1X drivetrain used a SRAM Force 1 rear derailleur, 48-tooth narrow-wide chainring, PC-1170 chain, and a 10-42t cassette
– The 2X drivetrain used a Shimano Ultegra rear derailleur, 53/39t chainrings, HG701 chain, and a 11-34t cassette

These drivetrains were selected as they have the same gear range which will help us compare the frictional losses at the equivalent gear ratios. Both drivetrains were fitted to a test machine that could calculate the frictional losses in each gear combination. The machine simulated a rider output of 250 watts pedalling at a cadence of 95RPM.

The chainlines were matched: the 1X drivetrain was set up to have a straight chainline in the 5th from smallest cassette cog, while the 2X drivetrain was aligned from the 53t chainring to the 5th from smallest cog, and from the 39t chainring to the 8th from smallest cog.

CeramicSpeed also stripped the factory lubricants and re-lubed them with the same mineral oil. Both chains were run for the same test duration.

Note: CeramicSpeed has previously found no increase in friction when using 1X narrow-wide chainrings when compared to uniform tooth 2X chainrings. They have also found no difference between the derailleur pulleys.

The Results

The 1X vs 2X drivetrain friction test results. Image: VeloNews

A few conclusions from the results:
– The frictional losses typically increase as you move up through the gear ratios
– The 2X drivetrain was more efficient in every gear (assuming you swap to the big ring after 39x21t)
– The difference in frictional loss is as small as 1-watt (48x21t / 53x23t) and as large as 6-watts (48×10 / 53×11)
– There are more frictional losses with a perfect chainline on the 1X drivetrain (48x18t) than the 2X (53x19t)
– The 1X drivetrain is as efficient as 96.0% and as inefficient as 92.4%. On average it’s 95.1% efficient.
– The 2X drivetrain is as efficient as 96.8% and as inefficient as 94.8%. On average it’s 96.2% efficient.

CeramicSpeed calculated that the average friction for the 1X drivetrain was 12.24 watts. This was determined by adding together the drivetrain power losses in each of the 11 gears, then divided by 11. The same was done with the 2X drivetrain using the 15 optimal gears divided by 15. The result was 9.45 watts, or just under a three-watt average difference between the two drivetrains.

Why Is 1X Less Efficient Than 2X?

There are four main sources of frictional loss in a chain. The obvious one is the chain bend angle, which results in the chain plates scraping harder on the cogs. But the chain tension, chain link articulation and chain speed also play a key role.

Chain tension results in the chain pushing harder on the chainring and cog teeth, and it’s higher when you use smaller chainrings and cassette cogs. Chain link articulation is the amount the chain has to hinge at the pins, where wrapping on a smaller cog causes higher friction. The chain speed is the tooth interactions per minute, which increases as the chain runs on the smaller cassette cogs.

Ultimately, a 1X drivetrain cannot run as straight chainline across its gear range, its smaller chainring results in more chain tension, the chain has to articulate more over the smaller cassette cogs, and the chain has to run faster on the smaller cogs.

These additional factors help to explain why in the gear with the straight chainline, the 1X drivetrain is still consuming 2 watts more than the 2X. It also explains why the 48x21t gear has the lowest friction despite the chainline not being perfectly straight – the reduced chain articulation and lower chain speed is yielding more friction savings than those from the straighter chainline.

What Is The Speed Difference Between Drivetrains?

Here’s the fun bit!

Using BikeCalc we can determine the speed a bike will travel in each of the gear ratios by plugging in a cadence of 95RPM with a 700x44C wheel. We can then add the different rates of power (231 to 242 watts depending on gear ratio) as well as a rider+bike weight (85kg) into Bike Calculator* to find out the speed and time differences over 100km.

Smallest Difference in Efficiency:
In the 48 x 21t (1X) and 53 x 23t (2X), you would cycle at 29.12km/h @95RPM. There is a 1-watt difference which results in a 0.06km/h speed advantage to the 2X drivetrain. Over 100km the 1X drivetrain would add 25 seconds (0.2% slower).

In The Highest Gear:
In the 48 x 10t (1X) and 53 x 11t (2X), you would cycle at 61.28km/h @95RPM. There is a 6-watt difference which results in a 0.14km/h speed advantage to the 2X drivetrain. Over 100km the 1X drivetrain would add 14 seconds (0.3% slower).

In The Smallest Gear:
In the 48x42t (1X) and 39x34t (2X), you would cycle at 14.49km/h @95RPM. There is a 2.5-watt difference which results in a 0.15km/h speed advantage to the 2X drivetrain. Over 100km the 1X drivetrain would add 3 minutes and 50 seconds to your cycling time (0.9% slower).

*Through my weight testing, I’ve determined Bike Calculator to be close to accurate.

How Does Derailleur Drivetrain Efficiency Compare To Gearboxes?

pinion gearbox

We actually have some drivetrain efficiency data for gearboxes, so let’s see how these numbers stack up!

Unfortunately, the gearboxes were all tested at 200 watts rather than 250 watts, so this isn’t a perfect comparison by any means. Let’s assume that the derailleur efficiency is the same at 200 watts which will give us a rough idea of the speed differences between derailleurs and gearboxes.

The different drivetrains achieved an average efficiency of:
– 96.2% for 2X Shimano Ultegra
– 95.1% for 1X SRAM Force 1
– 94.5% for Rohloff 14-speed
– 90.5% for Pinion 18-speed

On A Flat 100km Route (0% Gradient):
– 2X Shimano Ultegra would average 31.13km/h
– 1X SRAM Force 1 would average 31.00km/h (52 seconds or 0.5% slower)
– Rohloff 14-Speed would average 30.92km/h (1 min 20 seconds or 0.7% slower)
– Pinion 18-Speed would average 30.41km/h (4 mins 35 seconds or 2.3% slower)

On A Hilly 100km Route (10km up, 10km down x5 @ 2% Gradient):
– 2X Shimano Ultegra would average 28.8km/h
– 1X SRAM Force 1 would average 28.6km/h (1 min 10 seconds or 0.6% slower)
– Rohloff 14-Speed is 28.5km/h (1 min 49 seconds or 0.9% slower)
– Pinion 18-Speed is 27.9km/h (6 min 20 seconds or 2.9% slower)

Note: For the gearbox test, the results showed a marked increase in efficiency as the rate of power increased, so it is likely that if we were to test the gearboxes at 250 watts, they would achieve higher rates of efficiency. I would imagine the Rohloff hub would actually leap-frog the 1X SRAM Force 1 drivetrain in the higher gear ratios!

Does Derailleur Efficiency Really Matter?

Only a little.

To put the 1X/2X frictional losses into perspective we can compare the 0.3-0.9% slower speeds with:
– 7.9% slower cycling speeds when using four panniers as opposed to bikepacking bags
– 5.4% slower cycling speeds when using Schwalbe Marathon Mondial as opposed to Schwalbe Almotion tyres
– 3.2% slower cycling speeds when carrying 30kg extra luggage on a flat road
– 1.5-2.7% slower cycling speeds when a dynamo hub is switched off or on

If you’re spending a lot of time in the smallest gear, you have the most to lose with a 1X drivetrain. The 1X system is 0.9% slower than a 2X drivetrain which results in a 3 minute and 50 second time penalty over 100km.

When travelling at faster speeds, the higher wind drag negates the additional frictional losses resulting in the 1X drivetrain being 0.3% slower. This translates to a 14 second time penalty over 100km if using a 1X drivetrain. In other words, you have the least to lose when cycling at high speeds with a 1x drivetrain.

When the chainline is almost straight, the drive efficiency is within 1-watt between 1X and 2X drivetrains, resulting in the 1X drivetrain being 0.2% slower. This translates to a 25 second time penalty over 100km if using the 1X drivetrain.

Click HERE To Check Out My Weight Testing, HERE For The Tyre Resistance Testing and HERE To See My Aero Testing

The post Drivetrain Efficiency: What’s The Difference In Speed Between 1X and 2X? appeared first on CyclingAbout.com.

Do You Prefer A Bikepacking Or Bike Touring Set Up? – Interview With Alee Denham

$
0
0

I’ve just published a 30-min interview on YouTube with a bit more insight into my crazy life! You’ll hear my backstory, why I cycle with panniers, what my favourite memories are and more!

I’ve timestamped the whole thing so you can pick and choose the questions you want to hear answered.

1:51 How long are you currently travelling?
2:19 Are you stopping to work on your blog and make videos?
3:47 How long have you been vegan for?
4:45 How did you get started with veganism?
6:56 When and how did you get into bicycle travel?
9:04 Questions about Europe-Australia bike tour
11:10 If you had to choose, would you pick a bikepacking or bike touring set up?
14:21 Do you think it’s important to cycle alone?
15:46 What are your favourite memories or highlights?
18:07 Do you have tips for someone starting out?
19:47 What do you do with regards to saddles and padded shorts?
21:36 Is the CyclingAbout blog a full-time thing for you?
25:31 What are the best way a traveller can give back to the communities they pass through?
27:47 How would you sum up your life philosophy?
29:50 After you finish your trip, what are your plans?

interview

Alee Denham Interview

The post Do You Prefer A Bikepacking Or Bike Touring Set Up? – Interview With Alee Denham appeared first on CyclingAbout.com.

All About The Best Dynamo USB Chargers For Bicycle Touring and Bikepacking

$
0
0

There is a wide array of dynamo USB chargers available (24 of ’em, in fact), and while most do an adequate job of keeping your electronics charged at high speeds, there is only a select few which can provide a decent charge at ‘touring’ speeds.

Dynamo USB charger technology is actually improving at an incredibly fast rate. Very small companies (ie. often just one person) are designing both hardware and software that exploits the very modest power offered by a dynamo hub. The result is powerful USB chargers that offer high levels of efficiency, that can be neatly fitted to any bike.

This is a pretty technical resource, so strap yourselves in and take it slow. A big focus will be the power output of different chargers at different speeds, but we’ll also look at dynamo hub drag, charger efficiency, form factor and how quickly you can expect your batteries to charge.

This article was originally written September 2017 but has been re-written in July 2019 with the latest information.

dynamo usb charger

The Cinq Plug5 Plus charger on my KOGA WorldTraveller-S.

Watts, Volts and Amps

Firstly, let’s quickly cover a few basic electricity units of measurement. It’ll take a moment to get your head around this, but the knowledge will help, promise!

Today we’ll be discussing voltage (in volts or ‘V’) and current (in amps, or ‘A’). A common analogy for these units of measurement is in terms of a water pipe. Voltage is the water pressure and current is the flow rate. By increasing the water pressure in a pipe, you will increase the flow rate too. It’s the same with electrical systems; increasing the voltage increases the current.

Watts (W) is the total electrical system power, equal to the voltage (V) multiplied by the current (A). The equation is, therefore:
Watts (W) = Volts (V) x Amps (A).

A 3-watt dynamo hub will put out 6 volts at 0.5 amps (3W = 6V x 0.5A) in AC power. Once the power is converted to DC it’s more like 5V and 0.5A, which is the power required for USB charging. While some USB chargers will start charging at lower rates of power, most devices like to charge above 2-watts (5V x 0.4A) to ensure the charging level is stable.

2-watts can be reached by the best dynamo USB chargers at speeds between 11-13km/h. If you’re cycling at lower speeds for short periods of time, a buffer battery will need to be incorporated into your charging system to help meet the power needs of your device. And when cycling for long periods of time below 11-13km/h, you’ll need to look to other charging solutions (solar or power banks are usually best for off-road bikepacking).

Most dynamo USB chargers use chipsets with a current limit to prevent overheating (eg. Sinewave Revolution is 1A, therefore the maximum power is about 5W (5V x 1A)). It can be said that any USB charger that puts out high watts will also be putting out a high current.

The Most Powerful Dynamo USB Chargers

Fahrrad Zukunft has conducted some very extensive testing over the years that determines the amount of power (in watts) that can be produced by various dynamo USB chargers. The three below charts (2016, 2016 and 2019) compare 13 different models.

To put the below numbers in perspective, consider that a smartphone consumes around 3-4 watts in navigation mode with full-screen brightness. Therefore, just to keep the battery at the same level will require cycling speeds of 15 to 25km/h depending on the model of USB charger. Even then, there’s only a handful of products that generate enough power for this activity.

Let’s take a look at the numbers.

dynamo usb chargers

Horizontal Axis: Cycling speed. Vertical Axis: Maximum output power at the USB. Image: Fahrrad Zukunft

The graphs above show the output power at the USB port at various cycling speeds. You’ll notice that most power curves are rather linear from 5km/h until they plateau somewhere between 20-40km/h. The exception is the Forumslader V5, which uses a special series of capacitors to boost the power potential of a dynamo hub at low speeds.

Power at different speeds:
1 Watt – 
Most chargers will hit 1w between 7-10km/h.
2 Watts – At 11km/h the highest performing charger hits 2w (Plug5 Plus). Most other chargers will hit 2w between 12-15km/h
3 Watts – At 14km/h the highest performing charger hits 3w (Plug5 Plus). Other chargers hit 3w between 15-25km/h
4 Watts – At 17km/h the highest performing charger hits 4w (Plug5 Plus) – Other chargers hit 4w between 27-28km/h
5 Watts – At 20km/h the highest performing charger hits 5w (Forumslader) – Some chargers hit 5w above 35km/h

The top-performing chargers:
Cinq Plug5 Plus – 2w@11km/h, 3.5w@15km/h, 4.5w@20km/h, 5w@25km/h – Best for sub-20km/h speeds
Forumslader V5 – 2w@12km/h, 3w@15km/h, 4.75w@20km/h, 6.5w@25km/h – Best for above-20km/h speeds
Lumi-Con P5 – 2w@12km/h, 3w@15km/h, 4w@20km/h, 4.25w@25km/h
Dynamo Harvester Plus – 2w@14km/h, 2.5w@15km/h, 4.5w@20km/h, 6.25w@25km/h

dynamo USB chargers

Igaro reveals the power for a few missing dynamo USB chargers, including their D1 and the kLite unit.

Igaro has been recently publishing (non-independent) results for its prototype D2 model. These numbers don’t perfectly align with Fahrrad Zukunft, but they are within 10% when examining the Sinewave Revolution charger. The x-axis is measured in amps, but we can use the equation to convert amps to watts by multiplying by 5 (volts).

Here are some quick conversions:
10km/h – E-Werk (0.9w), Sinewave (0.9w)
15km/h – Igaro D1 (2w), kLite (1.75w), Sinewave (1.75w), E-Werk (1.75w)
20km/h – Igaro D1 (3w), kLite (2.75w), Sinewave (2.75w), E-Werk (2.75w)
25km/h – Igaro D1 (3.75w), kLite (3.5w), Sinewave (3.5w), E-Werk (3.5w)
30km/h – Igaro D1 (4.75w), kLite (4.5w), Sinewave (4.5w), E-Werk (3.5w)

Dynamo Hub Drag

There is no such thing as free energy! Do you want a powerful charging system? Ok, well you’re going to have to pedal a bit harder for it. Let’s take a look at dynamo hub ‘drag’ from using different charging systems.

dynamo usb chargers

Horizontal Axis: Cycling speed. Vertical Axis: Power at the USB charger when a buffer battery is full. Image: Fahrrad Zukunft

The charts above show the power created at the dynamo hub by different USB chargers. The efficiency of a high-quality dynamo hub at low power (eg. cycling at 10-20km/h) works out to be around 50-60%. This means that when the charger is making between 1-3 watts you can roughly double that figure to work out the drag (in watts) at the hub.

Therefore, when making 2.5 watts for USB charging, you’re using about 5 watts of your pedalling power. That drag equates to ~0.4km/h slower riding speeds than if you weren’t charging (80kg rider / 15kg bike and gear / 150 watts / flat road). Or a ~3-minute time penalty over a 100km ride.

The efficiency increases to 70-80% at high power (ie. cycling at 30km/h). This means that a charger like the Forumslader V5 will be taking 15-watts from your pedalling power while charging at 10.5 watts. That drag equates to ~1.1km/h slower riding speeds than if you weren’t charging at 10.5 watts (80kg rider / 15kg bike and gear / 150 watts / flat road). Or a ~9-minute time penalty over a 100km ride.

That’s a decent chunk of time, so it’s in the best interests of charger manufacturers to make efficient units that don’t create too much power, or the drag becomes particularly noticeable when riding.

Power Banks & Charging Batteries

hub dynamo cache battery

The Cinq5 Smart Power Pack II is an aftermarket buffer battery for charging at low speeds.

Once you drop below around 2-watts, a dynamo charger will not be able to provide power to most devices. But luckily, some chargers have integrated buffer batteries that will swoop in and provide the power needed for low-speed riding. For this feature, check out the Cinq Plug5 Plus, NC-17 Appcon 3000, Lumicon P5, Forumslader V5 and B&M USB-Werk.

Charging Batteries or Power Banks
If your speed is regularly dropping above and below 11-13km/h, it’s best to charge into a power bank for later use. But this is not the most efficient way to keep your devices charged because there are energy losses in the additional circuitry. When power is stored in a battery, it experiences a storage loss of around 15-20%. This means you lose around 1-hour of power generation per 5-hour ride, which adds up!

If you’re cycling faster than 11-13km/h, make sure to minimise this loss in efficiency by charging your electronics either straight from the USB charger or by using batteries with a ‘pass-through’ feature (the Cinq Smart Power Pack is the best available).

How Long Does It Take To Charge A Battery?
This depends on the dynamo USB charger and your cycling speed. Let’s take a look at two different power outputs.

Example One: 2.5-Watts (12.5km/h on the Cinq Plug5 Plus)
Once a 3-watt dynamo hub has been converted from AC to DC the output will translate to roughly 5V and 0.5A, which for an hour of riding is 500mAh. Charging a 5000mAh battery will, therefore, equate to 10 hours of riding. However, when we factor in the small losses in the charging circuitry, we lose around 20% of the total generated power. Adding the 20% extra ride time (10 hours + (10 hours x 0.2)) and we’re looking at 12 hours of riding to fill the battery from scratch.

Example Two: 4-Watts (17km/h on the Cinq Plug5 Plus)
If we use fancy circuitry to boost the output power to 4-watts (5V and 0.8A), we can fill a 5000mAh battery in 6.25 hours of riding. When we account for the ~20% losses in the charging circuitry, this results in 7.5 hours of riding to theoretically fill the battery from scratch.

You can usually find out the battery size of your USB device in the product specifications or written on the battery itself. Read more about power banks and buffer batteries in my resource HERE.

20-Minute Charging Test

While the graphs above give us an idea of the power output at specific speeds, in the hills, it is unusual to cycle at a constant speed for long periods of time. To help simulate hilly or undulating riding conditions, Fahrrad Zukunft created a dynamic test with varied cycling speeds to see which dynamo USB chargers could generate the most power. The test is probably a little over the top in speed variation, but it’s still pretty interesting to see the losses in the charging circuitry.

Left: The test cycle showing time in seconds (x-axis) and speed (y-axis). Right: The resulting difference in power after the 20-minute test between the dynamo hub (green) and at the USB port (red). Image: Fahrrad Zukunft

The test changed the cycling speed in 2-second steps from 10km/h up to 30km/h and then back down to 10km/h again. The accelerations between steps took 3-seconds. This 20-minute test essentially exposes the responsiveness of the microcontrollers inside the chargers, which are constantly trying to optimise the output power at different cycling speeds.

Output power at the USB port after 20 minutes:
1. Forumslader V5 (1200mWh or 240mAh)
2. Lumi Con P5 (1000mWh or 200mAh)
3. Plug5 Plus (1000mWh or 200mAh)
4. NC-17 Appcon 3000 (900mWh or 180mAh)
5. USB Werk (600mWh or 120mAh)
6. Zjego (400mWh or 80mAh)

The test also shows differences in charging efficiency. The bigger the difference between the mWa at the dynamo hub and USB port, the more inefficient the charging system. For example, the Zjego turns 1000mWa into only 400mWa in this test, indicating some very big losses in the circuitry (~40% of power retained). On the other hand, the Forumslader V5 retained ~66% of the power created.

Tying this back to battery charging in the previous section, we could expect the Forumslader V5 to charge a 5000mAh battery in 8.33 hours (including losses in the battery circuitry). The Plug5 Plus would take 10 hours. The USB-Werk would take 16.65 hours.

The Neatest Dynamo USB Charging Systems

sinewave reactor

The Sinewave Reactor offers a very low profile charging port above the stem.

Steerer Tube USB Chargers
I don’t know about you, but I really appreciate a neat and integrated charging solution – and the steerer tube mounted systems have got to be the best in this regard. I personally use the Plug5 Plus which integrates a 1100mAh buffer battery inside the steerer for cycling at speeds below 11km/h. A very neat metal ring seals the USB-C port from the elements when needed.

Check out the Cinq Plug5 Plus, Forumslader V5 Aheadring, Sinewave Reactor and Cycle2Charge V2.

Regular USB Chargers
Ortlieb has a handlebar bag called the Ultimate 6 Pro E which has connectors built into handlebar bag mount. This allows you to keep your USB charger and devices inside your waterproof bag, and take the handlebar bag off without unplugging anything. That just leaves a few wires on your bike – a very neat solution!

Sinewave Cycles Beacon

Dynamo Light USB Chargers
Here’s another super neat charger design. There are a handful of lights that also incorporate the circuitry for charging USB devices. This creates a very neat (less cabling) and often cost-effective light+charger. That said, some light/chargers are less efficient than standalone units because they are not optimised around charging.

Check out the Sinewave Beacon, Forumslader IQ-X, Axa Luxx70 Plus and B&M Lumotec IQ2 Luxos.

Testing Your USB Charger

You can use a USB LED voltmeter to determine how much power your charger is making.

If you’re having issues with charging, a cheap USB LCD Voltmeter can help diagnose whether your USB charger is making the right amount of power. If you’ve determined you’re getting the right voltage and current for your device, you may be having issues with the particular cache battery you’re using.

The Best-Performing Dynamo USB Chargers

dynamo usb charger

Cinq Plug5 Plus // Sub-20km/h
Most bike travel is conducted at speeds below 20km/h (12mph), and the charger that offers the most power at these speeds is the Plug5. Not only is it powerful, but it also integrates a buffer battery into the system for the times you’re cycling below 11km/h. The covered USB port is very neat too!

Cinq Plug5 Plus Numbers:
2w @ 11km/h
3.5w @ 15km/h
4.5w @ 20km/h
5w @ 25km/h

page street cycles

Forumslader V5 // Above-20km/h
The Forumslader V5 uses a special series of capacitors to achieve big power from 20 to 30km/h (12-19mph) in particular. It also incorporates buffer batteries (3x700mAh) and a neat USB port near the handlebars.

Forumslader V5 Numbers:
2w @ 12km/h
3w @ 15km/h
4.75w @ 20km/h
6.5w @ 25km/h

Creating Bombproof Dynamo USB Chargers

Kerry from kLite focuses on building dynamo light and charging systems for remote backcountry use. His main aim is reliability, so his charging systems are as simple as possible, using thick internal cabling, full waterproofing and smoothing capacitors that offer ultra-consistent waveforms (best practice for direct charging; Kerry says they take up half of his charger).

Usually, more complex circuitry and small form factors result in more chance of something going wrong, so it’s always best to hunt around for reviews online to see how different USB chargers are performing in the world’s harshest environments.

List Of Different Dynamo USB Chargers

You can see a list of most hub dynamo USB chargers options HERE.

Summary

The top-tier dynamo USB chargers offer very decent power these days, provided your touring speed is above 11-13km/h. Once you hit 15km/h with five of the charging units tested, you’ll be generating more than 3-watts which is a very decent charge for most batteries and devices. And by 17-20km/h you can generate 4-watts for even the most power-intensive smartphones.

You can neatly integrate a USB charger into your steerer tube, front dynamo light or handlebar bag via the Ortlieb Ultimate 6E connectors. There are lots of great options!

Remember that you increase the dynamo hub drag when generating additional power, but this will be necessary if you’re a heavy electronics user (eg. smartphone navigation with the screen always on). That said, if you just want to keep on top of your phone or GPS, almost all USB chargers will do this job just fine.

Learn About Dynamo Hub Systems HERE, About Buffer Batteries HERE and Dynamo Lights HERE

The post All About The Best Dynamo USB Chargers For Bicycle Touring and Bikepacking appeared first on CyclingAbout.com.

List of Hub Dynamo USB Chargers and Charging Systems for Electronic Devices

$
0
0

These days there are more than 20 hub dynamo USB chargers available! I have listed the key specs from each of these chargers and have organised them according to type (headset, regular in-line and light chargers). Within these categories, you’ll also find them ranked in terms of available output power.

Hub dynamo USB chargers are really useful if you carry any battery-powered gadgets. I use my Cinq Plug5 Plus to top up my iPhone, eReader, head torch, GoPro, Garmin GPS and 5000mAh power bank. You can also charge batteries (AA, AAA), USB powered lights, cameras, speakers, MP3 players and much more.

If you’re bikepacking off-road or spending lots of time on steep mountain roads you should consider carrying a power bank or solar charger instead. Dynamo chargers are almost useless if you don’t average over 12km/h (7.5mph) for the majority of your ride. If you’re travelling on terrain that has you cycling above and below 12km/h, make sure to choose a system with an integrated buffer battery that will kick in at low speeds.

Before digging too far into this resource, it’s worth attempting to understand everything there is to know about hub dynamo USB chargers HERE.

Key Stats include:
Speed at 2.5W:
This is the speed you need to ride in order to achieve the minimum charge for most smartphones.
Power at 20km/h:
This is the output power at the USB port at 20km/h.
Power Output Graph: If the charger has been tested, I have listed its power output graph here.
Buffer Battery:
 If a buffer battery is integrated into the system, I have listed the battery capacity here.
Price: Retail price on the dynamo USB charger.

This list was originally published March 2012 but has been updated July 2019.

Cinq5 The Plug5 Plus

dynamo usb charger

Cinq Plug5 Plus dynamo USB charger.

The Cinq Plug5 Plus is the most powerful USB charger below 20km/h and it’s almost certainly the neatest. When you don’t have anything plugged into the unit you can hide the USB-C plug by rotating the ratcheting top cap door. There’s a 1100mAh battery hidden in the steerer tube which will step in when your speed drops below 12km/h, and Cinq says that simultaneous operation of lighting and charging is possible with this unit too. The Plug5 is made exclusively for the new USB-C plugs so you may need to buy an adapter or different charging cable if you select this option.

Speed at 2.5W: 12km/h
Power at 20km/h:
4.6-watts
Power Output Graph: HERE
Buffer Battery: 1100mAh
Price: €259

Forumslader V5 Ahead

page street cycles

Forumslader V5 Ahead dynamo USB charger.

The Forumslader V5 is the most powerful dynamo USB charger on this list over 20km/h (independent testing HERE). It is able to hit 2.5W at 13km/h and 5W at 20km/h. It’s constantly getting updated with the latest tech and circuitry due to the small-scale production.

Speed at 2.5W: 13km/h
Power at 20km/h:
 4.8-watts
Power Output Graph: HERE
Buffer Battery: 2100mAh
Price: €227

Cycle2Charge V3

dynamo usb

Cycle2Charge V3 dynamo USB charger.

This is a headset top cap charging option from Cycle2Charge that’s available at a great price point. According to the manufacturer, it will produce the minimum charging for USB devices at 12km/h (2.5W) and by 21km/h it will be making 5W. The nice thing about this one is that it uses a rotating dome to protect the USB plug when not in use.

Speed at 2.5W: 12km/h (non-independent testing)
Power at 20km/h: 
4.7-watts (non-independent testing)
Power Output Graph:
HERE
Buffer Battery:
No
Price: €69

NC-17 Appcon 3000 (Dynamo Harvester)

dynamo usb

NC-17 Appcon 3000 dynamo USB charger. Image: GPSRadler.de

The NC-17 Appcon 3000 (previously Dynamo Harvester) is one of the more powerful chargers available. The unit fits inside the steerer tube but rather than offering a charging port, it routes the cables into your handlebar bag.

Speed at 2.5W: 13km/h
Power at 20km/h:
 3.5-watts
Power Output Graph: HERE
Buffer Battery:
 3000mAh
Price: €229

Sinewave Reactor

sinewave reactor

Sinewave Reactor dynamo USB charger.

The Sinewave Reactor offers the same functionality as their other chargers, but it has been incorporated into a 43 gram, super slim headset top cap. The electronics are neatly integrated into the fork steerer, making it somewhat theft-proof and elegant. It’s manufactured in the USA and tends to get rave reviews from many users.

Speed at 2.5W: 17.5km/h
Power at 20km/h:
 3-watts
Power Output Graph: HERE
Buffer Battery:
No
Price: US $220

Cinq Plug III

Cinq5 The Plug III

Cinq Plug III dynamo USB charger.

This is the older version of the Cinq Plug5 Plus that has been available since 2013. If you’re travelling in terrain that has you riding above and below 12km/h regularly, you’ll want to pick up a Cinq Smart Power Pack II battery to ensure your devices are always getting a charge.

Speed at 2.5W: 12km/h (non-independent testing)
Power at 20km/h:
3.7-watts (non-independent testing)
Power Output Graph:
HERE
Buffer Battery:
 Available separately
Price: €159

Forumslader V5

Forumslader V5 Dynamo USB Charger

Forumslader V5 dynamo USB charger.

The Forumslader V5 Ahead is also available in a larger unit that will sit inside a handlebar bag for a MUCH lower price!

Speed at 2.5W: 13km/h
Power at 20km/h:
 4.8-watts
Power Output Graph: HERE
Buffer Battery: 2100mAh
Price: €110

NC-17 Connect Appcon GT (Dynamo Harvester)


hub dynamo usb charger

NC-17 Connect Appcon GT dynamo USB charger.

NC-17 also make a more powerful charger that sits in a small bag on the handlebar (or inside a handlebar bag). This charger (previously Dynamo Harvester Plus) is half the price of the Appcon 3000 but offers some of the highest USB outputs above 20km/h!

Speed at 2.5W: 16km/h
Power at 20km/h:
4.5-watts
Power Output Graph:
HERE
Buffer Battery:
 3000mAh
Price: €110

Lumi-Con P5 Bike Harvester

dynamo usb

Lumi-Con P5 dynamo USB charger.

The Lumi-Con P5 offers excellent specs for the price. It has the 2nd highest power output at 15km/h of any charger, and above 20km/h it’s the 4th most powerful according to the testing. Additionally, it’s fitted with 5000mAh worth of batteries which will have saved some power for when you’ve finished your ride.

Speed at 2.5W: 14km/h
Power at 20km/h:
4-watts
Power Output Graph:
HERE
Buffer Battery:
 5000mAh
Price: €85

kLite USB Charger

Kerry at kLite makes some amazing light and dynamo systems for remote backcountry use. His focus is specifically on reliability, so his systems are as simple as possible, using thick internal cabling, full waterproofing and smoothing capacitors that offer ultra-consistent waveforms (best practice for direct charging; Kerry says they take up half the charging unit). The kLite charger also offers solar charger input and 2x USB output ports (1x Spot Tracker or GPS + a smartphone or other power-hungry device).

Speed at 2.5W: 16km/h (non-independent testing)
Power at 20km/h:
3.2-watts (non-independent testing)
Power Output Graph:
HERE
Buffer Battery:
 Available separately
Price: US $140

Sinewave Revolution

Sinewave Revolution

Sinewave Revolution dynamo USB charger.

This small, 38 gram, waterproof charger can be connected directly to phones or power packs and is especially popular given it offers the same performance as the Reactor but with a lower price tag. It will achieve 2.5W at 16km/h, 3W at 20km/h and 4.5W at 30km/h. Like all Sinewave products, it’s made in the USA.

Speed at 2.5W: 17km/h
Power at 20km/h:
 3-watts
Power Output Graph: HERE
Buffer Battery:
 No
Price: US $120

Igaro D1

Igaro D1

Igaro D1 dynamo USB charger.

The Igaro D1 is a very compact unit that’s waterproof and hand-assembled in the UK. It employs titanium for the charging box and comes with a lifetime warranty, in fact, Igaro will ship warranty replacements anywhere in the world for free. The D1 comes with an optional ‘stability bank’ that will temporarily maintain a high current when you drop below 15km/h. I really like that a whole raft of add-ons (such as an on-off switch) that are available so you can easily build a custom dynamo system.

Speed at 2.5W: 17km/h (non-independent testing)
Power at 20km/h:
 3-watts (non-independent testing)
Power Output Graph: HERE
Buffer Battery:
Available separately
Price: US $109

USB2BYK

USB2BYK USB Charger

USB2BYK dynamo USB charger.

USB2BYK make a small, matchbox-sized charging unit that will produce 2.5-watts at 20km/h (about half the power compared to the best chargers). This charger will probably only be useful if your average speed is around 25km/h.

Speed at 2.5W: 20km/h
Power at 20km/h:
 2.5-watts
Buffer Battery:
No
Price: €39

Busch and Muller USB-Werk

Busch Muller USB Werk Dynamo Charger

B&M USB-Werk dynamo USB charger.

The USB Werk is the most recent release by Busch and Muller. It’s a stripped-back version of the E-Werk (below) but with tiny cache battery built-in. It can achieve USB power (5V and 500mA) at about 19km/h.

Speed at 2.5W: 19km/h
Power at 20km/h:
 2.6-watts
Power Output Graph: HERE
Buffer Battery: 300mAh
Price: US $150

Busch and Muller E-Werk

Image: GPSRadler.de

B&M E-Werk dynamo USB charger. Image: GPSRadler.de

The E-Werk is a unique unit as you can control the voltage (2.8 to 13.3 V) and current (0.1 to 1,5 A) to suit the specifications for each device you’d like to charge. It’s a great idea, but it really just makes the charger more complicated than necessary. The only time I can see this device being useful is if you’re regularly travelling ULTRA fast (40km/h+) or slow (<7km/h). In terms of performance, it’ll hit USB charge specification at 17.5km/h (2.5-watts) and by 30km/h it will be producing over 4-watts. This E-Werk doesn’t include a cache battery (extra US $105) like USB-Werk.

Speed at 2.5W: 17.5km/h
Power at 20km/h:
 3-watts
Power Output Graph: HERE
Buffer Battery: Available separately
Price: US $210

Kemo M172N

Kemo 172N USB Dynamo Charger

Kemo M172N dynamo USB charger.

The Kemo M172N is a dynamo USB charger with a built-in switch so that you can choose between sending power to your lights or your USB device. It’s an absolute bargain, and from all accounts, works really well.

Speed at 2.5W: No data
Power at 20km/h:
No data
Buffer Battery:
No
Price: €40

Ullmann Power Station 4

usb chargers

Ullmann Power Station 4 dynamo USB charger.

Speed at 2.5W: No data
Power at 20km/h:
 No data
Buffer Battery:
No
Price: US $130

LightCharge2 Dynamo USB Charger

LightCharge2 dynamo USB charger.

Speed at 2.5W: No data
Power at 20km/h:
 No data
Buffer Battery:
No
Price: US $50

BioLogic ReeCharge Dynamo Kit

Biologic ReeCharge dynamo USB charger.

Speed at 2.5W: No data
Power at 20km/h:
No data
Buffer Battery:
No
Price: US $39

Zzing Battery Kit

dynamo usb

Zzing dynamo USB charger.

The Zzing USB Charger connects to your handlebars via a KLICKfix mount (90 degrees to connect and disconnect it). There’s not too much info on this model, but the price and integrated battery seem great.

Speed at 2.5W: No data
Power at 20km/h:
No data
Buffer Battery:
2000mAh or 2700mAh (+€10)
Price: €99

Light: Sinewave Beacon

Sinewave Cycles Beacon

Sinewave Beacon dynamo USB charger.

The third dynamo USB charger from Sinewave is an LED light with 750 lumens output and an integrated switch for charging. The Beacon uses the same internals as the Revolution and Reactor so you can expect 2.5W at 17km/h. Interestingly, this light also has a ‘Charger Priority Mode’ which will provide the minimum brightness to the LEDs and will send the rest of the power to the USB plug. Pretty cool! I’ve written a detailed article about the Sinewave Beacon light HERE.

Speed at 2.5W: 17km/h
Power at 20km/h:
3-watts
Power Output Graph: HERE
Battery: No
Price: US $350

Light: B&M Lumotec IQ2 Luxos

Busch und Muller Lumotec IQ2 Luxos Dynamo Light USB Charger

B&M Lumotec IQ2 Luxos dynamo USB charger.

Introduced to consumers at the 2012 Eurobike tradeshow, this 90lux dynamo light incorporates a handlebar switch and USB plug so that you can charge and ride. It’s a super neat and integrated design, however, comes with mixed reviews when it comes to its charging ability. Even so, this is a great dynamo light with a nice beam shape for on-road use.

Speed at 2.5W: No data
Power at 20km/h: 
No data
Battery:
No
Price: US $260

Light: AXA Luxx70 Plus

axa luxx70 plus

Axa Luxx70 Plus dynamo USB charger.

The AXA Luxx70 Plus is a similar product to the Lumotec IQ2 light, providing a handlebar switch to select between using the LED light or USB charger. The key advantage of this product is the exceptional price point. From all accounts, it works really well too!

Speed at 2.5W: No data
Power at 20km/h:
 No data
Battery:
No
Price: US $150

Light: Spanninga Nomad

usb charger

Spanninga Nomad dynamo USB charger.

The Spanninga Nomad is, by far, the cheapest light and USB charger combo. It has a small form factor, with the USB plug hidden on the side of the lamp. The Spanninga LED has a lower 40 lux output than the competition (compared to the B&M 90 lux and AXA 70 lux).

Speed at 2.5W: No data
Power at 20km/h:
 No data
Battery:
No
Price: US $50

Learn About Hub Dynamo USB Chargers HERE, Dynamo Wiring Systems HERE, Cache Batteries HERE and Dynamo Lights HERE

The post List of Hub Dynamo USB Chargers and Charging Systems for Electronic Devices appeared first on CyclingAbout.com.

Viewing all 447 articles
Browse latest View live