Quantcast
Channel: CYCLINGABOUT.com
Viewing all 446 articles
Browse latest View live

Steering Masterclass: How Stem Length Affects Your Steering Speed

$
0
0

These bike stems look insane. Seriously, a 0mm stem length? Have Analog Cycles gone completely mad???

According to Analog Cycles, the 0mm Discord Creemee stem helps riders to achieve a higher and shorter cockpit than typical, and there is no doubt about that.

But what about the ‘twitchiness’ of the steering? After experimenting with zero millimetre bike stems for a while, the guys at Analog Cycles say the difference in twitchiness is negligible.

Today, we’re going to run the numbers and find out how short bike stems affect steering twitchiness, and I think you’ll be really surprised by the results.

But first, let’s dive deep into the role of bike stems.

Stem Length: Just One Part Of A Steering System

stem length

The 0mm Discord Creemee stem looks kinda crazy. Image: Analog Cycles

The stem on a bicycle is part of a steering system, and there are many aspects which affect the steering “feel”. These include your handlebar design, head tube angle, fork offset, trail, tyre width and whether you’re carrying any luggage on the front of your bike.

Arguably, the most important feature of a stem is that it positions your body in an optimised location between the wheels for the type of riding you do. That’s going to be different depending on the purpose of your bike. I recently discussed the optimal weight distribution in my Frame Geometry Masterclass – check it out HERE.

In short, bicycle fit is key here, and different frames have been optimised for a somewhat narrow range of handlebar widths and stem lengths.

Steering Characteristics

koga denham bars

The KOGA Denham Bars on my touring bike.

When we isolate other variables, there are three different measurements at the cockpit that tell us the most information about how the steering will feel.

The first is the width of your hands from the steering axis. The wider this distance is, the more steering leverage you will achieve, requiring less upper body force to change the direction of your bike. Steering leverage is particularly important for a bike with front luggage, as it will help you move multiple kilograms around the steering arc.

The second is the distance your hands need to move when turning your bars. The shorter this displacement is, the more ‘twitchy’ your steering will become. This just means that less steering input is required to change the direction of your bike. The downside to having more steering input or ‘twitchiness’ is that forces acting on the wheel on the ground will have a greater effect at your handlebars. That said, higher steering leverage can minimise this effect, so it’s only really a problem with narrow bars.

And the third is the location of your hands on the steering arc.

Steering Zones

stem length

Different bikes have different steering zones. These zones are the section of the steering arc that your hands travel along when changing the direction of your bike. It’s hard to definitively place an ideal steering zone because that depends on all of the other aspects of steering (eg. handlebar width, steering trail, luggage, intended use of the bike etc).

On most bikes, we want our hands to travel in the upper half of the steering arc, in front of the steering axis.

stem length

This is because we apply a forward force to our grips when we ride. Steering in the upper half of this arc allows our bars to self-centre as we’re always working against this forward pressure when we turn our bars. This self-centring is particularly important when you’re slowing down, as a bike that cannot self-centre under braking will pull the front wheel to the left or right.

In comparison, the lower half of the steering arc works with your forward grip force, resulting in less steering stability. A cruiser or Dutch bike is an example of a bike that steers in this steering zone, but given there is very little forward force on the grips, these bikes usually handle just fine.

However, it’s worth noting that the steering zones on these bikes are more a function of the overall bike design.

Long Stem vs Short Stem Stabilization

stem length

The 30mm Discord W(right) stem. Image: Analog Cycles

A shorter stem offers a more ‘direct’ or ‘neutral’ steering, as there is less left-to-right movement along the steering arc. This is nice because you can be a bit more intentional with the location of your centre of mass. The downside is that forces coming from the ground have a larger effect on the steering. That said, adding steering leverage to a bike by fitting wider handlebars will counter most of these forces.

In comparison, a longer stem offers more side-to-side movement on the steering arc. The result is more stabilization from ground forces – which is usually better with narrow handlebar bikes on softer surfaces like sand.

How Does Stem Length Affect Steering Speed?

I’ve run the displacement numbers on five different handlebars (to the centre point of your hand) to see how stem lengths change the ‘twitchiness’ of a bike. For the sake of today’s exercise, we’re going to assume that the reach to your handlebars from your seat is the same for a 0mm, 50mm and 100mm stem. This is technically possible by increasing the reach of a bicycle frame in accordance with the reducing stem lengths.

1. Turn a Ritchey Venturemax 44cm drop bar 20 degrees, your hands will move:
– 9.8cm with a 100mm stem
– 8.8cm with a 50mm stem (10.2% more twitchy)
– 8.1cm with a 0mm stem (17.3% more twitchy)

2. To turn a Ritchey Venturemax XL drop bar 20 degrees, your hands will move:
– 10.9cm with a 100mm stem
– 10cm with a 50mm stem (8.3% more twitchy)
– 9.4cm with a 0mm stem (13.8% more twitchy)

3. Turn a Curve Walmer 60cm drop bar 20 degrees, your hands will move:
– 11.8cm with a 100mm stem
– 11.1cm with a 50mm stem (5.9% more twitchy)
– 10.6cm with a 0mm stem (10.2% more twitchy)

4. Turn a Ritchey Comp 710mm flat bar 20 degrees, your hands will move:
– 10.47cm with a 100mm stem
– 10.14cm with a 50mm stem (3.2% more twitchy)
– 10.09cm with a 0mm stem (3.6% more twitchy)

5. Turn a KOGA Denham Bar 20 degrees, your hands will move:
– 11.32cm with a 0mm stem
– 10.94cm with a 50mm stem (0.9% more twitchy)
– 10.84cm with a 100mm stem (4.2% more twitchy)

Analysis

Ok, let’s make sense of these numbers.

When using narrow handlebars with a short stem, there will be much bigger changes to the twitchiness of the steering than if you use wide handlebars. The extreme case of switching from a 100mm stem to a 0mm stem on a 44cm wide handlebar will result in 17% more twitchiness, which is a lot. But if you’re switching from a 50mm to a 0mm stem on a flat bar bike, the difference will be almost impossible to detect (<1%).

In general, I suspect a displacement difference of less than 5% will likely go unnoticed. But when you climb into the double digits, that’s when the twitchiness of an ultra-short stem will become obvious.

Note: The sweptback nature of the KOGA Denham Bar results in negative effective stem lengths using 50mm and 0mm bike stems. That means that a 100mm stem is actually more twitchy than a 0mm in this case because it puts your hands closer to the steering axis!

Who Needs A Zero Millimetre Stem?

stem length

A 0mm stem paired with wide drops on a fat bike works out to be an ideal situation for an ultra-short stem. Image: Analog Cycles

A zero millimetre stem is going to be best used on a bike with:
(1) slow steering characteristics (ie. high trail), and;
(2) a handlebar with very little backsweep (as it puts your hands a long way behind the steering axis) – in other words, pair it with wide drop bars or an alt bar like the forward-reaching Surly Moloko, rather than my sweptback KOGA Denham Bars.

A good use case might be a mountain bike frame paired with wide drop bars like the photo above. Mountain bikes already have slow steering (high trail) so the slight increase in twitchiness will be largely offset. Mountain bike frames are also 50mm+ longer than a drop bar frame, so a zero millimetre stem will help claw back some of this reach.

Another use case might be to achieve a more upright bike fit on your current bike. The Discord Creemee stem will increase the stack by 80mm along with bringing the bars closer to your body. As long as you’re already using a wide handlebar, this short stem will not change the twitchiness of your steering by a whole lot.

Summary

If you switch from a 50mm-to-0mm stem, you’ll probably not notice any twitchiness difference using a flat or riser bar, but you will notice the extra twitchiness with narrower drop bars.

That said, bikes have been designed around an intended use, which is optimised around bike stems in a certain length range. I first and foremost recommend finding a bike that is the right fit so you can match the stem length with the rest of the steering characteristics.

If you’re looking to ‘hack’ a bike that’s technically too long, fit drop bars to a mountain bike, or achieve a shorter and higher handlebar set up – a short stem is not as crazy as it sounds. Preferably you would pair the short stem with a wide handlebar with more leverage to reduce the impact of the forces coming from the front wheel.

Also, make sure your hands are in front of the steering axis to take advantage of the extra stabilization of steering in the upper half of the steering arc.

Learn All About The Basics of Frame Geometry HERE

The post Steering Masterclass: How Stem Length Affects Your Steering Speed appeared first on CyclingAbout.com.


The Comprehensive Guide To Bikepacking Racing: Learn Everything In One Book

$
0
0

The Tour Divide, the Trans-Am and the Transcontinental Race. These are three iconic races you’ve probably heard of, but they are just the tip of the iceberg. These days there are literally hundreds of events to take part in. But let’s say you want to get into bikepacking racing. Where do you start?

You start with the book, Touring With A Sense Of Urgency.

The Comprehensive Guide To Bikepacking Racing

Bikepacking racing is a new and unique skill set, thanks to its self-supported nature. You ideally need to understand a lot about bikes, equipment, nutrition, hydration, training, psychology, weather conditions and sleep management. It takes years to build a sound understanding of all of these topics.

After years of experience, ultra-athletes Jesse Carlsson and Sarah Hammond have put together the book they wish they had before their first bikepacking race.

Here’s why Sarah and Jesse’s book is the best information you’ll find on bikepacking racing:
1.
They know more about bikepacking racing than almost anyone else on the planet.
2. They’ve run one of the only training courses specifically for bikepacking racing.
3. They’ve played a big role in preparing other Australian ultra-athletes to win events like the Tour Divide and Trans-Am.
4. They’ve designed and tested numerous bikepacking-specific race bikes under the brand Curve Cycling.
5. Jesse is the mastermind behind Australia’s two biggest bikepacking races – the Indy Pac and Race To The Rock.
6. Amongst their palmares are 4x Race To The Rock wins, a Trans-Am win, a 2nd place in the Tour Divide (behind the unstoppable Mike Hall) and a 3rd place in the Indian Pacific Wheel Race (at the time it was tragically cancelled with only a few hundred kilometres remaining).

With this kind of background, it is not surprising Jesse and Sarah spend half their life talking about bikepacking. I’ve personally seen them pour huge amounts of time into immediate responses to Instagram DMs in between sips of beer.

“We get asked countless questions by people interested in bikepacking racing, bike touring and flashpacking. At times the volume of questions has been incredibly overwhelming. Sometimes there just aren’t enough hours in the day to respond to everyone.”

The 290-page book they’ve just finished piecing together not only answers everything they’ve ever been asked, but it fills any possible information voids by laying out their complete approach to racing. I’ve just finished reading the book cover-to-cover and I’m certain there is no stone left unturned. This really is the comprehensive guide to bikepacking racing!

You can get a digital copy of their book for AU$35 (US$23/€21/£18 at the current exchange rate).

Book Chapters and Page Samples

Chapter 2: What Is Unsupported Bikepacking Racing?
Race Tracking
Why Is Bikepacking Racing Special?
Why Do We Love Bikepacking Racing

Chapter 3: DO YOU REALLY WANT TO RACE?
Why Do You Want To Race?
How to Choose a Race
Working Out a Budget for Racing

Chapter 4: TRAINING FOR BIKEPACKING RACES
Bike Fitness
Mental Strength
Experience

Chapter 5: TRAINING PLANS FOR BIKEPACKING RACING
Strength on the Bike
Power
Recovery

Chapter 6: RACECRAFT
Daily Distance Target
Sticking to Your Plan
Getting the Fastest Time Possible

Chapter 7: EVERYTHING YOU NEED TO KNOW ABOUT SLEEP AND THE LACK THEREOF
How to Stay Awake
Discover the Beauty of Power Naps
Efficient Sleep Systems

Chapter 8: COURSE RESEARCH
Race Logistics
Elevation Profiles

Chapter 9: LET’S RACE!
Mental Preparation
Race Day

Chapter 10: THE LONG HAUL – BEYOND DAY THREE
The Emotional Rollercoaster
The Seven Day Barrier – Resisting the Urge to “Just Finish”
Various Health Issues

Chapter 11: The Recovery
Physical Recovery
Mental Recovery
Tips to Help with Recovery

Chapter 12: Race Nutrition
Electrolytes
Vitamins, Minerals and Supplements
Important Foods

Chapter 13: Water
Water Consumption for Experienced Racers
Water Storage
Water Treatment

Chapter 14: THE PACK LIST
Clothing
Sleeping Gear
Tools and Maintenance
Spare Parts and Repairs

Chapter 15: HOW TO PACK YOUR BIKE
General Principles
Bike Bags

How to Pack a Bike

Chapter 16: SELF CARE AND AVOIDING OR MANAGING COMMON INJURIES
Self Care Routine
Saddle Sores
Hand Damage
Neck Issues
Hot Foot
Knee Pain

Chapter 17: BIKE SET-UP
Tyres
Aerobars
Saddle

“Touring With A Sense of Urgency” Can Be Downloaded HERE

The post The Comprehensive Guide To Bikepacking Racing: Learn Everything In One Book appeared first on CyclingAbout.com.

23 Insane Touring Bike Features That Need To Be Seen To Be Believed

$
0
0

I’ve been documenting the technical side of touring bikes for about a decade, and in my time have seen some mind-blowing touring and bikepacking features.

I’ve just spent the week scouring the internet (thanks COVID!) so that I can take you on a tour of the most insane touring bike features ever conceived. We will start out with lots of nifty, but uncommon bike features that I really appreciate on my various bikes. But you’ll really want to stick around until the end of this video as these features are going to get seriously out of hand.

Let’s do it!

23. Schmidt SON SL Dynamo Wiring

One of the coolest features you can find on a premium touring bike is Schmidt SL dynamo wiring. With the matching SL dropouts, all you need to do is fit your front dynamo wheel to your bike and your dynamo system is all wired up.

While plugging in a dynamo cable really isn’t actually a big deal, if touring forks are already equipped with internal dynamo cabling, we may as well add the SL connectors to complete the incredibly clean look.

22. Internal Dynamo Cable Routing

After the dynamo cable has run up the inside of your fork, it makes sense to keep the internal wiring right through to the back of the bike. This is actually not as hard as you’d think given there are holes in the ends of most frame tubes.

The best touring racks use hollow steel tubes, and this is a great opportunity to wire your rear dynamo light cable inside the rear rack. I have drilled a small hole at the top of my rack so that my cable is hidden all the way to my light!

21. Guided Internal Cable Routing

On the subject of internal routing, another very neat feature is guided internal cable routing for your brakes and gears. This not only looks incredible, but it silences your cables on bumpy roads and keeps them free from debris too.

It’s a pretty labour intensive process given the need to drill holes in the frame, install long metal tubes and finish off the surface – but it’s definitely one of my favourite features of the KOGA WorldTraveller.

20. Direct Mount Frame Packs

Direct mount frame packs have been around for a while in the handmade bike community, but it’s only recently that major adventure bike brands Salsa, Marin and Niner have committed to this setup. Other than looking super clean, these bags are actually quite functional as velcro bag straps usually like to scratch your frame when the mud and grit inevitably works its way in.

19. Anodized Finishes: Frames, Fenders, Rohloff Hubs

Anodizing is a surface treatment process which allows you to add colour to a bike without adding any extra weight – plus it’s more durable than paint and less prone to scratching too. The most incredible anodizing is done by Firefly bikes, just check out how pretty all these designs are!

Frames aren’t the only thing we can anodize though. You can buy many components in anodized colours, and you can even take your fenders and Rohloff hub shell to an anodizing specialist to make something truly unique.

18. Custom Saddles

It’s safe to say that artist Kara Ginther has carved out a niche for herself. While motorbike and horse saddles have long been decorated, it only seems reasonable that somebody carves up your favourite bike saddle too. According to Kara, nothing “carves as nicely as a Brooks saddle”.

Kara has gone on to create a very impressive resume of saddles, from a Japanese “Great Wave” saddle design right through to pretty much anything you can possibly imagine.

Another artist doing cool things with saddles is Mike Peel in Australia. He re-covers many popular saddles with incredible designs and colours. His combination of perforated hole sizes, raised edges and subtle colours will add something truly special to your bike.

17. Carbon Fibre Parts

Carbon makes for a great frame and fork material, but did you know you can also get custom-made carbon touring accessories?

This is a Calfee carbon fork with integrated front rando rack. The rack adds just 70 grams to a fork and Calfee can actually build these into your existing fork. Another popular touring component that can be made using carbon is your fenders.

16. Rohloff and Pinion Gearbox 3000% Drivetrain

Let’s shift gears a bit. Don’t know whether to pick a Pinion 18-speed gearbox or Rohloff 14-speed hub on your next touring bike? Well, why not combine both! That way you can have 252 individual gears and you can finally pedal your buff legs at 128KPH!

Ok, this is technically an April Fools joke, but you could actually make it happen. There are a few people on earth who would actually pedal fast enough for this drive system – Denise Mueller-Korenek and Eric Barone are two that I can think of.

But seriously, you can extend the range of a Rohloff hub by fitting a Schlumpf two-speed crankset. These nifty cranks have an overdrive gear of 1.65 or 2.5 times, which results in an insanely wide gear range of 868% or 1315%!

15. Custom Aerobars

Aero bars are gaining in popularity on bikepacking bikes, but what you may not realise is that for ultra events, and adventure riding in general – aero bars aren’t really about speed. Most users will agree the biggest advantage is the extra comfort they offer by taking the weight off your hands and wrists, and changing the angle of your back and neck.

If you know your exact bar height and reach, why not integrate the arm pads into a custom stem cap… or a fork for that matter, in the case of the above Victoire build!

A really neat bikepacking accessory that can be integrated into a custom aero bar is a magnetic hydration pack hose connector. This custom accessory by Fern Bicycles allows your hydration bladder hose to always be at the ready.

14. Custom Integrated Handlebar and Stem

Let’s hang out at the front of the bike a little longer and ogle over some custom bar and stem combos. It turns out I’m not the only person who can design a handlebar to their every specification – anybody can! Dekerf Cycles and Moonmen Bikes make some amazing custom handlebars.

James at Black Sheep also constructs some very appealing titanium bar and stem combinations for touring, adjusting for all the dimensions, backsweep and angles you prefer. But if you throw enough money at him, James can even integrate the handlebar, stem and fork together into one incredible work of art!

13. Titanium Suspension Fork

James doesn’t only make incredible handlebars, he also makes custom leaf-sprung titanium forks that require zero maintenance, which is perfect for the backcountry or an extended tour. The only fork option which operates using the same principles is the incredible Lauf carbon suspension fork.

12. Couplers and Frame Breaks

When you order a custom frame, you are often given the option for various coupler and frame-break designs. While these options are rarely cheap, the idea is that you can break your bike into smaller pieces so that you can fly without oversized baggage fees – hopefully, recouping the upfront cost over time.

One of the most impressive bikes that will fit into two standard-size cases is this Moonmen tandem fat bike! It boggles my mind that all that titanium, rubber, leather and carbon fits into two tiny boxes.

But couplers don’t have to just stop at your bike frame. You can drop $900 on a coupler stem which will turn taking your bars off your bike from a 60-second job to a 10-second job! If you do this 100 times in your life, you’ll save an hour and 23 minutes. If we assume a nice stem is $700 cheaper, you’re looking at a stem feature that costs close to $1000 per hour to use!

11. Custom Racks

Custom racks always look pretty, but they often improve on standard designs too. You can integrate dynamo light protectors, baskets, bottle cage mounts and bag supports for bikepacking bags. It gets really fancy when you start to permanently braze the frame, racks and fenders together! Or simply build the rack into the fork and squeeze a custom bag inside.

10. Steering Locks

If you carry a front-load on your bike, you’ll have noticed that the front wheel likes to turn when you park your bike. There are a few aftermarket solutions to this problem including the SteerStopper and Hebie stabilizers, but none is as elegant as a stainless steel pin that pierces right through your fork and head tube!

9. Integrated Frame Lock

There are a few completely ridiculous things on this list, but the next few features take things to another level.

Tony from Breadwinner Bikes takes the idea of a steering lock much more literally! He has managed to use his custom bike frames, stems and forks as the lock cylinder and body. Simply slip the key into the side of your stem to free your bike. As the lock integrates with the steerer tube, this stops the wheel from turning when the bike is locked.

8. Gold Plated Rohloff Bike Chain

Image: Velo Ciao

Before Rohloff created their revolutionary 14-speed gearbox, they actually specialised in making chains. And in the late-1980s, they did a very limited run of 24-carat gold plated chains! You can sometimes come across these chains selling today for a mind-boggling €1500…

… if only there was a hub that was the perfect match for a gold-plated chain.

7. Gold-Plated Rohloff Hub Shell

Well, there is one 24-carat gold plated Rohloff hub in existence. It was constructed by Bernhard Rohloff himself – the mastermind behind the Rohloff gearbox – at the Eurobike trade show in 2008, and it signified the 100,000th hub Rohloff had sold.

55 Rohloff owners who had completed more than 60,000km on their current hubs went into a draw to win this gold hub. The winner of the competition then went on to auction the only gold-plated Rohloff hub off for charity. What a legend!

This Rohloff is incredibly rare and blingy, but what if gold ain’t your thing?

6. Custom Hub Shells For Rohloff and Schmidt Hubs

Image: Phil Wood

Don’t worry because Phil Wood is here to save the day!

You no longer have to deal with ‘common-folk’ hub shells from Rohloff and Schmidt, Phil Wood is going to help you stand out from the crowd with a set of custom-made polished hub shells. Other than the incredible aesthetic, the only reason to invest in new hub shells is so you can use lower or higher spoke counts than Rohloff or Schmidt themselves offer – that’s 24 spokes per wheel minimum and 48 maximum.

5. Wooden Touring Bikes

Ask anyone who builds wooden bike frames, and they would not think there is anything crazy about their construction material. Wooden frames often offer the same stiffness as carbon, at a similar weight to steel (2.3kg/5lb), and they actually prove to be stronger than steel in many load tests. The key attribute to wood is that it absorbs more vibration than any other typical frame material, which makes for a silky-smooth ride.

Wooden frames are usually constructed by cutting two matching frame halves, hollowing out the tubes (sometimes with a CNC machine, other times by hand) and then glueing the pieces together. The ride characteristics can be refined for the customer by selecting the appropriate wood types and wall thicknesses for the rider’s weight and riding style.

I’ve actually spent some time on a Renovo wooden bike and I can honestly say it offered a very dreamy ride.

4. Four-Wheel Antarctic Adventure Bike

What is the ultimate bike for cycling to the South Pole? Probably something like this Carver fat bike! In fact, this incredible piece of titanium machinery literally visited the most southern point on Earth.

The bike is running four 5.5″ tyres at 2spi(!) each providing massive float across polar terrain. A driving chain runs between the rear tyres to a custom-made cog; the front and rear hubs are actually all connected together so the wheels spin at the same speed. A Pinion gearbox at the crankset provides 18-gears that are enclosed in a sealed oil bath and there is only a front disc brake to stop this bike.

It’s definitely a crazy build!

3. StringBike

Image: StringBike

I almost fell off my bike when I first saw a guy touring on a StringBike! I was overtaking him at the time and looked down to see two weird alien arms moving in a very bizarre way. I immediately struck up a conversation with the guy and made him pull over so I could take a closer look.

The StringBike uses two crank pulleys and Dyneema ropes to drive the rear wheel, offering 19 non-overlapping gears spread over a 350% range. You can change the gears with a simple twist forwards or backwards at the grip. The main advantage of this design is that it is silent and requires little maintenance in all-weather conditions. That said, given all the proprietory parts, I don’t think we’ll see StringDrive on many touring bikes in the future.

2. Rodriguez 8-Ball Convertible Tandem

Image: Rod Bikes

As someone who has cycled across multiple continents on a tandem bicycle, let me tell you – it’s one of the best ways to explore the world with a partner or friend! These days my tandem gets very little use, but perhaps I would still be riding it if I had selected Rod Bikes for my custom tandem build…

This Pacific NW bike company specialises in convertible tandems from two riders to one… or four-to-one for that matter! By very cleverly locating S&S couplers so that you can remove sections of the bike, you can own one bike that adapts for multiple riders in less than 15 minutes!

1. Moots Fat Bike With Liquid Storage

moots snoots

Image: LaceMine29

Here we go…

The most insane bike feature I’ve ever seen on a touring bike has got to be liquid storage! In the case of this Moots fat bike, the liquid can be stored inside the titanium fork legs, the frame downtube, and the entirety of this trailer! If you look carefully, you will see the input screws at the highest points of the bike, and small brass taps at the lowest.

This fat bike was originally designed to cross some of the most remote places on Earth, which is why you’ll find more than 6-litres of fuel storage in the custom titanium trailer alone. But when not out on epic expeditions, I’d imagine this bike would make a pretty amazing party-bike filled with whiskey!

Bonus: Titanium Shot Glass Bell

Hey, and if whiskey is your game, those 6-litres of titanium-stowed deliciousness need to be consumed out of the right cup. The best cup in this instance is the removable titanium bell dome from a King Cage bell! You can literally buy these shot glass bells for US $40…

Let Me Know The Craziest Bike Features You’ve Seen!

The post 23 Insane Touring Bike Features That Need To Be Seen To Be Believed appeared first on CyclingAbout.com.

Gravel and Touring Bikes for Smaller Cyclists: XXS, XS, 38cm, 42cm, 44cm

$
0
0

Finding XS touring bikes can be hard work. I know because I fall on the other end of the spectrum; I’m two metres tall and am always looking for bikes big enough.

With more than 30 extra-small touring and gravel bikes listed below, there may well be an off-the-shelf bike option for you, without resorting to a custom-made frame – provided you’re not smaller than 147cm or 4ft10. But as you’ll soon find out, this will largely depend on your inseam length.

Note: This article was originally published in Jan 2015, but has been updated in May 2020. 

Bikes For Smaller Cyclists: Standover Height

Standover height

A diagram showing the typical location of a standover height measurement.

The standover height is one of the most important measurements for smaller riders. It is the measurement that tells us whether we can easily stand over the top tube with our feet flat on the ground, but it also gives us a good indication for how easy it will be to get on and off a bike.

Some standover measurements are made at the mid-point of the top tube, but the majority are calculated 50mm in front of the bottom bracket shell (see diagram above).

This list will have touring bikes with a ‘comfortable’ standover height for riders down to a 69cm/27″ inseam. But with the absolute minimum clearance, you could have an inseam of 66cm/26″ on the smallest models and still be fine (just).

Ideally, you’ll want an inseam 2cm/1″ longer than the measured standover height. If you require lower standover heights than those listed in this resource, please make sure to check out my list of every step-through touring bikes.

Bikes For Smaller Cyclists: The Bike Fit

xs touring bikes

Holly and her custom-built XXS Enigma touring bike. Image: Nowhere2far

Unless you’re really comfortable on your current bike, I’d recommend getting a bike fit at a shop before buying your next one. Not by the work experience kid, but by somebody who has a long history of making people comfortable on their bikes.

At a cost of roughly US $100, a bike fit consultation will have you set up on a stationary bike. The bike fitter will ask you how often you ride, about the type of riding you do, and about any riding goals that you may have. They’ll also incorporate some flexibility and strength tests in there too.

The measurements that come out of your bike fit session will allow you to be extra comfortable on your new bike. Provided you collect the ‘stack’ and ‘reach’ data from your bike fitter, you’ll even be able to use this resource to find your next bike!

Stack and Reach

wpid-Photo-20140818121611

The universal sizing metric that I’m using to compare small bikes is called ‘stack’ and ‘reach’. The reason it’s the best sizing metric is that it can inform us about how long and tall a bike frame is. Simply measuring the seat tube or top tube doesn’t take into account the bike’s angles, head tube length or fork length.

Most bike sizing is based on the seat tube length. Some manufacturers will tout their bikes as 42cm or XXS, but when we calculate the ‘stack’ and ‘reach’ numbers, you’ll see that some bikes are actually much taller and longer than others in the same size. Just take a look below – some “50cm” bikes are actually smaller than other “44cm” bikes! Don’t get caught out…

You won’t need to focus too much on the ‘reach’ numbers. The difference between bikes is usually no more than 20mm and we can easily accommodate this length discrepancy by swapping the handlebar stem. It’s not a huge deal at all.

But the ‘stack’ will give you a good idea for how high your handlebars will sit, so if you’re after an upright ride, look for the high stack figures.

If you’re interested in learning all about the frame geometry of a bicycle, click HERE.

26″ and 650B Wheels On Small Bikes

xs touring bikes

A custom Surly Straggler 38cm built up using 650B wheels. Image: Keep Pedalling

The smallest touring and gravel bikes in this list employ smaller diameter 26″ or 650B wheels. These wheels are more proportionate to smaller bike frames (when compared to 700C) and offer the advantages of less toe-overlap and a lower standover height, in particular.

To put it simply, extra-small bikes are ideally designed around smaller wheels to minimise frame geometry compromises elsewhere on the bike.

XS Gravel Bikes (Light Touring) By Standover Height

xs touring bikes

Salsa makes two of the smallest gravel bikes available – this is the 49.5cm Salsa Vaya.

Knolly Cache 49.5cm: Reach 385mm / Stack 559mm – Standover 646mm
Salsa Journeyman XS (650B):
Reach 364mm / Stack 528mm – Standover 658mm
Salsa Vaya 49.5cm: Reach 355mm / Stack 543mm – Standover 660mm
Evil Chamois Hagar S:
 Reach 400mm / Stack 575mm – Standover 662mm
Devinci Hatchet XS: Reach 376mm / Stack 528mm – Standover 676mm
Specialized Diverge 44cm: Reach 357mm / Stack 568mm – Standover 683mm
Felt Breed 47cm (650B): Reach 374mm / Stack 544mm – Standover 687mm
Marin Nicasio (650B): Reach 350mm / Stack 535mm – Standover 697mm
Norco Search XR 45.5cm (650B): Reach 355mm / Stack 504mm – Standover 701mm
Merida Silex XS: Reach 379mm / Stack 588mm – Standover 701mm
Cannondale Topstone XS: Reach 368mm / Stack 518mm – Standover 703mm
Surly Straggler 38cm
Reach 368mm / Stack 518mm – Standover 704mm
Niner RLT9 47cm: 
Reach 362mm / Stack 535mm – Standover 705mm
Kona Rove 46cm: Reach 370mm / Stack 510mm – Standover 707mm
All City Space Horse 46cm: Reach 359mm / Stack 493mm – Standover 709mm
Marin Headlands 49cm: Reach 370mm / Stack 550mm – Standover 711mm
Giant Revolt XS: Reach 373mm / Stack 548mm – Standover 714mm
Jamis Renegade Expat 44cm: Reach 351mm / Stack 495mm – Standover 715mm

XS Touring Bikes By Standover Height

xs touring bike

The smallest touring bike by standover height is the XS Marin Four Corners.

Marin Four Corners XS (650B): Reach 377mm / Stack 560mm Standover 667mm
Co-Motion Pangea 44cm (26″): Reach 356mm / Stack 514mm – Standover 685mm
Surly LHT 42cm (26″): Reach 367mm / Stack 497mm – Standover 702mm
Salsa Marrakesh 50cm: Reach 361mm / Stack 540mm – Standover 704mm
Co-Op Cycles ADV 3.1 (650B): Reach 368mm / Stack 532mm – Standover 709mm
Trek 520 48cm: Reach 368mm / Stack 540mm – Standover 713mm
Gunnar Grand Disc 48cm (26″): Reach 363mm / Stack 513mm – Standover 716mm
Soma Saga 44cm (26″): Reach 359mm / Stack 527mm – Standover 719mm
Thorn Nomad MK3 (26″): 379mm / Stack 529mm – Standover 725mm (mid top tube)
Jamis Aurora 47cm: Reach 371mm / Stack 518mm – Standover 726mm
Kona Sutra 47cm: Reach 374mm / Stack 549mm – Standover 745mm

XS Off-Road Touring Bikes By Standover Height

One small and one extra-small Salsa Fargo all loaded up.

Salsa Fargo XS: Reach 350mm / Stack 594mm – Standover 690mm
Salsa Cutthroat 52cm:
 Reach 358mm / Stack 585mm – Standover 697mm
Surly Bridge Club XS (27.5″): Reach 376mm / Stack 553mm – Standover 709mm
Breezer Radar Expert XS: Reach 393mm / Stack 576mm – Standover 711mm
Surly Troll XS (26″): Reach 371mm / Stack 551mm – Standover 720mm

Check Out The Step-Through Touring Bike List HERE

The post Gravel and Touring Bikes for Smaller Cyclists: XXS, XS, 38cm, 42cm, 44cm appeared first on CyclingAbout.com.

How Would I Build A Custom Round-The-World Touring Bike In 2020?

$
0
0

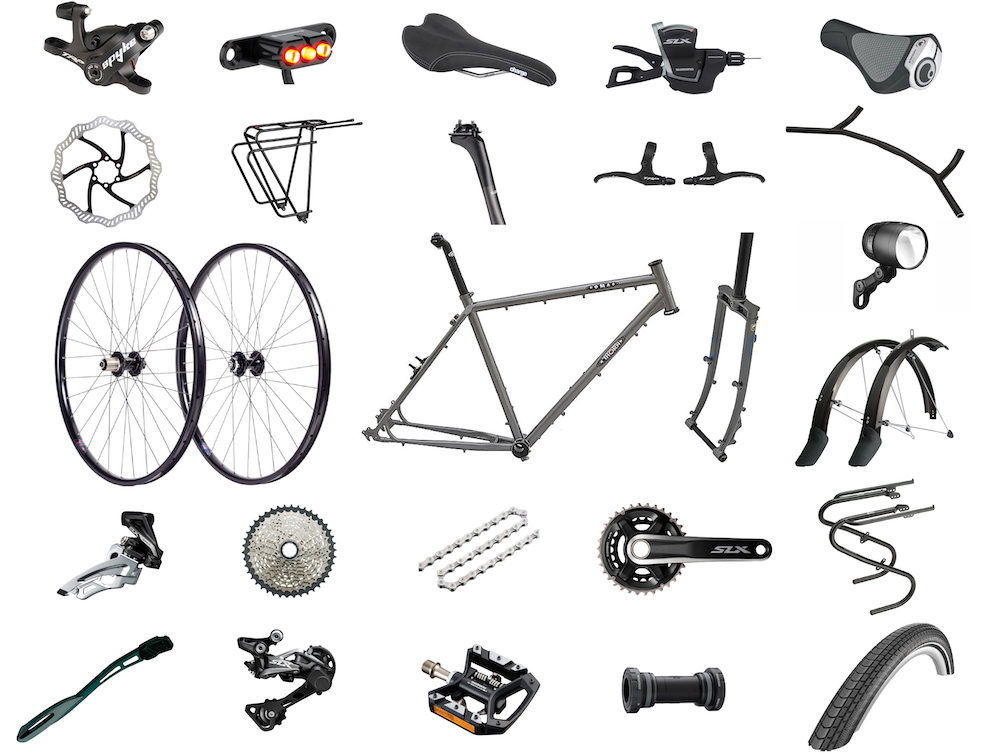
Last year I wrote an article explaining how I would build a custom round-the-world touring bike. It was based on the most well-proven and best-designed components that existed in 2019. A whole bunch of people actually went out and built the bike, and as far as I’m aware, are absolutely loving it!

After agonising on this for months and months (seriously!), I’ve got a completely new build for 2020. Surprisingly, about 50% of the build has changed, as new products have been released while others have started going out-of-date.

This can be considered a ‘dream build’, but I’ve importantly factored in:
Price – I’ve selected parts that offer high comfort, performance and durability without necessarily being the most expensive.
Product availability – You won’t find particularly obscure or custom parts here; apart from the frame, the parts are available in many regions.

This build is designed to handle rough roads and will support a massive amount of gear if you need. It’ll crush famous routes like the Pamir Highway, Peru Divide or Mawson Trail, but will also roll fast enough to cover the bike paths of Europe. I think it’s the perfect all-rounder for a round-the-world trip.

The article is pretty heavy reading, as there was a lot of thought that went into every component, and it was important for me to share my technical justifications! If you want to properly understand the concepts in this article, check out my book, the Touring Bicycle Buyer’s Guide which starts at the beginning.

Round-The-World Touring Bike Frameset – $863 (Ex VAT)

Touring Frameset

Frameset: Thorn Nomad MK3 – £818 (US $863 or €920)

People have been riding the Thorn Nomad MK1 and MK2 around the world for years and years – it’s an incredibly well-proven steel touring frameset. The MK3 update has brought the Nomad into the 21st century with new features including disc brakes (yep, a bit late to the party), 26/27.5/700C wheel size compatibility, a kickstand mount, a front thru-axle fork and a split in the rear triangle for belt drive.

The frame has a classic touring geometry with very long chainstays to keep your loaded bike nice and stable. It’s designed to be laterally stiff, using some of the biggest oversized steel tubes seen on any touring bike. There are 12 sizes available, including two step-through frames for riders with shorter inseams. You can get the frameset in a grey, red, green or blue colourway.

If you so desire, the Nomad will fit rim brakes with 26″ or 27.5″ rims. The frame is, of course, derailleur compatible, or if you have deeper pockets, it is Rohloff hub ready with an eccentric bottom bracket shell to tighten the chain or belt.

Yep, a belt-compatible Thorn bike, I never thought I’d see the day! This news will be shocking to you if you’ve ever read Thorn’s publication, “Living With A Rohloff Hub”.

The steel fork uses a classic twin-plate crown to maximise the tyre clearance. It comes in three different offsets, which allows for more toe clearance and better optimisation of the steering speed for the smaller frame sizes. The thru-axle size is 15x110mm, which is unusual for a touring bike (12x100mm would’ve allowed Shimano dynamo hubs to fit), but in terms of performance, there are no downsides to these hub dimensions.

Ok, so there are lots of cool features, but what about the geometry?

There are two different frame geometries for the Nomad MK3 – a shorter and taller frame for drop handlebars (“S” sizing) and a longer and lower frame for flat handlebars (“L” sizing). While Thorn keeps many aspects of the frame geometry and sizing a secret, I’ve managed to squeeze them for a few more clues which have allowed me to manually calculate the missing numbers. This has got to be peak bike nerd, but I was never going to recommend a bike without the numbers first!

NOTE: These numbers are my estimates derived from CAD software.

As you can see in the graphs above, the ‘reach’ numbers are within a very narrow range. Best-practice frame design will see the bikes get longer in proportion to their height, typically in accordance with the category trend lines – check out the Trek 520 for some proper textbook sizing. With bike sizing to the right of the category trend line, it means that the Nomad MK3 is not super upright, especially if you’re on the shorter side. You’ll, therefore, have to rely on headset spacers for an upright bike fit, which is fine, but a little bit ugly, in my humble opinion.

Strangely, the 40S and 47S step-through frames are above the category trend, meaning they’re very upright for their size.

The steering speed (trail) falls within 64-68mm on the flat bar frameset, which is on the fast side for a touring bike with a high leverage bar, but it’s also not unusually fast. The drop bar framesets have an almost identical trail (64-71mm) to the very well-proven Surly Disc Trucker.

Headset: FSA Orbit XLII – Included with the frame ($59 on Amazon)
I’ve been using FSA Orbit headsets as long as I’ve been riding bikes. They offer excellent bearings and extensive seals to keep water and debris from affecting the performance of the headset.

Wheelset – $755

Front Hub: Shutter Precision PD-8X 15mm Boost Dynamo Hub – $210
The SP dynamo hubs offer excellent reliability at literally half the cost of a Schmidt SON28! Read more about dynamo hubs HERE.

Rims, Spokes, Rear Hub: Velocity Cliffhanger 27.5″ – $625 with SP PD-8X Dynamo Hub
This wheelset is a very solid option for touring. It offers super-stiff touring rims, a 25mm internal rim width (suitable for 2.0-2.5″ tyres), Sapim Leader spokes and tubeless compatibility with the Velocity rim strips. The overbuilt rear hub uses four sealed bearings to keep everything running smoothly. Read more about the best touring rims HERE.

Option B: Check out Ryde Andra 40 rims, Sapim Leader 2.3mm spokes and a Velocity ATB rear hub ($63, $28, $150). This wheelset will be stronger again and it will save you $174 – but the rims are harder to source outside Europe, they have silver machined sidewalls and you lose the tubeless compatibility. Make sure to factor in the extra wheel building costs too; the Velocity wheelset includes the labour.

Tyres: Schwalbe Almotion 27.5 x 2.15″ – $130/pair on Amazon
I’ve been blown away by the capability of the Almotion tyre. It’s the fastest touring tyre on the tarmac (even in the 2.00-2.15″ range) and it’s tough enough for the roughest dirt roads. The wide widths offer extra comfort and I’ve found them to be super puncture resistant too. I get 15,000km+ out of a set provided I switch the rear tyre to the front at about 10,000km. I’d go the Vittoria Mezcal 2.25″ if you’re after extra grip off-road, and the Marathon Mondial for a super durable all-rounder. Read more about Schwalbe touring tyres HERE or durable bikepacking tires HERE.

Drivetrain – $427

Crankset & BB: Shimano SLX M7000 36/26t – $129 and $21 on Amazon
I have controversially selected an 11-speed 2X drivetrain for this build, which goes against the typical 3X setup on most touring bikes AND the current trend for 1X drivetrains.

There are many reasons why:
1. There are smaller jumps between gears compared to 1X. When you go up and down through your gears, there is a change in cadence for every shift you make. The best way to explain this is to imagine you’re going 15km/h and pedalling at 90RPM. If you shift to a harder gear on a 2X11 bike, you’ll still be going the same speed but you’re now pedalling at 80RPM. This works out to be 77RPM on a 1X12 drivetrain. The 3RPM difference may not sound like a lot, but it can be annoying on flat roads where maintaining your preferred cadence results in bigger changes in speed. I’ve calculated that 2X11 and 3X10 offer the exact same gear jumps, but 2X10 and 1X12 offer significantly bigger jumps.
2. 2X has a wider gear range than 1X (17-91″ for the lowest and highest gears). This 528% drivetrain achieves a climbing gear that allows a good cadence at 5km/h (3mph) for the steep hills, but also a top gear that will have you pedalling at 43km/h (28mph). These are the exact gear ratios I personally use to travel the world. If you want even lower climbing gears, you can spec 34/24t chainrings which will go down to a 16″ climbing gear – that’s super low!
3. A more efficient drivetrain. With the straighter chain lines of 2X, you’ll achieve a higher drivetrain efficiency (see the test HERE) compared to 1X.
4.
 Reduced drivetrain wear. With the straighter chain lines of 2X, you can use the smallest chainring with the biggest rear cogs, and the biggest chainring with the smallest rear cogs – the result is better chain-to-tooth interactions.
5. Great quality components. Shimano has just ditched 3X from its latest Deore groupset. That means that Shimano Alivio is now the highest-quality 3X option – which is ok, but a little lacklustre compared to the Deore and SLX we’ll use on this build.
6. Availability is very good. Bike shops in capital cities around the world stock replacement parts to service their existing customers. Mountain bikes at the $1000 price point now come with 11-speed SRAM NX and GX, and will soon have Shimano Deore M5100 drivetrains too. Gravel bikes currently use 11-speed SRAM Apex/Rival/Force and Shimano GRX, which have chain and cassette components that are also interchangeable with Deore/SLX.

Cassette & Chain: Shimano SLX M7000 11-42t & Shimano HG54 – $58 and $29 on Amazon
These drivetrain parts are not particularly expensive, they are longer-lasting than 8/9/10-speed, and are interchangeable with SRAM and Shimano 11-speed parts found around the world.

Front Derailleur: Shimano SLX M7020-H– $32 on Amazon
This derailleur offers very high performance at a reasonable price. The Thorn Nomad MK3 is routed specifically with a high-clamp, side-pull front derailleur in mind, which gives the best possible rear tyre clearance.

Rear Derailleur: Shimano SLX M7000-GS – $59 on Amazon
This SLX derailleur is tough as nails with super crisp shifts. The ‘shadow’ design sits the derailleur in-board which provides excellent clearance from rocks, and the clutch feature allows you to keep the chain taut on bumpy roads.

Pedals: Shimano XT T8000 – $99 on Amazon
I have nothing but good things to say about Shimano XT pedals. I’ve worn through two sets, each clocking an outstanding 50,000km (and they still spun perfectly after a re-grease). The T8000 is clip-in on one side, but flat on the other. It’s weighted to prioritise clipping in, so I never have to find the ‘right’ side. If you like flat pedals, check out the XT M8140 flat pedals. If you like a dual entry clip-in pedals, check out the XT M8120 trail pedals.

Cockpit – $393

Handlebars: KOGA Denham Bars – $95 (HERE or HERE)
I designed the KOGA Denham Bars, so they’re obviously the ultimate for touring! My bars have a bullhorn section which lets you mimic the ‘hoods’ of a drop handlebar (making your body more aerodynamic) and they also feature a wide grip section for the best bike control with front luggage. You can read about the thinking that went into the Denham Bar design HERE.

Grips: Ergon GC1 – $29 on Amazon
This grip is developed specifically for backwards-swept handlebars. The grip surface is designed to spread your upper body weight over a larger surface area, minimising hand numbness on long rides – and it really works! There’s a raised bulge in the middle of the grips that cups nicely below your hand; my grips honestly feel custom-moulded to my hands. These grips are quite long, so I normally lop 10-20mm off each side so that there is more real estate at the base of my bullhorns. Read more about grips HERE.

Stem: Zoom Black 4-Bolt – $16 on Amazon
I don’t find a big difference between stems once you get to a certain quality. Anything 4-bolt with nice hardware is good enough for me. If you’re riding rough roads and want a little extra comfort, take a look at the Redshift ShockStop suspension stem – I’ve just fitted one to my bike, so I’ll let you know how it goes in a few months.

Shifters: Shimano SLX M7000 2X11 – $86 on Amazon
I’ve specced the latest Shimano SLX trigger shifters on this build which are super reliable and easy to use. They also pair very well with the bullhorn section of the KOGA Denham Bars allowing for ample hand space.

Brake Levers and Calipers: TRP ML800 and TRP Spyke – $32 and $135 on Amazon 
I’ve chosen cable disc brakes, even though I swear by hydraulic. Why? The difference in power is there, but it’s not huge. Cable disc brakes will give you peace of mind in remote areas and it’s easy enough to run some lubricant down the cables periodically to keep them snappy. The TRP Spyke calipers are definitely the pick of the bunch as they pull both brake pads in like a hydraulic caliper. Personally, I ride with Shimano XT hydro brakes which have worked flawlessly the last few years, as long as I give them a yearly bleed. I’ve been able to find people to carry out hydraulic brake bleeds in any major city. If you’re happy to accept the risk of a potentially temperamental hydro caliper, the XTs are the go. You can read more about touring brakes HERE.

Saddle and Post – $196

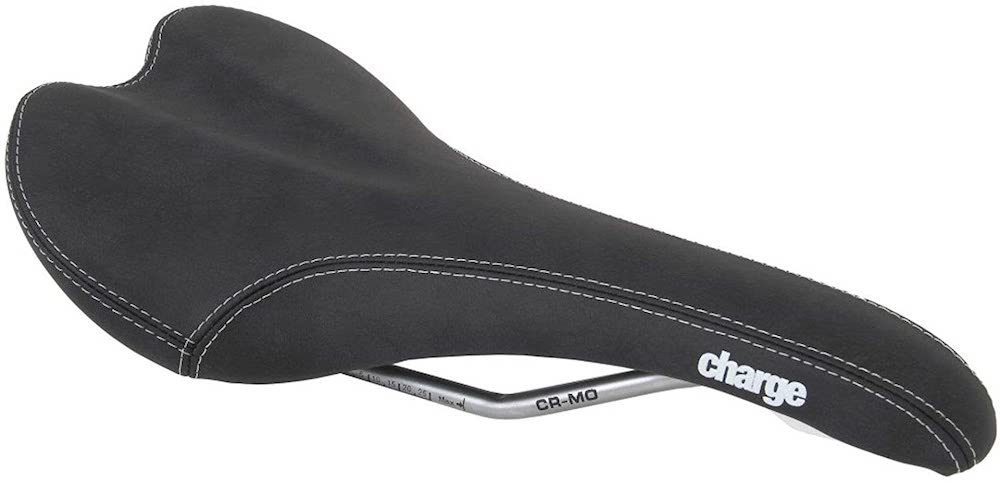
Saddle: Charge Spoon– $27 on Amazon
Saddles are hugely personal preference, so I am just going to recommend one that I like on my mountain bike. The shape really works for me on long rides – I never get saddle sores, I never get numbness. Read more about saddles HERE.

Seatpost: Cannondale SAVE or Cane Creek Thudbuster ST – $199 and $169 on Amazon
In terms of rider comfort, a flex seatpost is the ultimate upgrade. Bike frames require thousands of newtons of force to flex one vertical millimetre. On the other hand, a carbon or suspension seatpost requires well under 100N of force to travel the same distance. This allows a great reduction in road buzz, and the seatpost will absorb big hits on any dirt roads. A suspension seatpost is more suitable for both shorter riders and those wanting a bit more cushion. The carbon posts offer roughly half as much flex (20mm), which I personally prefer, but you will need a relatively high seat to unlock the full travel. Read all the nitty-gritty on seatposts HERE.

Accessories – $456

Lights: Busch und Muller IQ-X Front Light and Supernova E3 2 Tail Light // $90 and $54 on Amazon
The IQ-X has the best road beam going around (same reflector as Schmidt Edelux II), it’s super bright, it’s pretty efficient and it’s under $100. The asymmetric lens is optimised for bike paths and roads so your light won’t blind people approaching you. The Supernova E3 tail light is super compact, bright and will mount directly to your rack. Read more about dynamo lights HERE.

Racks: Tubus Logo Classic 29 and Tubus Duo – $112 and $90 on Amazon
Along with rims, spokes and tyres – racks are the next likely thing to break on a round-the-world touring bike. If you’re planning a long journey, using top-notch racks is one of the best ways you can possibly spend your money. I’ve had the most success with Tubus (zero failures) – but if you break these racks anywhere in the world within five years, Tubus send some new racks out, no questions asked! Read more about racks HERE.

Fenders: SKS Bluemels P65 – $50 on Amazon
These wide fenders clear 27.5×2.4″ tyres without issue. They are light and come with quick-release mounts to prevent sticks and rocks from getting caught on trails. Read more about fenders HERE.

Kickstand: Dropout Adapter + Pletcher ESGE Comp – $42 and $18 on Amazon
I’m a massive kickstand fan. Thorn has a neat kickstand mount that connects to the rear dropout. Read more about kickstands HERE.

Build Summary

The total came to US $3090. This includes top-tier accessories like the best dynamo lighting and racks that money can buy.

Make no mistake – a complete touring bike offers unparalleled value. The Thorn Nomad MK3 starts at just $2200 for a 3X10 Deore build. But if you’re interested in optimising every component, it can really be worth building a custom bike to get the right gear ratios, brakes, rims, tyres, lighting and more.

Although this is a lot of money, I think it still represents good value considering the comfort, durability and performance that this build would offer. I was pretty careful about saving money in areas where it’s safe to do so, but in other areas, I picked parts which would optimise everything nicely.

You can definitely cut corners at the seatpost and tyres, saving ~$200 off the build price. You could also do without the lights, dynamo hub, fenders, kickstand and racks (if you went for bikepacking bags instead) bringing the build price down to a touch over US $2200.

And if you were to use the same parts but with a Rohloff 14-speed internally geared hub, I’ve estimated that the total price would increase to about US $4040, which is cheaper than many Rohloff builds.

How Would You Spec Up A Dream Build With Price Factored In?

The post How Would I Build A Custom Round-The-World Touring Bike In 2020? appeared first on CyclingAbout.com.

100,000km On Belt Drive: The Best Bicycle Drivetrain Available!

$
0
0

I’ve been riding belt drive across continents since 2010, and after more than 100,000km across one hundred countries – I’m ready to tell you there is no better touring, bikepacking or commuting drivetrain available.

I’ve taken belts across the hottest deserts, into icy snowfields, through dense jungles, along beaches, up muddy tracks and to the top of the highest road in the world. I suspect there are few people on Earth with the same real-world experience as me.

In this article, we’ll look at what belt drive is, what the advantages and disadvantages are and then I’ll go through the frequently asked questions to make sure that no rock is left unturned.

This is NOT a sponsored article, I haven’t invested in any belt drive businesses and I am free to use chains on my bikes at any time. I’m just a big ol’ fan of belts and I hope you can soon see why.

What Is Belt Drive?

Belt Drive

Belts are used to run the blowers on 10,000 horsepower racing engines, the powertrains of 150 horsepower motorbikes, and more recently, the drivetrains of many bicycles. Gates Corporation invented their first automotive belts a century ago, and today they’re the most popular brand of belt system for bikes.

The belts themselves are made from a polymer that is reinforced using multiple carbon fibre cords. They are then usually paired with stainless steel cogs and durable alloy chainrings.

Why Are Belts The Best Drivetrains?

belt drive

My Gates S550 crankset with a direct mount front chainring.

1. Belts Have A Very Long Service Life
You can expect a belt drivetrain to last 3-4x longer than a typical chain, that’s upwards of 30,000km/20,000mi – even in the poor riding conditions you often see me flailing about in. Additionally, they’re impervious to water and salt – so there’s no rust here, even after months of cycling through intense wet seasons.

2. Belts Require Little to No Maintenance
Belts do not stretch, they don’t require lubrication, they are never greasy and they do a surprisingly good job of clearing the mud out! Just a splash of water is usually enough to keep them going.

3. Belt Drivetrains Are Perfectly Silent
You know when your chain is freshly cleaned and lubed and running perfectly silent? Well, that’s a belt pretty much all the time.

4. Belts Are Lighter Than Chains
You can expect a weight saving of between 100-300 grams when compared to chain drive.

The Upsides Are Looking Pretty Darn Good, What About The Downsides?

belt drive

A belt drivetrain handles adverse conditions incredibly well.

1. You Cannot Use Belt Drive With Derailleurs
A belt is designed to run in a perfectly straight line. That means that it cannot be paired with derailleurs, chainrings or cassettes – but it can be used with a gearbox at the crankset or an internal gear hub at the rear wheel.

2. You Need A Belt Compatible Frame
As belts are usually one-piece, your frame will need to be designed with ‘belt splitter’ in the rear triangle so that you can fit a belt to your bike. The frame also needs to be ‘stiffness test approved’ to ensure the frame will not flex sideways too far, causing the belt to wander off the rear cog.

3. Replacement Parts Are Not Found In Typical Bike Shops
I personally have never found this a problem. I buy all of my replacements online and I always carry a spare belt for emergencies (87g/3oz). I usually travel for 18 months before I even start thinking about ordering replacement parts.

4. There’s A Higher Upfront Cost
A belt drivetrain is not super cheap (US $240), but they are cost-efficient. Provided you get the full mileage out of your belt drivetrain, I’ve estimated you’ll go about 125km per dollar. This is the equivalent of a chain drivetrain costing you about $60 per 7500km. For reference, that’s the same price as the longest-lasting chain we have (SRAM X01 12-speed), which wears out at between 5000-7000km.

5. It’s A Less Efficient Drivetrain
Derailleurs are undoubtedly the most-efficient drivetrains available, with an average drive efficiency across all gears of between 95-97%. As you need to employ a gearbox system on a belted bike there will always be additional frictional losses. According to the data we have: Shimano internal gear hubs and Pinion gearboxes are a bit over 90% efficient, while the Rohloff hub jumps up to over 94% efficient – the efficiency discrepancy is one of the reasons you’ll rarely see gearboxes and belt drivetrains on race bikes. There can be additional resistance at the belt too but it’s a much smaller percentage than the gearbox itself – we’ll take a closer look below.

Frequently Asked Belt Drive Questions

belt drive

My current belted touring bike, a KOGA WorldTraveller-S.

How Does Gates Carbon Drive Feel To Ride?

A belt rides just like a well-lubricated chain but has a slightly different humming sound. Despite its looks, it feels just as stiff and solid to use as a chain.

How Do You Repair A Belt?

It’s very easy to remove a chain link on the side of a trail. Belts, on the other hand, are designed to be replaced. Rather than carrying a chain tool, it’s prudent to carry a spare belt which coils down to a small enough size. I’ve broken just one 31,000km old belt in the last ten years, so emergency belt replacement never actually crosses my mind.

When Do You Know The Belt is Too Worn?

Surprisingly, it’s the rear cog that wears the fastest in a belt system – the teeth can get very pointed! Given that I stray pretty far from services, I usually swap my entire drivetrain out as a precautionary measure at about 30,000km. I’ve never actually found the true distance limit where the belts cease to work, but it looks like the lifespan may have just been extended, as Gates just introduced a new high-hardness steel cog this week.

belt drive

Belt friction testing in the lab by Friction Facts.

What’s The Deal With Belt Resistance?

Perhaps you’ve seen videos of people stacking weights on pedals to show the difference in drive resistance between a belt and a chain. These tests are a bit misleading because chain and belt friction increases at different rates (the belt slope is 4x less steep). There is a crossover point where a belt becomes more efficient than a chain – it’s when you’re pedalling at 212-watts. This is a bit higher than the typical cyclist pushes, so expect around half a watt penalty (0.5-1.0% of your power output) on the belt system in ideal riding conditions, but likely a better efficiently in adverse conditions due to the way a belt can remove debris from the cogs.

That said, if you use a particularly stiff frame, you can lower the belt tension below the recommendation. You didn’t hear this from me, but I’ve been slowly reducing the belt tension on my KOGA slowly over the last year, and frankly, it’s getting ridiculous. My belt can now touch my chainstay, it’s so far beyond the minimum that I can’t even measure it – and I’m a very strong rider, with a heavy load, riding up incredibly steep mountain roads.

At my approximate belt tension, and at the power outputs I push, my belt is likely running the same or lower friction than a chain. I only recommend trying this with a belt snubber fitted, which will make sure the belt stays on, even if the belt tries to skip.

What Is The Actual Maintenance Like?

If you ride in adverse conditions it’s a great idea to use a toothbrush and water to clean the debris off the system if only to reduce the wear on the cogs.

In dry conditions with very fine dust, a belt drivetrain can sometimes make an infuriating squeaking sound. This is very easily remedied by using a silicone spray which immediately dries onto your belt. I am currently experimenting with treadmill silicone lubricant which stays wet a bit longer, attracting more grit in the short term but it seems to require fewer applications. Rohloff biodegradable chain lube is known to work similarly; just make sure to skip the Hanseline belt care stick – it’s extremely sticky, and frankly, a terrible product for a belt.

belt drive

The sliding dropouts of an Ahearne touring build.

How Do You Adjust The Belt Tension?

Unlike chains, belts do not get longer with time, resulting in a true set-and-forget drivetrain. There are two typical ways to set the tension of a belt. Some bikes use sliding rear dropouts, but from speaking to a handful of bike engineers, it sounds like an adjustable eccentric bottom bracket shell allows for the stiffest possible rear triangle for running lowest possible belt tensions.

You can use your smartphone to determine the appropriate tension of your belt. By plucking the belt, your smartphone app will decipher the frequency and determine if your belt tension is correct.

Don’t Belts Destroy Bearings?

It’s possible that a belted bike with the maximum belt tension could prematurely wear bearings. But on a bike engineered for belts, the frame will be stiff enough so that the tension is the equivalent of a rider using a chain, and pedalling at 250 watts – which is not at all that unusual.

Aren’t There Limited Gear Ratios Available?

There are four front sprockets, four rear cogs and 20 belt lengths to choose from. This should not be limiting at all for the purposes of touring and commuting.

custom touring bike

The belt split I had installed in my steel touring bike.

Can You Modify Your Frame for Belt Drive?

I have taken two touring bikes to a custom frame builder to get belt splits installed in the rear triangles. They have worked just fine, but I’ve had to use a high belt tension (more drive resistance) as the rear triangles had more side-to-side flex than a dedicated belted frame.

Are There Any Other Belt Companies?

Gates completely dominate the market when it comes to belt drivetrains, but there are a few companies offering alternatives, including Veer, Accord and Driveline.

Veer looks to be the most promising and has one big advantage over Gates, their belts are able to split, which means that you can fit them to any bike! As the rear triangles of a typical bike are not designed to be particularly stiff, I suspect the Veer system will have high friction when retrofitted to a bike. That said, you still get all the other advantages of belt drive – so I really think it’s a really cool product if you’re belt curious but don’t want a new bike.

Belt Drive Summary

I really hope this information has hit every possible belt talking point.

I have put belt drivetrains through the wringer for 10 years, taking them into the world’s most remote locations – and I’m certain there is no better drivetrain available for touring, bikepacking and commuting.

If the idea of a gearbox system like the Rohloff or Pinion is compelling to you – definitely skip the chain option and pair it with belt drive. They are incredibly long-lasting, virtually maintenance-free, lightweight and silent.

You Can Find A List of Belt Drive Touring Bikes HERE.

The post 100,000km On Belt Drive: The Best Bicycle Drivetrain Available! appeared first on CyclingAbout.com.

What’s The Best Bicycle Gearbox? Rohloff Hub vs Pinion Gearbox

$
0
0

As you guys know, I’m a big fan of gearbox drivetrains. Almost all of my journeys around the globe have been without derailleurs and chains. But in a head-to-head battle between the two most popular options, the Rohloff Hub vs Pinion Gearbox – which one comes out on top?

This will likely be the internet’s most thorough analysis of these bicycle gearbox systems – but did you expect anything less? We’ll assess 18 different criteria to find out, once and for all, which is the ultimate bicycle gearbox!

I am going to focus on the 18-speed version of the Pinion gearbox for this comparison, but it’s worth noting that you can get them in 6, 9 and 12-speed versions too.

1. Gear Range

47 Grad Nord Sleipnir

Your bike’s gear range determines the speeds at which you can pedal your bike. Gear range gives us an idea for how easy it will be to climb hills, cruise along on the flat and whether you’ll have enough gearing to pedal on the downhills too.

A Rohloff has a gear range of 526% while the Pinion offers 636% – the widest gear range for any bicycle!

Using a Rohloff hub with a low drive ratio, you can comfortably pedal up a hill at 5KPH in the smallest gear. When you shift to the largest gear, you will top out at about 45KPH. The Pinion gearbox, with its extra 21% gear range, provides 21% more top-end speed – so you can still pedal right up to 54KPH.

Winner: Pinion P1.18 (1)

2. Gear Steps (Jumps)

The Pinion gearbox and Rohloff hub have even gear steps (or jumps) of 11.5% and 13.6% for the latter.

The best way to understand what these numbers mean is to translate them to cadence, which is the number of times your cranks spin per minute. When you change the gears on your bike, your cadence becomes faster or slower for every shift. Ideally, we want the smallest possible cadence changes because it allows us to maintain the cadence we prefer, without a big change in speed.

With a cadence difference of 9RPM for every shift, the Pinion gearbox is as good as it gets for a wide-range bicycle drivetrain. It’s slightly harder to find the perfect cadence with the Rohloff hub, as the cadence difference when you shift gears is 11RPM.

For reference, a 2X11 derailleur drivetrain offers around a 10RPM difference, and 1X12 has a 13RPM difference.

Drivetrain Gear Change Cadence Differences:
Pinion P1.18: 9RPM
2X11 MTB: ~10RPM
3X10 MTB: ~10RPM
Rohloff Speedhub: 11RPM
1X12 MTB: ~13RPM
2X10 MTB: ~13RPM
Pinion C1.12: 14RPM

Winner: Pinion P1.18 (2)

3. Drive Efficiency

The Rohloff hub is known to be efficient enough to make a great winter road bike. Image: BikeFeeling

We have run lab tests to determine how much of your pedal power is lost in different gearbox drivetrains.

The Rohloff hub is the most efficient available, with an average efficiency of 94.5% across all gears. The Pinion has a few more losses in the system so it averages out at 90.5%.

When it comes to the Pinion gearbox, it is understood that the large crankshaft seals, faster rotating internal cogs, smaller front chainring and faster chain speed are the most likely sources of the extra friction.

Winner: Rohloff Speedhub (1)

4. Weight

Rohloff hubs have been built into an 8.8kg (19.5lb) mountain bike!

The Rohloff hub works out to be about one kilogram lighter than the Pinion gearbox. The hub and associated components are around 700 grams lighter, but there is also around 300 grams extra frame weight required to house the Pinion gearbox.

Winner: Rohloff Speedhub (2)

5. Drive Noise

The Rohloff hub is notorious for producing noise in some of its gears, in particular, gear seven. The Pinion gearbox is not completely quiet – it still makes a slight whirring sound – but it’s certainly less pronounced, especially in the lower half of the gear range.

Winner: Pinion P1.18 (3)

6. Gear Pickup

pinion gearbox

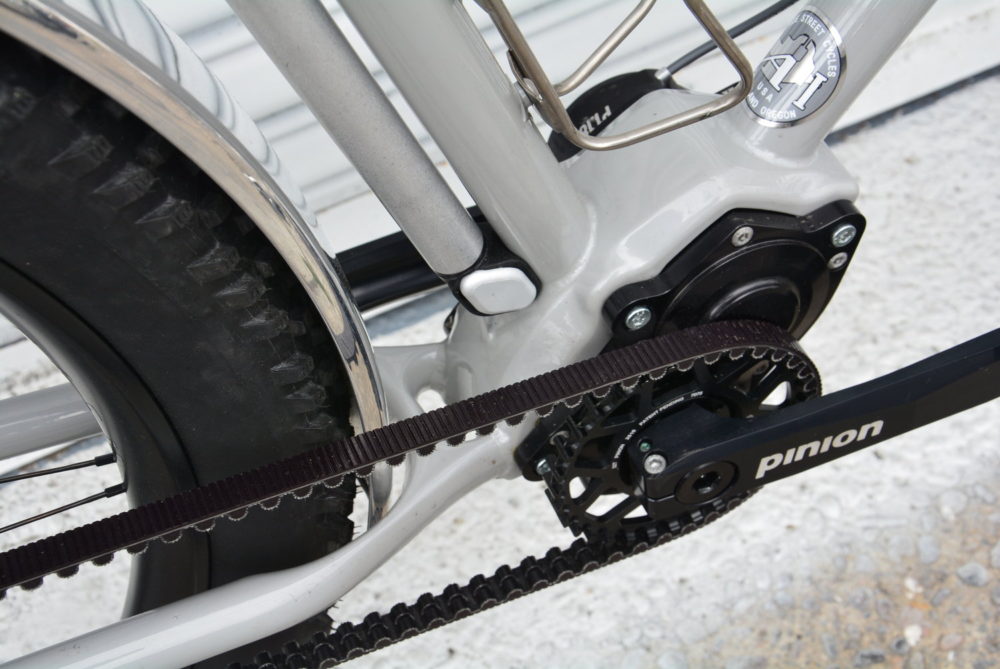
The Pinion drivetrain engages at both the rear hub and gearbox itself.

Gear pickup determines how quickly your drivetrain engages when you start pedalling. On most bikes, you’ll notice a small clunk when you apply power to the pedals, which is usually the pawl system in your rear hub engaging. Ideally, we want instant engagement, but bike hubs usually offer between 24 to 36 engagement points per wheel revolution.

The Rohloff and Pinion have a different number of engagement points depending on the gear selected. The Rohloff has the most engagement points of the two – between 16 and 54 – while the Pinion has between 14 and 22.

But the Pinion gearbox also needs to engage at the rear hub when you pedal, so ideally, you’ll want a hub with the most engagement points possible to minimise any drivetrain ‘slop’. The Onyx hub wins this competition with its instant-engagement sprag clutch design.

Winner: Rohloff Speedhub (3)

7. Shifting

pinion gearbox

When you change gears with the Rohloff shifter, there are varying levels of shifting resistance as you engage different sections of the gearbox. The Pinion shifter has a lighter shifting action across all gears, making it a bit nicer to use.

Winner: Pinion P1.18 (4)

8. Oil Changes

Both gear systems operate inside a sealed oil bath, and you’ll need to change this oil periodically. It’s a very easy job to do yourself and it won’t take you more than 10 minutes. Pinion want you to change the oil every 10,000km of cycling, while Rohloff calls for 5000km intervals.

Winner: Pinion P1.18 (5)

9. Price

While both gearboxes are priced incredibly high, the Pinion gearbox is undoubtedly the most expensive gearbox option.

The price difference varies a little between manufacturers, but Rohloff bikes are usually somewhere between €600 and €1000 cheaper for the equivalent bike build.

Winner: Rohloff Speedhub (4)

10. Product Refinement Period

With over 20 years of production, Rohloff has had a lot of time to iron out any kinks in their product. In comparison, the Pinion gearbox is a spring chicken, with about eight production years. While not a definitive measure of product refinement, the fact that people have been able to put huge distances (380,000km+!) on Rohloff hubs has certainly helped to develop the product.

Winner: Rohloff Speedhub (5)

11. Warranty

page street cycles

The Pinion gearbox comes with a five-year warranty, while the Rohloff hub comes with just two years.

In addition, if there is a failure, it’s much easier to swap out a Pinion gearbox than it is to dismantle and rebuild a new Rohloff wheel.

Winner: Pinion P1.18 (6)

12. Retrofitting and Interchangeability

As the Rohloff hubs do not require a specially-designed frame, there are enough adapter accessories so that the hub will fit almost any bike. That makes them the perfect retrofit if you’re looking for a low-maintenance drivetrain.

You can also own just one Rohloff hub that will transfer between bikes. I’ve actually used one of my Rohloff hubs on three different builds!

Winner: Rohloff Speedhub (6)

13. Wheel Swaps

Many modern bikes have the ability to run multiple wheel sizes. A mid-fat bike is a perfect example. It can fit 26×4.0″, 27.5×3.0″ and 29×2.25″ wheels – all on the one bike!

If you wanted one super-versatile bike, you could use a Pinion gearbox and have two or three different wheelsets that you switch out depending on the terrain. In comparison, you would need multiple Rohloff hubs to provide the same versatility.

Winner: Pinion P1.18 (7)

14. Mountain Biking

If you’re looking to use a gearbox for mountain biking, you’ll want the Pinon.

A crank-based gearbox makes the most sense, by centralising weight on the bike and reducing the unsprung mass at the rear wheel – you can improve the overall suspension performance and ride dynamics of the bike.

In addition, Pinion gearboxes use smaller front chainrings, providing more ground clearance from rocks and roots.

Winner: Pinion P1.18 (8)

15. Hike-A-Bike

Trans Ecuador Mountain Bike Route

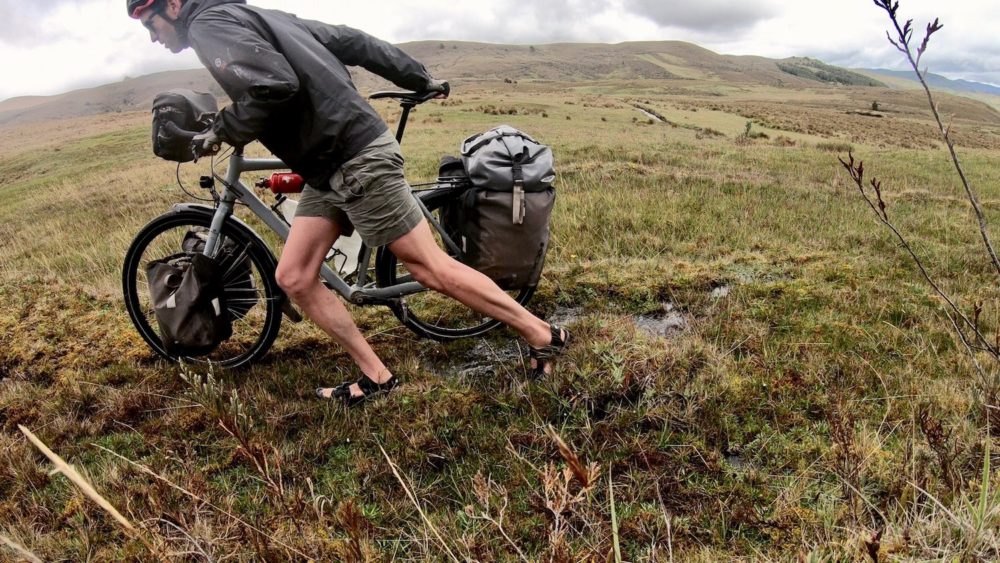
There is friction between the hub seal and rear cog on a Rohloff hub. As a result, you’ll find your cranks spin when you push your bike. This can put your pedals in a very awkward location when negotiating narrow tracks – so the Pinion is definitely the better option here.

Winner: Pinion P1.18 (9)

16. Electric Bikes

Almost all of the top-tier eBikes use mid-drive motors. And there is a strong case for this setup, in particular on steep gradients, where the motor can use each of your gears to optimise the torque, and therefore, optimise the range.

As the Pinion gearbox occupies the space of a mid-drive electric motor, the Rohloff hub is usually the way to go on an eBike.

Rohloff actually offers a Bosch-compatible gear shifter that tells the motor to reduce its output torque when shifting, providing one of the smoothest gear shifts of any electric bike.

Winner: Rohloff Speedhub (7)

17. Cable Changes

Pinion gear cables seem to wear out much quicker than Rohloff cables for some reason, but under daily use, you should get at least one year from either set of cables.

Gear cable changes are a much more simple process for the Rohloff hub, which is demonstrated in the tutorial video that runs for half as long.

Winner: Rohloff Speedhub (8)

18. Aftermarket Shifters

Both the Rohloff hub and Pinion gearbox come with a twist shifter, which I love, but there a few aftermarket shifters too.

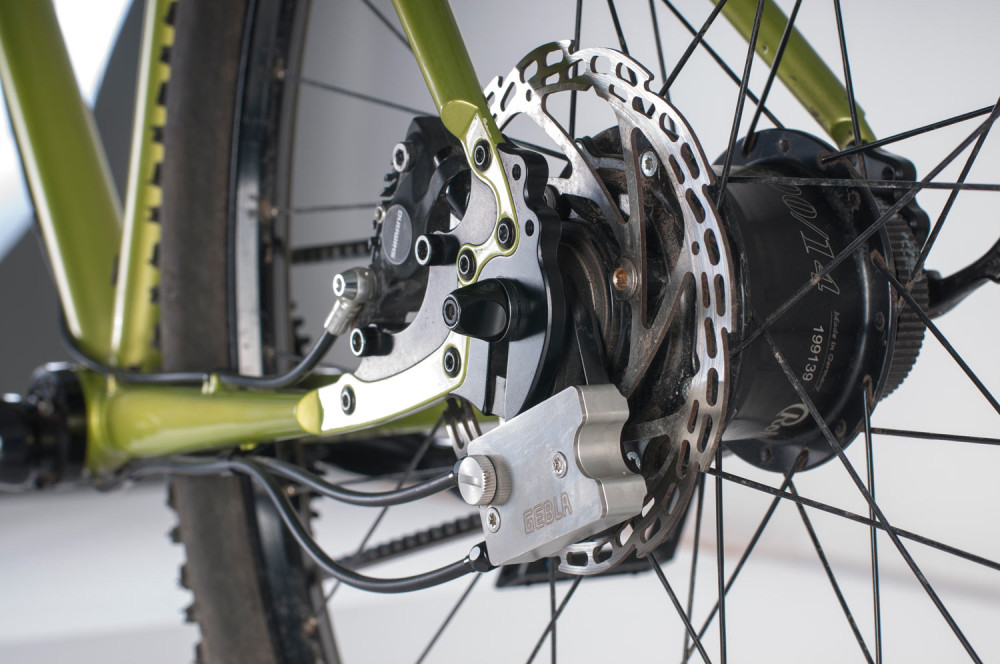
In terms of Rohloff options, Cinq makes both integrated drop bar shifters and trigger shifters for flat bars. Gebla makes the Rohbox, which is a very neat shifting system that allows you to use 11-speed SRAM or Campagnolo shifters to change your Rohloff gears.

In comparison, there is only one aftermarket shifter for the Pinion P1.18, and that’s a drop bar twist shifter by Co-Motion.

Winner: Rohloff Speedhub (9)

Summary: Rohloff Hub vs Pinion Gearbox

This head-to-head resulted in a tie, with each gearbox system ending up with nine points.

There are clearly pros and cons to both gearbox systems, so ultimately, you’ll need to go through this article and weigh up the metrics that are most important to you.

For a faster and lighter build, the Rohloff is definitely the most compelling option, especially if you prefer drop bars. For a mountain bike build, you’ll definitely want the Pinion gearbox.

Otherwise, there really is no clear cut winner here – both systems offer ultra-reliable, long-distance drivetrains, and frankly, are both engineering marvels of the bike world.

You Can Read More About Rohloff Hubs HERE and Pinion Gearboxes HERE

The post What’s The Best Bicycle Gearbox? Rohloff Hub vs Pinion Gearbox appeared first on CyclingAbout.com.

The New 2021 Surly Disc Trucker: My Honest Thoughts

$
0
0

The Trucker touring bikes by Surly are probably the most recognised touring bikes in the world. Go to any popular cycling destination, and you’ll find a handful of people riding them. Jump on Instagram, and lots of folks are using them for their cross-continental trips. There’s no doubt they’re great bikes, and today, there’s a fresh update to make the 2021 Surly Disc Trucker even better.

I’ve actually toured dozens of countries and pedalled more than 50,000km on a Surly Trucker, so I am very familiar with the bike. In fact, it was my first touring bike when I was just a wee teenager starting to explore the world!

This article will outline all of the changes, and I’ll provide my honest thoughts on the implications of this update.

The 2021 Surly Disc Trucker Frame Geometry

You can see that the geometry has changed very little overall, with the exception of the taller ‘stack height’.

The frame has had a few geometry tweaks.

The most notable is an increase in stack height on the 700C wheel bikes. Stack height is the height difference from the bottom bracket shell to the top of the head tube. This height has gone up by 20-30mm (~1″) on all sizes, which will reduce the number of headset spacers required to get your handlebars to a suitable position. In addition, the Disc Trucker comes with a drop bar with 30mm of rise. These two changes allow for 5-6cm (~2″) fewer headset spacers in total.

Surly has added more top tube slope to their bigger frames to ensure that the standover remains the same. They have also taken 10mm from the chainstay length to make the bike more agile. I don’t think this is a win for a dedicated touring bike, but it makes the bike feel a touch more nimble in the city or if you want to use it for gravel.

The frame geometry is otherwise essentially the same as before.

12mm Thru Axles

Surly has followed Kona’s lead with an update from quick-release wheels to 12mm thru-axles. This format is standard on disc brake road and gravel bikes and is presumedly going to be even more widespread on touring bikes in the coming years.

Hub failures are uncommon in the field, so I don’t actually see this update as a negative. While it’d be nice to pick up a new 700c or 26″ quick release wheel to get going, the wheels you’ll find are usually not as strong, and you can almost always find someone to re-build your hub into another rim in the big cities around the world.

A cool thing about 12mm is that you can pair it with the super-powerful Shimano UR-705 dynamo hub. This hub has been tested to offer the most output power at low speeds of any dynamo hub. That’s great for lighting and charging!

The Disc Trucker’s thru-axle design is pretty handy to use too, as it has one open dropout so that you can unscrew the axle a few times, and drop your wheel out without taking the axle out completely.

Lots of Fork Luggage Options

2021 Surly Disc Trucker

The fork now has three-pack mounts for cargo cage bags, and some internal routing for a dynamo cable. You can also fit the Surly Porteur racks to the fork crown, giving you a total of three different luggage solutions up front.

No Kickstand Frame Mounts

Unfortunately, the Disc Trucker still does not have a dedicated kickstand mount, but there is an adapter plate which is included with the bike.

While kickstands are on literally every European touring bike, I have no idea why North American manufacturers don’t make it easy to fit one. I use my kickstand 50 times per day to quickly take photos, pack my bags, organise my bags and to quickly park my bike.

I don’t mind having no kickstand on a bikepacking rig because you can lean your bike to your grips and saddle. But when it comes to using panniers, a kickstand is a must, in my opinion.

Shimano 9-Speed STI Shifters

The drivetrain is a mix of Shimano Alivio and Shimano Sora. This is currently the best solution if a manufacturer wants to a 3X drivetrain with STI shifters. The Sora shifters are reliable these days, but I’d personally prefer to see a 30-speed Deore drivetrain with bar-end shifters on the bike. That drivetrain offers smoother shifts, and from experience, works better in nasty weather conditions.

Another solution is to fit Shimano 11-speed GRX shifters with a mix of Shimano SLX parts. You’ll get much lower gears again, but I suspect this would bump up the price by a fair bit.

In terms of climbing gears, the lowest gear is 19.7″ with a 26″ wheel, and 20.9″ with a 700C wheel. For reference, 20 inches or less is usually the gold standard, so if you find these gears a bit high, you can swap out the front chainrings to smaller sizes down the track.

26″ and 700C Wheels

The rims have an internal diameter which is 3mm wider (21mm) than previously, making them perfectly adequate for 40-50mm wide touring tyres. Unfortunately, the wheels have reduced to 32 spokes, so they aren’t quite as burly as they could be, although I don’t think this is a dealbreaker because the Alex Adventurer rims are pretty stout.

Surly offers 26″ wheels in the smaller sized bikes – that’s 42cm right up to 56cm. 26-inch is often touted as being the best for developing countries, but from experience in Latin America over the last few years, 27.5″ is definitely the most common size as it’s readily found on entry-level mountain bikes. When I last went shopping with a friend to find a good quality 26″ tyre we came back empty-handed.

With the 56cm bike, you get two wheel size options, then from 58cm up to 64cm, you’ll be on 700C wheels. It’s worth noting that the 64cm bike is now one of the biggest touring bikes you can buy, and will suit riders over 2-metres tall.

The maximum tyre width with fenders is 26 x 2.1″ and 700c x 47mm.

2021 Surly Disc Trucker

The bike has been upgraded to the best cable disc brakes in town; TRP Sypre. These cable disc brakes are the only model to pull both brake pads at the same time. Otherwise, there are Surly ExtraTerrestrial tyres, and the high-quality sealed bearing Cane Creek headset should do a great job to keep the water out.

The price jumps up to US $1675, which is in-line with similarly spec’d bikes, the Salsa Marrakesh and Trek 520, but is a couple of hundred more than the Kona Sutra.

You can also get the frameset for US $725 if you want to do your own build.

Surly Disc Trucker Summary

The frame geometry is as good as ever, and I love that the stack height is much taller. The 12mm thru-axle standard future-proofs the bike and will suit the super-powerful Shimano UR-705 dynamo hub.

Some people are going to lament the lack of bar-end shifters, but the Shimano Sora shifters have proven themselves to be very reliable. I think a Deore drivetrain would’ve offered the best performance for the price, but I can see why Surly picked the Alivio drivetrain and Sora STI shifters – they’re just a bit more user friendly.

It’s nice to see 48cm wide drop bars on the bigger bike sizes to squeeze a bit more steering leverage from the bike.

I would’ve loved to have seen some larger diameter steel top tubes and down tubes, as the Disc Trucker frames have never felt as laterally stiff as comparable touring bikes. A rear KSA-18 kickstand mount would’ve been a very welcome addition, and a bit more tyre clearance with fenders would’ve been appreciated – just enough to get my favourite slick touring tyre in, the 700c x 50mm Schwalbe Almotion.

But in general, this is a pretty decent update for the 2021 Surly Disc Trucker.

Want To Compare The Kona Sutra With Dozens of Others?

Check out the Touring Bicycle Buyer’s Guide which compares touring bike steering, sizing, gear ratios, specification, pricing and more. The Bikepacking Bike Buyer’s Guide does the same thing, however, with a focus on lighter bikes and models with more off-road capability. Both of these guides are updated annually with the latest models at no extra cost!

Helpful Resources

All About Touring Bike Brakes
Frame Materials for Bicycle Touring
How to Select Touring Bike Gearing
Understand Bicycle Frame Geometry
What’s the Difference between Cyclocross and Touring Bikes?

Touring & Bikepacking Bike Overview

2016 Advocate Lorax
2018 All City Gorilla Monsoon
2016 Basso Ulisse
2016 Bianchi Volpe and Lupo 2016
2016 Bombtrack Beyond
2017 Bombtrack Beyond
2018 Bombtrack Beyond
2018 Bombtrack Arise Tour
2019 Bombtrack Beyond
2016 Brodie Elan Vital
2016 Cannondale Touring
2019 Cannondale Topstone
2020 Cannondale Topstone
2016 Cinelli Hobootleg Geo
2018 Co-Op ADV 4.2
2017 Curve Grovel V2
2017 Diamondback Haanjo EXP Carbon
2016 Fuji Touring
2017 Fuji Touring
2018 Fuji Touring
2018 Fuji Touring Disc
2016 Genesis Tour de Fer
2016 Giant ToughRoad
2017 Giant ToughRoad
2018 Giant ToughRoad and ToughRoad GX
2016 Jamis Aurora and Aurora Elite
2019 Jones Plus SWB
2020 KOGA WorldTraveller-S
2016 Kona Big Rove
2016 Kona Roadhouse and Sutra LTD
2016 Kona Sutra
2017 Kona Sutra
2018 Kona Sutra
2018 Kona Sutra LTD
2019 Kona Sutra and Sutra LTD
2020 Kona Sutra and Sutra LTD
2020 Kona Unit X
2016 Marin Four Corners
2017 Marin Four Corners
2018 Marin Four Corners
2016 Masi Giramondo
2018 Masi Giramondo
2016 Niner RLT9
2016 Rawland Ulv and Ravn
2016 Salsa Deadwood
2017 Salsa Fargo
2018 Salsa Fargo Ti Frameset
2018 Salsa Journeyman
2016 Salsa Marrakesh
2017 Salsa Marrakesh
2018 Salsa Marrakesh
2020 Salsa Marrakesh
2017 Salsa Vaya
2019 Salsa Warbird
2016 Specialized AWOL
2017 Specialized AWOL
2017 Specialized Diverge
2018 Specialized Diverge
2019 Specialized Diverge
2017 Specialized Sequoia
2018 Specialized Sequoia
2019 Specialized Sequoia
2018 Surly Bridge Club
2017 Surly Troll
2016 Traitor Wander
2019 Trek 520
2016 Trek 920, 720, 520 & CrossRip
2017 Trek CrossRip
2018 Trek 920
2018 Trek 1120

The post The New 2021 Surly Disc Trucker: My Honest Thoughts appeared first on CyclingAbout.com.


Touring VS Bikepacking Bikes: What Are The Actual Differences?

$
0
0

How is a bikepacking bike different to a touring bike? Is it just the bags? Or is there something unique about the bikes themselves?

I can already sense the keyboard warriors informing me that you can go touring or bikepacking on any bike. While that’s 100% true, it doesn’t mean we shouldn’t optimise a bike for our purposes. After all, you could drive a Ferrari around the world, but is that really the best car for the job at hand?

This article will be a comprehensive overview of the eight bike distinctions that separate a touring vs bikepacking bike.

1. Bikepacking Bikes Are Less Overbuilt

Touring bikes are designed to handle very heavy loads. The safety test protocol for most touring and bikepacking frames is usually around a rider and equipment weight of between 125 and 136kg – but this testing sets a floor, not a ceiling. While bikepacking bikes are designed closer to the minimum, top-tier touring bikes are regularly designed to handle more weight – even if the manufacturer doesn’t state it anywhere.

That said, we’ll soon see touring bikes advertising higher maximum weights, as bike testing companies are now providing certification right up to 180kg/400lb.

A bike designer not only needs to engineer their frames for the heaviest expected load of any of their customers, but they need to carefully select components that will not break too. As the wheels are the most likely component to fail on a touring bike, you will usually see very heavy-duty rims and higher spoke counts than on a bikepacking bike.

The downside to an overbuilt bike is that it’s heavier. Most bikepacking bikes are in the 10-14kg range, while similarly priced touring bikes are 14-17kg.

It’s worth noting, that the components of your bike don’t really care whether you weight 50kg and carry 40kg of luggage, or whether you weigh 80kg and carry 10kg. However, the location of weight does matter. If your equipment load is high, your frame needs to be stiff too.

2. Bikepacking Bikes Usually Have Less Frame Stiffness

frame stiffness

Co-Motion uses the biggest diameter steel tubing available to maximise the frame stiffness of their touring lineup.

Frame stiffness usually goes hand-in-hand with an overbuilt bike. The top tube and down tube are the most important frame tubes, as they are the medium that resists most of the twisting forces between the front and rear luggage.

Touring bikes regularly use the largest-diameter, thickest-wall tubing. As the loads are more minimal on a bikepacking bike, frame designers can opt for lighter frame tubes, which aren’t as stiff but result in a more ‘lively’ ride when you go out pedalling without any of your luggage.

I characterise ‘liveliness’ as a frame that has noticeable but very minor amounts of frame flex. Optimising the liveliness of a bike requires a look at the riding style, power output and weight of the rider. It’s essentially impossible to create a ‘lively’ feeling bike that is also stiff enough to carry a heavy front and rear load. You can, however, use a lighter built frame, and carry a load at just one end, or you could carry your gear in a trailer instead.

Bikepacking loads can also be very heavy, especially if you’re carrying food for a week and 10 litres of water. If this is the kind of riding you do, you’ll want to make sure your bikepacking rig is just as stiff as a touring bike.

3. Bikepacking Bikes Have Different Mounts

The mounts are usually different between touring and bikepacking bikes, but the lines are getting pretty blurry these days.

A touring bike will always have rack and fender mounts, while a bikepacking bike will only sometimes have them. A bikepacking bike will almost always have a few cargo cage mounts, while a touring bike may not.

Additionally, bikepacking bikes can have mounts for a direct-mount frame pack and top tube bag, along with occasional mounts on the seatstays and chainstays too.

It’s pretty rare to find a kickstand mount on a bikepacking frame, but that’s ok – it’s easy to lean your bike to its handlebar with narrow bikepacking bags. A bike with panniers doesn’t lay down well, so that’s why kickstands are commonplace on touring bikes.

4. Bikepacking Bikes Have Shorter Chainstays

A touring bike has long chainstays for three reasons:
1. There is usually a significant rear weight bias due to the larger rear bags, and longer chainstays help to shift the centre of mass further forward.
2. By extending the wheelbase, you get a stability boost at speed with a heavy load.
3. To make sure your heels don’t strike your panniers when you ride.

In comparison, bikepacking bikes usually have 20-30mm shorter chainstays. Given the differing bag designs and low expected load, a bikepacking bike shouldn’t have any problems with heel strike or ride stability. The shorter chainstays will make the bike feel a bit more nimble and it will also be easier to lift your front wheel over obstacles.

If you’ve ever heard people say that short chainstays make a bike accelerate faster, well, it could be true when you factor in a handful of grams saved from the frame – but generally, it’s a pretty non-sensical claim.

5. Bikepacking Bikes Are Usually Intended For Off-Road Terrain

My Bikepacking Bike Buyer’s Guide bike categories:
Gravel & All Road Bikes – with 700C Wheels
Gravel & All Road Bikes – with 27.5″ Wheels
Off-Road Adventure Bikes – with 29″ Wheels
Off-Road Plus Bikes – with 3.0″ Tyres
Full Suspension Bikes – with 2.2-3.0″ Tyres
Fat Bikes – with 4.0-5.0″ Tyres

Just a quick look through the categories in my Bikepacking Bike Buyer’s Guide, and it’s clear these bikes are generally more purpose-built for off-road terrain. I classify bikepacking bikes based on the wheel specification because this is a key factor in determining how capable a bike will be on off-road terrain.

That said, bikepacking bikes can be purpose-built for the road too. Many of the gravel bikes in my book are really just fat tyre road bikes, which makes them the speediest option for a lightweight road tour.

My Touring Bicycle Buyer’s Guide bike categories:
Long Distance Touring – with Drop Handlebars
Long Distance Touring – with Flat Handlebars
Long Distance Trekking – with Flat Handlebars
Off-Road Touring – with Drop Handlebars
Off-Road Touring – with Flat Handlebars
Light Touring / Bikepacking / Gravel – with Drop Handlebars
Step-Through Touring – with Flat Handlebars

In comparison, a typical bike tour is conducted on much less varied surfaces (predominately smooth roads), so the handlebar type is usually the best place to start when you’re choosing a touring bike.

There is a lot of crossover between bikes! Heavy-duty off-road bikes feature in both of my books, and provided gravel bikes have the mounts for racks and fenders, they often work their way into the “light touring” section of my Touring book too.

6. Bikepacking Bikes Have Higher Gear Ratios (Sometimes)

touring vs bikepacking

A touring bike should ideally have a climbing gear of around 20 gear inches or less. A bikepacking bike can get away with a higher climbing gear, as you are likely to be carrying less weight up a hill.

That said, bikepacking bikes are often focussed around off-road riding where the gradients are both steeper and more slippery.  As a result, the best bikepacking bikes will have the equivalent climbing gears as a touring bike, and sometimes less.

7. Bikepacking Bikes Use 1X Drivetrains More Often Than Not

Across the majority of bikepacking bike categories in my book, 1X drivetrains are definitely the most popular option (42%, 66%, 36%, 70%, 100%, 95%). The notable exceptions are 700C gravel bikes, which are often built around road riding too, and strangely, 29″ off-road bikes.

1X drivetrains offer more tyre clearance and shorter chainstays when compared to a front derailleur setup. While they have larger gear jumps between each gear, on steeper terrain, you won’t need to make fine gear adjustments like you do on the road.

8. Bikepacking Bikes Use Less Field-Serviceable Components

Eurobike 2018

The expected bikepacking trip duration is often shorter than a touring trip. This typically means that you spend more time around bike shops, so if something goes wrong, you can send parts in for warranty, obtain spares, or get a professional repair.

It’s common to find press-fit bottom bracket bearings, suspension forks, hydraulic brakes, integrated shifters, and titanium or carbon fibre on bikepacking bikes, but these are much less common features on a dedicated touring bike.

A touring bike usually has the most simple parts available, that require the basic tools found in shops anywhere in the world. That said, more complex parts such as integrated shifters and hydraulic brakes have recently proven to be quite reliable, so expect to see more of them on touring bikes in the coming years.

Can A Bike Be Designed For Both Bikepacking and Touring?

Absolutely!

The Co-Op Cycles ADV 4.2 is an excellent example. The bike uses overbuilt components, that are kept somewhat simple (thumb shifters!). It has super low gear ratios (16″ climbing gear!), is very off-road capable (3.0″ tyres!) and has provision for touring racks and fenders, or cargo cage bags.

The build is tough and it shows, with its 16kg/35lb weight. The frame geometry is much closer to a touring bike, with a long wheelbase and upright handlebars. You could set the bike up with panniers for a long tour, or alternatively, as a lighter and faster off-road setup.

 Touring VS Bikepacking Bike Summary


TOURING BIKES:
  • Tougher frames and components
  • Stiffer frames to handle higher loads
  • Ride great with luggage
  • Lower gear ratios on average
  • Rack and fender mounts at a minimum
  • Simple components
BIKEPACKING BIKES:
  • Less overbuilt frames and components
  • Reduced frame stiffness for lighter loads
  • A more ‘lively’ ride unloaded
  • Slightly higher gear ratios on average
  • Cargo cage mounts at a minimum
  • More advanced components

Which Bike Should You Use?

I need to re-iterate: you can use whatever bike you want for touring and bikepacking!

But if you want to optimise your setup, you should consider your total load, the surfaces you will ride, the steepness of the terrain, the bag setup you prefer and whether you will have access to spares parts or workshops with the appropriate tools.

A decent bikepacking-touring hybrid is an off-road bike that’s overbuilt, has generous tyre clearances, and mounts for racks, fenders and cargo cage bags.

The post Touring VS Bikepacking Bikes: What Are The Actual Differences? appeared first on CyclingAbout.com.

Here’s Why The 2021 Tout Terrain Silkroad Is Worth $6300

$
0
0

In the last few months, I have written articles about fancy touring bikes, belt drive components, gearbox systems and all the incredible features you can find on custom bikes – including steering locks, guided cable routing and SL dynamo wiring.

During this period, Tout Terrain released a bike called the Silkroad which incorporates many things I’ve recently discussed, plus some never seen before features that will give us a good indication for where touring bike design is going in the future.

I contacted this German bike company because I liked their forward-thinking, I wanted to find out more information than was publically available and I wanted to share with you all the design considerations that go into a top-tier bike – because if you didn’t know bikes, the Silkroad kind of just looks like any bike.

Note: The above video was made in collaboration with Tout Terrain and it included a fee to compensate my time. This is not an endorsement or review, just a deep dive into the bike’s features.

Steel Is Real

Let’s start with the frameset.

Tout Terrain has specialised in steel bikes for about 15 years. The biggest advantage of a steel touring bike in my mind is that you can easily repair and modify the frames. Let’s say you drop your bike and a rock damages the top tube – that individual steel tube can be replaced by an experienced frame builder.

The steel tubes of this frame are manufactured from raw materials in Taiwan, and it’s welded together there as well. This is actually quite unusual as raw materials, tube processing, manufacturing and painting often end up happening all over the world, resulting in a higher carbon footprint for a bike.

The Silkroad frames are some of the first to pass the highest safety testing a bike can undergo, which is 180kg/400lb.

It helps that the Silkroad uses oversized, thick-wall tubing to build a strong structure that can resist the twisting forces between the front and rear luggage. I can only think of a handful of brands with the equivalent tubing spec. While steel normally has a different ride feel to say aluminium, when it comes to super-stiff touring bikes with a bunch of luggage attached, it’s actually hard to discern between materials.

There is heaps of storage space on the frame for water bottles, folding locks or two-bolt cargo cage bags.

 Steering Lock

tout terrain silkroad

One of the nicest features on the Silkroad is the steering limiter – to prevent your cables from getting crushed – and the integrated steering lock.

If your bike ever falls over when it’s parked, it’s usually because the has front wheel has moved. With the push of a button, the steering can be locked in place on the Silkroad, making bike parking, mounting your panniers and general bike maintenance a bit easier.

A steering lock is particularly important if you use a double-legged kickstand, as any front-wheel movement can easily tip the balance of the bike. That said, after experimenting with many kickstand types over the years, I think a rear-mounted model is the most stable across all surfaces.

It’s cool that this bike has the mounts for both kickstand options, and I really like the small brace from the kickstand to the rear brake mount.

Rear Rack

tout terrain silkroad

Up the back is an integrated stainless steel rack. As racks are one of the most likely components to fail on a bike trip, Tout Terrain wanted to make something indestructible, that has no bolts to work themselves loose on rough dirt roads.

New for 2021 is an extra rail system which allows you to lower the centre of mass of your luggage, resulting in better bike handling. The rails are made from corrosion-resistant stainless steel and have a sandblasted finish so that they doesn’t scuff over time.

This is the neat bit though, Tout Terrain is producing their own heavy-duty pannier system in partnership with Ortlieb. Usually, you need to adjust the pannier hooks and anchors to match the geometry of different racks, but this is not the case with the QL3 system. QL3 is no-compromise as the bag and rack have a perfect fit, making it more secure on rough roads, and quicker and easier to fit too.

It’s worth noting that regular panniers can still fit onto either the built-in rack or the EX rails.

Schmidt SL Wiring

tout terrain silkroad

The Silkroad is using 12mm thru-axles front and rear to maximise stiffness and ensure your wheels are always perfectly aligned in the dropouts.

The fork not only has all the mounts you need for touring and bikepacking, but it has the fancy SL dynamo wiring built-in too. If you haven’t seen this system, it essentially eliminates the need to manually connect your dynamo cable spades to your hub. To send power to your system, the side of the dynamo hub just needs to touch the fork dropout – pretty neat, huh?

The power then runs up the inside of your fork leg, splitting between the dynamo lights and USB charger, and the rear light cable is fully-guided through the top tube and rear rack so that it doesn’t rattle inside the frame.

Rohloff Hub and Belt Drive

Tout Terrain has chosen a sealed oil bath, 14-speed Rohloff hub for this build. This rear hub offers the same gear range as many derailleur drivetrains, but instead of the components being exposed to mud, grit and water – they operate entirely inside the rear wheel.

Are they reliable? Absolutely.

I’ve been using Rohloff hubs for most of my journeys all over the world, and there is actually a Rohloff hub owner who has documented more than 380,000km on his.

The drive efficiency of a Rohloff hub is as good as it gets for a sealed gearbox system, but if you want the highest-performance drivetrain you can still spec this bike with derailleurs, which work out to be about 1-2% more efficient on average. But this assumes you fastidiously clean your chain and apply an efficient chain lube (I prefer Squirt) – when the conditions are bad I suspect a Rohloff works out to be the more efficient option.

The chain isn’t a chain at all – this bike is driven by a belt.

Belts are my personal preference for touring as they require no lubrication and very little maintenance – usually, just some water and a toothbrush is enough to keep you going. I’ve tested belts in the worst off-road conditions, and even still, I tour for about 30,000km before needing to replace anything, whereas my chain drivetrains usually don’t reach 10,000km in the equivalent conditions.

Hydraulic Brakes

Despite what you may have heard, hydraulic disc brakes are often very reliable. I’ve personally been using XT brakes for the last decade, and have never experienced any leaks or damaged cables. I don’t do any maintenance on my brakes other than a yearly refresh of the fluid and occasional pad changes.

The Silkroad uses post-mount calipers as they will allow downhill mountain bike rotors right up to 203mm – which is is great news for heavier riders with bigger loads. The stock rotors are perfect for most riders in most conditions, however, it’s 180mm on the front and 160mm on the rear.

Dynamo Lights and Charging

This bike is using Schmidt lights and a matching dynamo hub. The Schmidt hubs are undoubtedly the most reliable and efficient option that money can buy. Failures are rare and the level of drag you experience for the amount of power generated is a class above the rest.

The light’s tapered beam shape is one of the best for touring. It’s very well layered to give an even overall brightness, meaning the furthest away part of the beam is the brightest and the closest is the dimmest. Additionally, the beam has been designed so that it will not dazzle road users coming in the opposite direction. You’d think both of these characteristics are commonplace on bikes, but most bike lights are really just hand torches that connect to your handlebar.

This bike uses a Cinq Plug5 Plus USB charger, which integrates very neatly into your steerer tube, and is actually the most powerful charger at low speeds. A small ratcheting door above your stem reveals a USB-C plug where you can connect a phone, GPS or GoPro. It’s worth noting that a smartphone requires a minimum speed of about 12kph to create a good charge, but other devices like a GPS will charge at about 7kph.

And when your speed drops below the minimum for your device (for example, when stopping at traffic lights), a battery inside the steerer will provide backup power to make sure that you don’t lose your charge. It will then fill itself up again when you’re moving.

Wheels

Along with your racks, the rims and spokes are the most likely components to fail on a loaded bike. Ideally, we want super stiff rims, because rims that flex a lot under load put additional strain on your spokes – causing them to eventually break. The Ryde Andra rims may be heavy, but they are the gold standard for stiffness, which allows people like me to ride bikes on very rough terrain carrying huge amounts of gear with practically no spoke failures.

Rims often fail from cracks at the spoke holes too. You just need to see the cross-section of an Andra rim next to a typical rim to understand why they rarely suffer this fate.

On the Silkroad, you can choose between 26″ and 27.5″ wheels. I recommend 27.5″ as some tyre manufacturers have already dropped 26″ versions of their touring tyres, and in bigger cities, you’ll always find higher-quality 27.5″ mountain bike tyres to keep you going.

The maximum tyre size is limited to 2.1″, which is narrower than the 2.5″ clearance offered by most modern expedition touring bikes. Wide slicks are a very fast-growing tyre category, driven mostly by electric bike sales, so I think this would’ve made the bike that bit more versatile. But Tout Terrain offers other bike models with more tyre clearance for off-road if that’s what you want.

Elsewhere, the bike is fitted with Tout Terrain’s in-house “Black Label” components – that’s the handlebar, stem, seatpost, pedals and grips. The saddle of choice is a Selle Royal model from the popular Scientia range. This is a gel saddle with a shape that is derived from pressure mapping the backsides of different riders, and it has extra flex built into the rails to provide the smoothest possible ride.

Pricing

tout terrain silkroad

Usually, a frameset of this calibre is simply not available to purchase by itself, and forks with SL dropouts feature almost exclusively on very custom bikes. But if you want to spec your own Silkroad, you can buy the frameset alone for €1700.

Pricing for a complete Silkroad starts at €2900 for a Shimano Deore 30-speed bike and it jumps up to €3500 for the XT version. It’s €4400 for the base model Rohloff and belt drive bike or €4200 if you like the idea of a 12-speed Pinion gearbox.

The bike as you’ve seen it today with all of the optional extras fitted will set you back €5529.

If You Need Help Choosing A Gearbox For Your Silkroad, Click HERE.

The post Here’s Why The 2021 Tout Terrain Silkroad Is Worth $6300 appeared first on CyclingAbout.com.

Should You Use A 1X, 2X or 3X Drivetrain For Touring and Bikepacking?

$
0
0

Eight years ago, SRAM released the first 1X-specific bicycle drivetrain. I remember Nino Schurter winning on it within weeks of it being shown to the public, which was an early sign that 1X was going to pave the way for drivetrains to come.

Fast forward to 2020 and 1X drivetrains feature on a large percentage of bikes. According to my Bikepacking Bike Buyer’s Guide, it’s two-thirds of all 27.5″ gravel bikes, and close to 100% of mountain bikes.

So, are 1X drivetrains now the ultimate drive system, or is there still a place for 2X and 3X?

Today, we are going to analyse every aspect of bicycle drivetrains. We will be looking at all data available across nine different categories to find out once and for all, which drivetrain is best.

1. Drive Resistance

Image: VeloNews

VeloNews has lab tested the resistance of both 1X and 2X drivetrains, and the conclusion is clear: 2X is the most efficient across all gears (96.2% vs 95.1% drive efficiency).

The main reason for the higher resistance is greater chain angles from the chainring to the cassette, which results in the chainplates scraping harder on the cogs. But additionally, when you use the smaller chainrings and cogs found on a 1X system, the chain tension is higher, the chain speed (or tooth-interactions-per-minute) is faster, and a chain has to articulate more to wrap around smaller cogs.

The result is about 1% less drivetrain efficiency on average, but it’s 1.5 to 2.5% less in the three highest gears.

That said, there is also data available suggesting that SRAM chains run slower than Shimano chains, so the drive efficiency number might be a touch less – perhaps as little as 0.7% between drivetrains, on average.

Winner(s): 2X and 3X

2. Gear Steps (Jumps)

pedalling cadence

Cadence is the number of times your cranks spin per minute when you ride. And just like your car engine, you will have an ideal RPM range where you can pedal efficiently. My preference is to pedal along at somewhere between 80 and 90RPM.

In an ideal world, our cadence would remain constant as we increase in speed, but this is not possible on a bike with gears. The next best thing is to make the difference between gear changes as small as possible, so you can stay in your optimal RPM range for longer. We can do this by minimising the gear steps between each cog on a cassette.

Average percentage steps between cassette cogs:
10-52t SRAM 12-speed – 15%
10-51t Shimano 12-speed – 14.7%
11-42t Shimano 10-speed – 14.5%
10-45t Shimano 12-speed – 13.6%
11-42t Shimano 11-speed – 13%
11-36t Shimano 10-speed – 12.7%

Most cassettes used for touring and bikepacking have 13 to 15% gear steps. You’ll notice there isn’t a huge difference between 11-36t and 11-42t cassettes because the latter offers an extra gear to account for the 42t cog.

But gear steps are pretty abstract, so I prefer to graph them using cadence differences.

A 3X10 and 2X11 drivetrain showing average cadence differences of 11RPM.

A 2X10 and 1X12 drivetrain showing average cadence differences of 13RPM.

These graphs show the specific range of speeds for each gear between two selected RPMs. A crossover in the graph signifies smaller cadence differences than those selected, while any gaps in the graph result in bigger cadence differences.

At my typical cadence, an upshift on a 1X12 drivetrain will slow my cadence by 13RPM. Comparatively, my cadence will slow by 11RPM using a 2X11 or 3X10 drivetrain, allowing me to stay between 80 and 90RPM for longer.

Winner(s): 3X10 and 2X11

3. Gear Range

Your bike’s gear range, which is measured as a percentage, determines the speeds at which you can pedal your bike.

It was not that long ago when 1X drivetrains were limited to 420%, but these days, there is much less of a difference in gear range between all drivetrains.

Gear range of different drivetrains:
623% – Shimano XT 2X12
604% – Shimano XT 3X10
529% – Shimano Deore 2X11
520% – SRAM GX 1X12
510% – Shimano XT 1X12

A great way to visualise gear range is to peg the lowest gear at a set speed for all drivetrains and then calculate what the top speed will be. In the above example of bikes with common drivetrains, the 1X bikes top out at 47 to 48KPH in their highest gear, while a 2X or 3X bike will offer 15-20% more speed, topping out at 56 to 57KPH.

Winner(s): 2X and 3X

4. Weight

The 2021 Kona Sutra uses a Shimano Deore 3X10 drivetrain.

SRAM Force 1X – 1947g – Crankset (761g), shifter (153g), derailleur (261g), cassette (366g), chain (256g), cables (150g)
SRAM GX 1X – 1973g – Crankset (703g), shifter (122g), derailleur (290g), cassette (450g), chain (258g), cables (150g)
SRAM NX 1X – 2281g – Crankset (787g), shifter (112g), derailleur (339g), cassette (615g), chain (278g), cables (150g)
Shimano Ultegra 2X – 2338g – Crankset (756g), shifters (438g), derailleurs (302g), cassette (335g), chain (257g), cables (250g)
Shimano SLX 2X – 2400g – Crankset (822g), shifters (246g), derailleurs (456g), cassette (369g), chain (257g), cables (250g)
Shimano Deore 3X – 2423g – Crankset (930g), shifters (178g), derailleurs (448g), cassette (360g), chain (257g), cables (250g)

As expected, the weight goes down when you reduce the number of individual components in a drivetrain. When comparing drivetrains at the equivalent price points, 1X works out to be around 15-20% lighter than 2X. However, the difference in weight between 2X and 3X is much less pronounced.

Winner: 1X

5. Availability and Compatibility

As I specialise in bike travel, parts availability and compatibility is an important aspect of any drivetrain for me.

Available spare parts usually go hand-in-hand with the bikes that shops sell. You can find $800 mountain bikes in the capital cities of most countries, which are now specced with 10-speed drivetrains, and bikes that are not much more expensive come with 11-speed components too.

In comparison, 12-speed parts are harder to come by in low-income countries, but I suspect this won’t be for long.

While 8, 9, 10 and 11-speed drivetrain users can mix-and-match between brands without much concern, 12-speed SRAM uses oversized chain rollers to mate with their cassettes, and 12-speed Shimano only really works well with Shimano, which limits your options a bit.

Winner(s): 2X and 3X

6. Chain Longevity

Click the image for a bigger version. Source: ZeroFrictionCycling.com

There is a misconception that newer, narrower chains commonly found on 1X drivetrains are not as durable as previous drivetrains. Zero Friction Cycling has done a lot of testing in this space and has found that 12-speed chains are actually the most durable chains ever created, and not by a small margin either. This is due to advancements in materials engineering, metal hardening and coating treatments.

More than 30 chains have been tested by Adam on a converted smart trainer (250w resistance, 90RPM) with lubrication and contamination controlled. The test is stopped when the chain reaches 0.5% wear (or elongation), as this is the point when the chain starts to accelerate wear on your cassette and chainrings.

High-quality 12-speed chains are lasting 4000 to 6800km in this test, with equivalent 11-speed chains running closer to 3000km.

For 8, 9 and 10 speed chains, the accelerated wear starts at 0.75%. As chain wear is not linear, the best estimates allow us to add 20% extra kilometres to those shown in the graph above, which would mean an Ultegra 10-speed chain will wear at ~3300km and an Ultegra 9-speed chain at ~2500km.

If these numbers look a bit low, it’s because the chains were tested with contamination to simulate real-world conditions. You can reduce chain wear by riding in dry environments, by keeping your chain super clean and by using a wax lubricant.

Winner: 1X

7. Price

According to Zero Friction Cycling, you should get three chains to one cassette, and as many as six chains to your chainrings. By knowing when a chain will get to 0.5% wear (11 and 12-speed) and 0.75% wear (9 and 10-speed), we can estimate the long-term running costs of different drivetrains.

The cost per 30,000km for some popular drivetrains:
1X12 SRAM X01 – 5 chains $300, 2 cassettes $770, 1 chainring $69 = $1139
1X12 SRAM NX – 13 chains $338, 4 cassettes $400, 2 chainrings $36 = $774
2X11 Shimano SLX – 12 chains $360, 4 cassettes $248, 2 chainring sets $108 = $716
3X10 Shimano Deore – 9 chains $288, 3 cassettes $153, 2 chainring sets $110 – $551
3X9 Shimano Alivio – 12 chains $300, 4 cassettes $108, 2 chainring sets $110 – $518

Assuming an environment with similar conditions to those controlled for by Zero Friction Cycling, the bikes with front derailleurs (and fewer speeds) should be the cheapest to run.

Winner(s): 2X and 3X

8. Ease of Use

For a beginner, there is no doubt that a 1X drivetrain is the easiest to use. If you want to go faster, you go up a gear, if you need to go slower, you go down.

In comparison, using a 2X or 3X drivetrain takes a little more practice. To avoid cross-chaining, you’ll want to use the biggest cassette cogs with the smallest front chainrings, and the smallest cassette cogs with the biggest front chainrings.

Additionally, something that is easy use should also be easy on maintenance. With fewer drivetrain components, 1X is the obvious winner here.

Winner: 1X

9. Tyre Clearance and Chainstay Length

A diagram showing how an inner chainring chainline can interfere with a wide tyre on a short chainstay bike.

The reason why 1X is so widely adopted on mountain bikes often comes down to frame design.

Both the front derailleur and inner chainring chainline can interfere with the rear tyre, restricting how short the chainstays of a bike can be. Usually, shorter chainstays are preferred on mountain bikes as they make it easier to lift the front wheel over obstacles, as well as making the bike feel more playful to ride.

Additionally, the pivot locations and tube shapes on full-suspension bikes can be limited by front derailleur infrastructure, so that’s why most full-suspension bikes are now exclusively 1X.

Winner: 1X

So Who Wins?

In this head-to-head, the 2X and 3X drivetrains took home five points, while the 1X setup ended up with four.

But ultimately, you will need to pick the drivetrain that best suits the type of riding you do.

The newest kid of the block, 1X, is certainly more user friendly, and the top-tier 12-speed chain durability is incredible. For mountain bikers, 1X allows for frame designs with fewer compromises, and if you spend a lot of your time on steep terrain, the bigger gear jumps will not be particularly noticeable.

However, the case is as strong as ever for front derailleurs, as they provide a lower drivetrain resistance, a wider gear range and a smaller cadence difference between each shift.

The post Should You Use A 1X, 2X or 3X Drivetrain For Touring and Bikepacking? appeared first on CyclingAbout.com.

Ask Me Anything: How Has The World Changed For Bike Travellers, Carbon vs Titanium, Kickstands, Insurance, Dangerous Animals

$
0
0

Hi all,

It's been a while since the last AMA, but these are the only questions I've received sinc...

Hi there!

This page is only available to CyclingAbout Site Supporters. If you'd like to access this content as well as help to create more bike travel resources, feel free to sign-up HERE.

My main aim here is to take the quality of CyclingAbout.com to the next level. Your generous donations will go directly into writing resources and improving the design, layout, speed and overall operation of the website.

All the best from the road,
Alee

The post Ask Me Anything: How Has The World Changed For Bike Travellers, Carbon vs Titanium, Kickstands, Insurance, Dangerous Animals appeared first on CyclingAbout.com.

Ask Me Anything: Directory of Every Question and Answer

$
0
0

Bikes & Gear

A trailer or panniers for a world tour?
Can you speak to what differentiates ...

Hi there!

This page is only available to CyclingAbout Site Supporters. If you'd like to access this content as well as help to create more bike travel resources, feel free to sign-up HERE.

My main aim here is to take the quality of CyclingAbout.com to the next level. Your generous donations will go directly into writing resources and improving the design, layout, speed and overall operation of the website.

All the best from the road,
Alee

The post Ask Me Anything: Directory of Every Question and Answer appeared first on CyclingAbout.com.

Which Is Best? Mechanical or Hydraulic Disc Brakes On Touring and Bikepacking Bikes

$
0
0

Mechanical or hydraulic disc brakes? It’s still a hotly-contested competition in the touring and bikepacking world.

While hydraulic brakes now dominate most bike categories of cycling, the criteria is a little different for bike travellers, as reliability and simplicity play a much larger role. Do you use the more complex but higher-performing hydraulic brakes? Or the more simple mechanical system that doesn’t quite perform as well?

I’m starting to get a LOT of inquiries about disc brakes as my most recent resource on touring bike brakes was written way back in 2011 (oops!), so let’s work out what is better in 2020.

In A Nutshell: Mechanical vs Hydraulic Disc Brakes

Mechanical Disc Brakes:
  • Easier to maintain yourself, but require more maintenance generally
  • Powerful enough for most touring applications
  • More of an on/off brake feel
  • Very unlikely to fail in remote areas
  • Typically cheaper, although not so much these days
Hydraulic Disc Brakes:
  • Self-adjusting and low in maintenance (usually!)
  • More powerful, more effortless braking
  • Gradual power delivery
  • Cylinder, piston and general oil leaks can render brakes useless
  • Perform better than mechanical brakes as the conditions get worse (system is sealed)


Why Not Rim Brakes?

A decade ago, almost all touring bikes came with rim brakes. These days, just 8% of the bikes in my Touring Bicycle Buyer’s Guide use rim brakes… and it’s 0% (zero!) my Bikepacking Bike Buyer’s Guide.

So, clearly disc brakes have prevailed, and for great reasons:
– You get better braking performance, especially in the wet and/or muddy conditions
– Your rims theoretically last forever, as they are not worn down by the brake pads
– Your brake pads will last much, much longer in the equivalent riding conditions
– You get additional tyre clearance

The Case For Hydraulic Disc Brakes

My KOGA WorldTraveller is using Shimano XT hydraulic brakes to ride throughout the Americas.

Hydraulic disc brakes have a fluid inside the brake lines, much like those in a car or motorbike. When you pull the brake lever, the fluid rushes down to the caliper, closing the brake pads. This type of brake line is sealed away from the elements, so they tend to work well in any riding conditions.

A big advantage for users is that as the pads wear, the pistons move inwards, keeping the same pad-to-rotor clearance. This self-adjustment just means they require less tinkering to keep them running well.

I was originally a little hesitant travelling with hydraulic disc brakes on my multi-year bike trips, as I have the propensity to disappear into remote areas with poor weather conditions. I also don’t like working on my bike if I don’t have to. But KOGA assured me that Shimano XT brakes had been working reliably for their customers, so I took their word and figured I could always switch to mechanical brakes if I needed.


Turns out, my Shimano XT brakes have been fantastic! Hydraulic brakes simply have more power than mechanical brakes, but additionally, they usually have a more ‘modulated’ feel too. This just means that you can ramp up the braking power at a more measured pace.

I did have to bleed a rear brake early-on as it must’ve been a bit dodgy from the factory, but otherwise, I bleed my brakes once every 12-18 months and swap my pads when they wear out. I went through just five sets of brake pads in South America, which is pretty incredible given the terrain.

As hydraulic brakes can have issues with oil leaks and brake bleeds from the factory, I recommend using your brakes for a minimum of three months before going rogue. This should iron out any kinks and give you confidence that your system will work as advertised.

The Case For Mechanical Disc Brakes

I used Avid BB7 mechanical brakes on my tandem ride from Europe to Australia.

Mechanical brakes use stainless steel cables between the lever and caliper, resulting in a very simple brake system. Replacement inner and outer cables can be found in any bike shop in the world, and they’re easy to change yourself – which is why I’ve long recommended mechanical disc brakes for touring and bikepacking.

I adopted Avid BB7 brakes for touring back in 2012, and while they weren’t the highest performing brakes available, they were plenty powerful for touring, especially with large rotors.

But more importantly, they were a fool-proof brake system. Lubricating the inner and outer cables was easy and it almost always brought my brakes back to their on/off brake bite after feeling a bit gunky.

One thing I found a bit annoying was the need for constant adjustment. As my brake pads would wear, I would need to add cable tension. This was done easily by adjusting the barrel adjuster, but I found I needed to make fine adjustments at the Avid BB7 caliper too, or my brakes would rub.

My TRP Spyre disc brakes required a little less tinkering as both brake pads pulled inwards at the same time, but still – the inner brake pads always wear quicker than the outer pads, so caliper adjustment is inevitable.

What About The Hydro/Mechanical Combo Brakes?

The Yokozuna Motoko system combines a strainless brake cable to a hydraulic caliper. Image: CyclingTips

As well as these brakes do work, I feel like you’re better off (a) getting the full hydro system so that the cables are more weather-resistant or (b) going for the simplified mechanical system. These combo brakes a bit heavier and have the same cable friction losses as a mechanical brake.

They’re not a bad idea for a brake upgrade, however. For example, if you currently have integrated drop bar shifters and mechanical disc brakes, you can swap in some combo calipers which will give you more braking power and the self-adjusting hydro pistons.


Brake Pads

Do not underestimate the importance of brake pads! They come in two main compounds:
– Resin (aka organic or semi-metallic) which combines together various fibres
– Metal sintered which are made from metallic particles that have been fused together

I generally like using sintered brake pads for touring because they last longer (especially in wet/muddy conditions) and they manage heat very well on long descents. I’ve found sintered pads are a bit less common to find in bike shops around the world, so I often stock up on them when I can.

Resin brake pads are made from softer materials than sintered brake pads, so they often run quieter. As dust and other contaminants can cause brake pads to squeal, resin pads are usually best for dry regions. Some people prefer the brake feel of resin pads too, as they can have a bit more initial ‘bite’.

Ideally, you shouldn’t mix brake pad compounds on the same rotor. This is because brake pads deposit a small layer of particles on the rotor, so you essentially contaminate the brakes when you mix pads. That said, I switch between sintered and resin when that’s my only choice and I’ve found it only reduces the performance a bit.

One thing to note: many different brake brands use their own brake pads. If you are travelling through low-income countries, the most common pads available are always (1) Shimano and (2) SRAM, in my experience.

Number of Pistons

A bike fitted with Shimano’s new XTR 4 piston brakes. Image: Shimano

Disc calipers employ pistons on either side of the rotor (two-piston) to push the pads inwards, but four and six-piston calipers are also available. With more pistons, manufacturers can create brake pads with additional surface area to clamp on the rotor, and therefore, stop your bike quicker. You’ll find 4-piston brakes on most gravity-oriented mountain bikes, but they’re also popular on tandems.

The downside to four or six-piston brakes for travellers is that the brake pads are much less likely to be found in shops, so you’ll need to bring a few sets of pads from home when you travel.


Rotor Sizes

There are three common rotor sizes for touring and bikepacking: 160mm, 180mm and 203mm.

By increasing the rotor size, you achieve more leverage at the caliper, which results in more braking power. The larger surface area of the rotor offers better heat dissipation too for longer descents.

Generally, a heavier rider+bike+luggage will require more braking power than someone who is lighter. But if you’re riding steep mountain roads, using a 180mm or larger rotor diameter will be ideal, no matter your weight.

For a mechanical disc brake bike, I recommend going up a rotor size to help it to stop on a dime. On a touring bike, 180mm or even 203mm will get you closer to hydraulic brake bite.

Mounting Type

Post mount and Flat mount brake calipers for a 160mm rotor. Image: BikeHugger

The most common mounting type for disc brake is called ‘post mount’ and it’s found on 99.9% of mountain bikes. I generally prefer this mount type for touring and bikepacking, as you can easily install big 180mm and 203mm rotors to stop your loaded bike.

The ‘flat mount’ type of caliper is becoming more prevalent, especially in the gravel bike category. It’s essentially a more compact caliper design that better suits the aesthetic of road bikes. In its best form, it has no adapters and is easy to set up with a perfectly-aligned brake mount.

But generally, I find it’s harder to adjust a flat caliper for a couple of reasons:
– There is a disparity in distance between each bolt at the fork (when using an adapter), so one end of the caliper moves more than the other when you make small adjustments.
– The close bolt spacing can amplify any frame imperfections on the rear mount, resulting in a higher chance of rubbing (in particular with an adapter fitted).

In addition, some flat mount forks will not allow you to use rotors bigger than 160mm due to design constraints, for example, the 2021 Surly Disc Trucker – you’ll need to check with the manufacturer to find out if 180mm rotors will fit (203mm definitely will not).

Hydraulic Brake Maintenance

I’ve found that I can travel with hydraulic brakes for more than one year without needing to replace the brake fluid. There have been workshops right through Latin America who can bleed Shimano hydraulic brakes, in fact, I think it’s a really simple task for any mechanic (I would do it myself if I carried the bleed cup and fluid).

Around when its time for a bleed and my levers are starting to pull closer to my handlebars, I normally adjust the lever position so that it sits further out. This temporarily keeps me going until I find a shop in the next few thousand kilometres.

When you change your brake pads, you’ll want to clean your caliper well. This is because the pistons need to be pushed inwards for the thick new pads, and any debris on the sides of the pistons can potentially run into the caliper and damage the seals.


Disc Brake Squeal – A Technical Explanation!

We all know the truly evil sound that disc brakes can make. Disc brake noise comes from a few different sources, but let’s focus on a brand new, already bedded in brake setup.

When you grab the brake, the pads move a tiny bit forwards and backwards in the caliper, slipping and sticking on the rotor (known as “stick-slip”). This causes small oscillations in the caliper which then transfer to the frame and other components like your spokes, generating noise.

The reason disc brakes squeal more in wet conditions is that water creates a bigger difference between sticking and slipping when you brake, resulting in a higher amplification of noise.

A well-designed brake system will eliminate the potential for noise by resonating at fewer frequencies in the brake pads, caliper and rotor. This can be done by using different materials and shapes for the brake components – the aim is to minimise the number of frequencies of each of the brake components, ensuring they cannot ‘sing’ together.

As it’s not just the caliper and rotor that generates the noise, that means that the same braking system can be noisy on one bike, but not another! I’ve actually heard of some frame manufacturers needing to stiffen the seat and chainstays to attenuate more noise.

In the last three years of touring, I’ve only had my Shimano XT brakes squeal in particularly wet conditions, but they were also noisy when I fitted some cheap brake pads in Bolivia.

Flying With Disc Brakes

Normally, you’ll get just the bicycle box itself and it’s best to remove the front rotor for flying. Image: Singletrackworld

You might have concerns about flying with disc brakes, but let me reassure you – I’ve been on dozens of flights and have never bent a rotor or had anything drastic happen to the levers or calipers.

It’s best to install a spacer between your front brake pads and remove the rotor from your front wheel before flying. If you have a “centre lock” rotor, you’ll either need to use a cassette tool to remove it yourself or take your bike to a shop where they can take the rotor off for you. The six-bolt design is technically inferior (in my opinion), but you can remove the rotor with a small multitool, so I prefer that for touring.

I don’t worry about my rear rotor as it’s very well protected by my rack, kickstand and quick release lever (see pic below).


Recommended Hydraulic Disc Brake Models

mechanical vs hydraulic disc brakes

1. Shimano XT disc brakes are what I’ve been using since 2017. I lost most power to my rear caliper about three months into my adventures in Patagonia, but was able to add new fluid which remedied the problem – I suspect it wasn’t bled properly from the factory. Since then, I’ve been riding worry-free with my XTs. I usually bleed them every 12 months or so and get anywhere from 1000km to 10,000km out of a set of brake pads. Shimano brake pads for XT brakes are very common everywhere in the world, which is great if you’re on the road for a long time.

2. The Magura MT7 (or MT5) is recommended by Iohan Gueorguiev from Bike Wanderer. He originally had problems with his Shimano SLX brakes and switched to Magura which have since worked flawlessly in the remote terrain he rides. If you need more reassurance, KOGA also specs their touring bikes with the Magura MT5 brakes. But just make sure you stock up on pads as you definitely won’t be finding replacements in many bike shops…

Recommended Mechanical Disc Brake Models

2019 Kona Sutra

1. TRP Spyke (or TRP Spyre for drop bar bikes) are my preferred mechanical disc brakes as both brake pads cleverly pull in together like a hydraulic caliper. While some people think they lack power, I’ve never found this – but then again, I’ve always used them with larger rotors. TRP uses Shimano ‘B01S’ brake pads which are readily available around the world.

2. Avid BB7 Mountain (or BB7 Road) disc brakes have been around for decades and I’ve personally used them on multiple bikes. They have a decent amount of power, and you can easily adjust the cable tension by turning the red knob. SRAM brake pads are pretty common around the world too.

Summary: Mechanical vs Hydraulic Brakes

Given my positive experience, I feel that hydraulic brakes are the way to go for touring in 2020 (but only just).

I have had very few issues with hydraulic systems in the last three years of travelling. I love the effortless power, the general brake feel, the self-adjusting pistons and the fact that the brake lines are sealed from the elements. I definitely recommend using your hydraulic brakes for a few months before tackling a remote tour, just to make sure they’re bled well and have no leaks.

If you prefer the most simple option and are happy to adjust your brakes a bit more, mechanical brakes will do you just fine. You can replace the cables anywhere in the world and easily lubricate the cables in between. To boost the power, I definitely recommend using rotors larger than 160mm.

Do You Agree That Hydraulic Brakes Are The Way Forward?

The post Which Is Best? Mechanical or Hydraulic Disc Brakes On Touring and Bikepacking Bikes appeared first on CyclingAbout.com.

The 23 BEST Gravel Bikes For 2021 – Under $1000

$
0
0

Gravel bikes have well and truly taken off, so it’s time I gave them a bit more attention on CyclingAbout. If you’re new here, I specialise in adventure cycling and really want you all to share my adventure joy by riding the best gravel bikes for your budgets!

In this article, I will be teaching you all about the best gravel bikes under $1000 – everything from the best wheel size to choose, frame materials, gear systems, tubeless tyres and gear ratios.

You can get a really decent bike at the $1000 mark, and I have ranked all of my favourite gravel bikes, to make your buying decision as easy as possible.

All About The Best Gravel Bikes

Frame and Fork Material
The frame and fork are the heart of the bike – it’s the frame angles and materials selected that determine how the bike will ‘feel’. In general, aluminium is the most popular material for a low-cost gravel bike because it is very lightweight for its price. Aluminium bikes with carbon forks are usually 1kg to 2kg lighter than a comparable bike made from steel (10-12kg for an aluminium bike, 12-13kg for steel). That said, steel has a bit more lateral compliance, or side-to-side flex, which some people enjoy the feel of. Look out for bikes with “full carbon forks” as they are often more than 500 grams lighter than bikes with a carbon fork using a bonded-in aluminium steerer tube.

Wheel Size – 700C (bigger wheels with narrower tyres) and 650B (smaller wheels with fatter tyres)
The wheel size and tyre width will determine the types of gravel roads you can ride. The rougher the surface, the more a wider tyre can deform to ensure (1) the best grip, (2) the most speed and (3) the most comfortable ride. That said, a narrower 700C wheel is super quick rolling on harder surfaces, and the wheels are often a touch lighter too. I typically recommend 650B if the majority of the time you’re on bumpy gravel roads, and 700C if the gravel roads only make up a smaller percentage of your overall rides.


Gearing – 1X vs 2X
You will find gravel bikes with front and rear shifting (2X) or with just rear shifting (1X). I personally prefer using 2X for gravel because it allows for a smaller ‘jump’ between each gear ratio and a broader overall range of riding speeds. A 1X setup is great for beginners, however, as it’s intuitive to use, plus it’s lighter and has fewer parts to go wrong out in the field.

Tubeless Compatible Wheels
A lot of money has been spent developing tubeless tyre technology and it actually filters down to many entry-level gravel bikes. The advantages are ‘self-healing’ when you get a puncture (sealant rushes in to plug the hole), lower rolling resistance and a lighter weight too. I always recommend investing in high-quality tubeless tyres because you will save a chunk of weight, get higher-performing rubber compounds and be able to ride faster with less effort.

Low Gear Ratios
To make a gravel bike properly versatile, I believe it needs to have low gear ratios. If you ride on steeper terrain, you’ll ideally want your bike to have a low gear ratio under 25-inches. This measurement is simply the tyre rollout, and lower is always better. I have calculated the climbing gear for all gravel bikes so you can find out which gravel bikes will go up the steepest hills.

Upright Factor
I have calculated how tall the frames are for how long they are – or the Upright Factor. This number helps us to understand which gravel bikes are more upright, and which ones are more performance-oriented. The Upright Factor is the “stack” measurement divided by the “reach” – and it is averaged out across all bike sizes. A number under 1.50 is low and performance-oriented, while anything about 1.55 is quite upright and relaxed.

If you’d like to learn everything about gravel bikes, check out my in-depth book, The Bikepacking Bike Buyer’s Guide.

Gravel Bikes and Coronavirus

2019 Cannondale Topstone

The bicycle industry has been severely affected by COVID-19. Gravel bike sales are actually booming, resulting in bike shortages in every country and region! Upon researching this article, I found almost all bikes are out of stock in early-September 2020, but do not fret – the latest bikes should arrive in the next few months.

Scoring The Best Gravel Bikes

Given these gravel bikes are in the budget category, I have placed a strong emphasis on price to make sure the most expensive bikes aren’t all on top. I have also prioritised the quality of the frameset as it’s easy to upgrade the parts, but much harder (and more expensive) to upgrade the frame.

Frameset Quality (/4) – Based on frame features, fork material, cable routing and axle type.
Bike Weight (/3) – 10-11kg is 3 points, 11-12kg is 2 points, 12-13kg is 1 point.
Gearing Quality (/3) – ‘Tiagra’, ‘Microshift’ and ‘Apex’ is 3 points, ‘Sora’ and ‘Sensah’ is 2 points and ‘Claris’ is 1 point.
Low Gear Ratios (/3) – Sub-25″ is 3 points, 25-27″ is 2 points and 27″+ is 1 point.
Price (/6) – Sub-$800 is 6 points, $800-$900 is 4 points, $900-$1000 is 3 points, $1000+ is one point.
Tubeless-Ready (/1) – An extra point for tubeless tyre compatibility.
TOTAL: /20


Ranking The Best Gravel Bikes

700C GRAVEL BIKES
15/20 – State Bicycle Co 4130 – Best price-to-performance, without doubt. Nice ‘n upright.
14/20 – Cannondale Topstone 4 – Lightweight gravel bike with quality parts, one of my favourites here.
13/20 – Boardman ADV 8.6 – Cheapest bike with Shimano Sora gearing, decent weight, full carbon fork.
13/20 – Salsa Journeyman Claris – Excellent frameset, upright, great gear ratios, tubeless compatible.
13/20GT Grade Elite – Really nice frameset for the price, tubeless compatible.
13/20 – Giant Revolt 2Another of my favourite gravel bikes (10kg!), D-shaped seatpost flexes vertically.
13/20 – Cube Nuroad Pro – Great pricepoint for Shimano Tiagra gearing, lightweight.
12/20 – Breezer Radar Expert – 29×2.2″ mountain bike tyre clearance, low ratios, super upright.
12/20Jamis Renegade A1 – Nice frameset and weight, tubeless compatibility.
12/20 – Triban RC 500 – Shimano Sora gearing under $1000, decent weight but 36mm maximum tyres.

11/20 – Marin Nicasio 1
11/20 – Diamondback Haanjo 2
11/20 – Pure Cycles Gravel Adventure Pro
11/20 – Felt Broam 60
11/20 – Octane One Gridd 2
11/20 – Specialized Diverge Base E5
10/20 – Genesis CDA 10
9/20 – KHS Grit 55
9/20 – Kona Rove AL 700C

KEEP SCROLLING FOR 650B (27.5″) GRAVEL BIKES!
14/20 – State Bicycle Co 4130 – Best price-to-performance, without doubt. Nice ‘n upright.
13/20Salsa Journeyman Claris – Excellent quality frameset, upright, great gear ratios, tubeless compatible.

11/20 – Marin Nicasio Plus
9/20 – Kona Rove AL 650B


2021 State Bicycle 4130 All Road – North America – $799

15/20 – Best price-to-performance, without doubt. Nice ‘n upright. The 4130 All Road is a very compelling gravel bike for the price. It’s built around a hardworking steel frameset that has modern thru-axles and it’s ready for racks or bikepacking bags too. The Sensah gearing is not a typical drivetrain pick, but from all reports, it works quite well, and allows State Bicycle Co to deliver a 1X11 bike under $800. The cherry on the top is the tubeless compatibility. This is available in North America exclusively.

Frameset Quality (3/4) – Quite a decent steel frame and fork, 12mm thru-axles.
Weight (2/3) – 11.96kg without pedals.
Gearing Quality (2/3) – Sensah SRX Pro 1×11 gearing.
Low Gear Ratios (1/3) – 27.7″ climbing gear.
Price (6/6) – It’s one of the cheapest bikes on the list with some of the best features!
Tubeless-Ready (1/1) – Tubeless compatible.

Upright Factor: 1.59 – quite upright to ride
XS:
154-168cm – S: 165-177cm – M: 175-188cm L: 185-196cm

2021 Cannondale Topstone 4 – Global – (Sorry, it’s $1050)

14/20A lightweight gravel bike with quality parts, one of my favourites here. I’ve been recommending the entry-level Cannondale Topstone since it was first released. The frame is one of the nicest available at this price point and it’s spec’d with a full carbon fork to keep the weight low. The Microshift drivetrain offers all the low climbing gears you need, so this is a bike that will suit more mountainous roads than most.

Frameset Quality (4/4) – Top-tier aluminium frame, full carbon fork, internal cable routing, 12mm thru axles.
Weight (3/3) – Approximately 10.5kg without pedals.
Gearing Quality (3/3) – Microshift 1×10 gearing.
Low Gear Ratios (3/3) – 22.8″ climbing gear.
Price (1/6) – It’s a bit more expensive, but still competitively priced for a bike of this calibre.
Tubeless-Ready (0/1) – Tubes only.

Upright Factor: 1.50 – on the sporty side
XS:
152-165cm – S: 162-175cm – M: 170-185cm – L: 180-193cm – XL: 190-203cm


2021 Boardman ADV 8.6 – Europe – £700

13/20The cheapest bike with Shimano Sora gearing, decent weight, full carbon fork. It’s pretty hard to argue against the ADV 8.6, with its respectable weight, 2X9 drivetrain, good climbing gear and tubeless compatibility. This bike is available throughout Europe.

Frameset Quality (3/4) – Decent aluminium frame, full carbon fork, quick release axles.
Weight (2/3) – Approximately 11.1kg without pedals.
Gearing Quality (2/3) – Shimano Sora 2×9 gearing.
Low Gear Ratios (2/3) – 25.7″ climbing gear.
Price (3/6) – Excellent value for money.
Tubeless-Ready (1/1) – Tubeless compatible.

Upright Factor: 1.50 – on the sporty side
S: 170-179cm – M: 177-183cm L: 181-189cm – XL: 187-195cm

2021 Salsa Journeyman Claris 700C – Global – $949

13/20 Excellent frameset, upright, great gear ratios, tubeless compatible. I’ve been long recommending the Journeyman thanks to its worldwide availability, upright ride, low gear ratios and high-quality frameset for the price. The size range is also great!

Frameset Quality (3/4) – Decent aluminium frame, carbon fork, internal cable routing, quick release axles.
Weight (2/3) – 11.79kg without pedals.
Gearing Quality (1/3) – Shimano Claris 2×8 gearing.
Low Gear Ratios (3/3)
– 24.1″ climbing gear.
Price (3/6) – Excellent value for the frameset quality.
Tubeless-Ready (1/1) – Tubeless compatible.

Upright Factor: 1.56 – quite upright to ride
50:
152-160cm – 52: 157-165cm – 54: 165-175cm – 55.5: 173-183cm – 58: 180-190cm – 59.5: 188-200cm


2021 GT Grade Elite – Global – $999

13/20 – Really nice frameset for the price, tubeless compatible. The GT Grade is a modern gravel bike with somewhat good climbing gears and a respectable weight for the price.

Frameset Quality (4/4) – Top-tier aluminium frame, full carbon fork, 12mm thru axles.
Weight (3/3) – Approximately 11.3kg without pedals.
Gearing Quality (1/3) – Shimano Claris 2×8 gearing.
Low Gear Ratios (2/3)
– 25.7″ climbing gear.
Price (3/6) – Excellent value for the frameset quality.
Tubeless-Ready (1/1) – Tubeless compatible.

Upright Factor: 1.49 – on the sporty side

2021 Giant Revolt 2 – Global – Whoops, it’s $1150

13/20 – Another of my favourite gravel bikes (10kg!), D-shaped seatpost flexes vertically. I think I would be happiest using the Revolt for my gravel exploits. It has a full carbon fork, Shimano Sora gearing, a broad size range, decent brakes, tubeless compatibility and a pretty good climbing gear. It ticks almost all boxes. And for $74, you can upgrade the aluminium flex seatpost to a composite model which will smoothen out the ride even better!

Frameset Quality (4/4) – Top-tier aluminium frame, full carbon fork, internal cable routing, D-Fuse Flex seatpost, 12mm thru-axles.
Weight (3/3) – 10kg without pedals.
Gearing Quality (2/3) – Shimano Sora 2×9 gearing.
Low Gear Ratios (2/3) – 25.7″ climbing gear.
Price (1/6) – It’s a bit more expensive than $1k, but still very competitively priced for a bike of this calibre.
Tubeless-Ready (1/1) – Tubeless compatible.

Upright Factor: 1.51 – on the sporty side
XS:
155-166cm – S: 159-171cm – M: 169-181cm – ML: 174-186cm – L: 179-191cm – XL: 189-200cm


2021 Cube Nuroad Pro – Global – Whoops, it’s $1169

13/20 – An excellent price point for Shimano Tiagra gearing! The Cube may be the most expensive bike here but I really wanted to give you an indication for how much extra you’d need to spend to get Tiagra. The frameset is great, it’s tubeless compatible and the bike is nice and light overall.

Frameset Quality (4/4) – Top-tier aluminium frame, full carbon fork, internal cable routing, 12mm thru axles.
Weight (3/3) – 10.6kg without pedals.
Gearing Quality (3/3) – Shimano Tiagra 2×10 gearing.
Low Gear Ratios (1/3)
– 27.3″ climbing gear.
Price (1/6) – A really great value Shimano Tiagra gravel bike.
Tubeless-Ready (1/1) – Tubeless compatible.

Upright Factor: 1.50 – on the sporty side

2021 Breezer Radar Expert – Global – $969

12/20 – 29×2.2″ mountain bike tyre clearance, low ratios, super upright. I’ve been recommending the Radar Expert for years, it’s really hard to beat for the price. It may be a bit heavier than the other options, but it’s in a league of its own in terms of the terrain it can ride – this is thanks to the exceptional tyre clearance. The gear ratios are low for a gravel bike – which will be great for remote mountain roads.

Frameset Quality (2/4) – Somewhat basic steel frame and fork, quick release axles.
Weight (1/3) – 12.6kg without pedals.
Gearing Quality (2/3) – Shimano Sora/Deore 2×9 gearing.
Low Gear Ratios (3/3) – 23.2″ climbing gear.
Price (3/6) – Great value for a Shimano Sora equipped gravel bike.
Tubeless-Ready (1/1) – Tubeless compatible.

Upright Factor: 1.62 – super upright to ride
45:
155-167cm – 48: 167-175cm – 51: 175-180cm – 54: 178-183cm – 57: 183-188cm – 60: 188-196cm


2021 Jamis Renegade A1 – Global – $999

12/20Nice frameset and weight, tubeless compatibility. The Renegade looks to be a great gravel bike option this year. It’s running one of the broadest size ranges too.

Frameset Quality (3/4) – Top-tier aluminium frame and fork, internal cable routing, quick release axles.
Weight (3/3) – 10.89kg without pedals.
Gearing Quality (1/3) – Shimano Claris 2×8 gearing.
Low Gear Ratios (1/3)
– 27.3″ climbing gear.
Price (3/6) – Decent value for the frameset quality.
Tubeless-Ready (1/1) – Tubeless compatible.

Upright Factor: 1.50 – on the sporty side
44:
 147-152cm – 48: 152-160cm – 51: 160-165cm – 54: 165-175cm – 56: 175-180cm – 58: 180-185cm – 61: 185-193cm

2021 Triban RC 500 – Global – $999

12/20 – Shimano Sora gearing under $1000, decent weight, but 36mm maximum tyres. Decathlon’s Triban bike brand always offers excellent value for money. The RC 500 is a bit more of a road bike, so it’s most at home on hard surfaces but will handle the smoother gravel roads just fine. A 10.6kg bike under $1000 is exceptional.

Frameset Quality (3/4) – Decent aluminium frame, carbon fork, quick release axles.
Weight (3/3) – 10.6kg without pedals.
Gearing Quality (2/3) – Shimano Sora 2×9 gearing.
Low Gear Ratios (1/3)
– 28.9″ climbing gear.
Price (3/6) – Great value considering the frameset and Sora gearing.
Tubeless-Ready (0/1) – Tubes only.

Upright Factor: 1.51 – on the sporty side
XS:
155-165cm – S: 165-175cm – M: 175-180cm – L: 180-190cm – XL: 190-200cm


2021 Marin Nicasio 1 – Global – $759

11/20

Frameset Quality (2/4) – Somewhat basic steel frame and fork, quick release axles.
Weight (1/3) – 12.6kg without pedals.
Gearing Quality (1/3) – Shimano Claris 2×8 gearing.
Low Gear Ratios (1/3) – 28.7″ climbing gear.
Price (6/6) – Second-cheapest bike here!
Tubeless-Ready (0/1) – Tubes only.

Upright Factor: 1.53 – on the sporty side
48:
147-152cm – 50: 152-160cm – 52: 160-167cm – 54: 167-175cm – 56: 175-183cm – 58: 183-188cm – 60: 185-193cm

2021 Diamondback Haanjo 2 – North America – $875

11/20

Frameset Quality (2/4) – Decent aluminium frame, steel fork, quick release axles.
Weight (2/3) – Approximately 11.48kg without pedals.
Gearing Quality (1/3) – Shimano Claris 2×8 gearing.
Low Gear Ratios (2/3)
– 29.0″ climbing gear.
Price (4/6) – A solid bike for the price.
Tubeless-Ready (0/1) – Tubes only.

Upright Factor: 1.57 – quite upright to ride
XS:
155-162cm – S: 162-172cm – M: 170-177cm – L: 177-185cm – XL: 185-193cm


2021 Pure Cycles Gravel Adventure Pro – North America – $899

11/20

Frameset Quality (2/4) – Somewhat basic steel frame and fork, quick release axles.
Weight (1/3) – Approximately 12.5kg without pedals.
Gearing Quality (2/3) – Shimano Sora 2×9 gearing.
Low Gear Ratios (2/3)
– 25.7″ climbing gear.
Price (4/6) – Great value considering the frameset and Sora gearing.
Tubeless-Ready (0/1) – Tubes only.

Upright Factor: 1.50 – on the sporty side
S: 167-175cm – M: 173-178cm – L: 178-183cm – XL: 183-188cm

2021 Felt Broam 60 – Global – $949

11/20

Frameset Quality (3/4) – Top-tier aluminium frame, carbon fork, internal cable routing, 12mm thru axles.
Weight (2/3) – 11.1kg without pedals.
Gearing Quality (1/3) -Shimano Claris 2×8 gearing.
Low Gear Ratios (1/3)
– 27.3″ climbing gear.
Price (3/6) – Excellent value for the frameset quality.
Tubeless-Ready (1/1) – Tubeless compatible.

Upright Factor: 1.56 – quite upright to ride
47:
152-168cm – 51: 168-173cm – 54: 173-178cm – 56: 178-183cm – 58: 183-188cm – 61: 188-196cm


2021 Octane One Gridd 2 – Global – Whoops, it’s $1099

11/20

Frameset Quality (3/4) – Decent aluminium frame, carbon fork, quick release and thru-axles.
Weight (1/3) – 10.8kg without pedals.
Gearing Quality (3/3) – SRAM Apex 1×10.
Low Gear Ratios (1/3)
– 27.3″ climbing gear.
Price (2/6) – Great value considering the frameset and SRAM 1X gearing.
Tubeless-Ready (1/1) – Tubeless compatible

Upright Factor: 1.48 – quite low

2021 Specialized Diverge Base E5 – Global – Whoops, it’s $1150

11/20

Frameset Quality (4/4) – Top-tier aluminium frame, full carbon fork, internal cable routing, 12mm thru axles.
Weight (3/3) – 10.29kg without pedals.
Gearing Quality (1/3) – Shimano Claris 2×8 gearing.
Low Gear Ratios (1/3) – 27.2″ climbing gear.
Price (1/6) – Similar quality frameset to the Giant Revolt, however, the parts aren’t quite as nice.
Tubeless-Ready (1/1) – Tubeless compatible.

Upright Factor: 1.52 – on the sporty side


2021 Genesis CDA 20 – Europe – £699

10/20

Frameset Quality (2/4) – Basic aluminium frame and steel fork, quick release axles.
Weight (2/3) – 11.68kg without pedals.
Gearing Quality (2/3) – Shimano Sora 2×9 gearing.
Low Gear Ratios (1/3)
– 27.3″ climbing gear.
Price (3/6) – Good price for a Shimano Sora build.
Tubeless-Ready (0/1) – Tubes only.

Upright Factor: 1.54 – on the sporty side
XS:
156-164cm – S: 164-172cm – M: 171-179cm – L: 178-186cm – XL: 185-193cm

2021 KHS Grit 55 – Global – $829

9/20

Frameset Quality (2/4) – Somewhat basic steel frame and fork, quick release axles.
Weight (1/3) – Approximately 13kg without pedals.
Gearing Quality (1/3) – Shimano Claris 2×8 gearing.
Low Gear Ratios (1/3)
– 29.0″ climbing gear.
Price (4/6) – Priced on the lower end of the specturm.
Tubeless-Ready (0/1) – Tubes only.

Upright Factor: 1.55 – quite upright to ride


2021 Kona Rove AL 700C – Global – $899

9/20

Frameset Quality (2/4) – Decent aluminium frame and fork, internal cable routing, quick release axles.
Weight (1/3) – 12.16kg without pedals.
Gearing Quality (1/3) – Shimano Claris 2×8 gearing.
Low Gear Ratios (1/3)
– 27.3″ climbing gear.
Price (4/6) – Decent value for the frameset quality.
Tubeless-Ready (0/1) – Tubes only.

Upright Factor: 1.49 – on the sporty side
48:
152-160cm – 50: 157-170cm – 52: 168-178cm – 54: 175-183cm – 56: 180-188cm – 58: 185-196cm

2021 State Bicycle Co 4130 All-Road 650B – North America – $799

14/20 – Best price-to-performance, without doubt. Nice ‘n upright. The 4130 All Road is a very compelling gravel bike for the price. It’s built around a hardworking steel frameset that has modern thru-axles and it’s ready for racks or bikepacking bags too. The Sensah gearing is not a typical drivetrain pick, but from all reports, it works quite well and allows State Bicycle Co to deliver a 1X11 bike under $800. The cherry on the top is the tubeless compatibility.

Frameset Quality (3/4) – Decent steel frame and fork, 12mm thru-axles.
Weight (1/3) – 12.59kg without pedals.
Gearing Quality (2/3) – Sensah SRX Pro 1×11 gearing.
Low Gear Ratios (1/3) – 27.7″ climbing gear.
Price (6/6) – It’s one of the cheapest bikes on the list with some of the best features.
Tubeless-Ready (1/1) – Tubeless compatible.

Upright Factor: 1.59 – quite upright to ride
XS:
154-168cm – S: 165-177cm – M: 175-188cm L: 185-196cm


2021 Salsa Journeyman Claris 650B – Global – $949

13/20 – Excellent frameset, upright, great gear ratios, tubeless compatible. I’ve been long recommending the Journeyman thanks to its worldwide availability, upright ride, low gear ratios and high-quality frameset for the price. The size range is also great!

Frameset Quality (3/4) – Decent aluminium frame, carbon fork, internal cable routing, quick release axles.
Weight (2/3) – 11.99kg without pedals.
Gearing Quality (1/3) – Shimano Claris 2×8 gearing.
Low Gear Ratios (3/3)
– 24.4″ climbing gear.
Price (3/6) – Excellent value for the frameset quality.
Tubeless-Ready (1/1) – Tubeless compatible.

Upright Factor: 1.56 – quite upright to ride
50:
152-160cm – 52: 157-165cm – 54: 165-175cm – 55.5: 173-183cm – 58: 180-190cm – 59.5: 188-200cm

2021 Marin Nicacio Plus 650B – Global – $899

11/20

Frameset Quality (2/4) – Somewhat basic steel frame and fork, quick release axles.
Weight (1/3) – 12.6kg without pedals.
Gearing Quality (2/3) – Microshift Advent 1×9 gearing.
Low Gear Ratios (2/3)
– 25.2″ climbing gear.
Price (4/6) – Decent value for performance.
Tubeless-Ready (0/1) – Tubes only.

Upright Factor: 1.53 – on the sporty side
48:
147-152cm – 50: 152-160cm – 52: 160-167cm – 54: 167-175cm – 56: 175-183cm – 58: 183-188cm – 60: 185-193cm


2021 Kona Rove AL 650B – Global – $899

9/20

Frameset Quality (2/4) – Decent aluminium frame and fork, internal cable routing, quick release axles.
Weight (1/3) – Approximately 12.5kg without pedals.
Gearing Quality (1/3) – Shimano Claris 2×8 gearing.
Low Gear Ratios (1/3)
– 27.5″ climbing gear.
Price (4/6) – Decent value for the frameset quality.
Tubeless-Ready (0/1) – Tubes only.

Upright Factor: 1.49 – quite sporty
48:
152-160cm – 50: 157-170cm – 52: 168-178cm – 54: 175-183cm – 56: 180-188cm – 58: 185-196cm

If You’d Like To Learn Everything About Gravel Bikes, Check Out My Book: The Bikepacking Bike Buyer’s Guide

The post The 23 BEST Gravel Bikes For 2021 – Under $1000 appeared first on CyclingAbout.com.


Video: Meet The Man Who Travels BIG Distances With His Dog [EP.18]

$
0
0

Meet Gil and Capi, the dynamic duo who always travel together! We went on a bicycle tour in the state of Aguascalientes in Mexico and I got to capture the incredible landscapes along with how Gil travels with his best friend.

Like my videos? Patreon supporters get early access to my films and exclusive access to my Q&As:
PATREON (Monthly rewards!)
PAYPAL (One-off donation to replace broken camera gear!)

🔥 INSTAGRAM: HERE
🌎 FACEBOOK: HERE
🐕 GIL AND CAPI: HERE
💦 MY WATER FILTER: HERE

MY BIKE: KOGA WorldTraveller-S 2.0
MY GEAR LIST: https://bit.ly/2C1BCKF
MY ROUTE: Coming soon
MY CAMERAS: Panasonic G9 + GoPro Hero 6 + DJI Mavic Air
MUSIC: Better Than Two (Visitants), Brighter Deeper (Visitants), Crowheart (The Realist), Carry Me Along (Timber Choir)

The post Video: Meet The Man Who Travels BIG Distances With His Dog [EP.18] appeared first on CyclingAbout.com.

MapOut, The Best Smartphone Mapping App – Just Got Updated!

$
0
0

MapOut – which is by far the best smartphone mapping app I’ve ever used – has received an update recently with some new features. If you are not in the know, I have a very comprehensive article about the MapOut app HERE.

Sorry Android users, this is just a quick public service announcement to iPhone users…

Here’s Why MapOut Is King For Navigation 👑

mapout

1. The maps are offline – you just download the tiles you need (only a few megabytes each) and you can roam anywhere.
2. Contour lines and hiking trails are shown.
3. You can choose A and B locations, and MapOut will create a route based on walking, cycling, road size and elevation gain.
4. You can draw routes with your finger and see the distance, elevation profile and vertical metres gained in real-time.
5. You can adjust routes with your finger too, just trace from your existing route to the roads you want to use.
6. Analyse specific sections of your route by adjusting the A and B points.
7. 3D tilt allows you to see what the terrain looks like!
8. Instant point-to-point elevation profiles by holding two fingers on the screen.
9. Easily import GPX routes that you’ve created or downloaded from elsewhere.
10. Easily export GPX routes that you’ve created or modified in the app.


What Are The New Features?

mapout

When you click on a segment of your route:
– It will tell you the elevation gain and loss for the section between your A and B points (you can adjust them).
– It shows the maximum gradient up and down.
– It gives both estimated walking and riding times (riding time is without much luggage).


You Can Get MapOut In The App Store For $4.99, No Subscription And Free Map Tiles For The Entire World!

The post MapOut, The Best Smartphone Mapping App – Just Got Updated! appeared first on CyclingAbout.com.

Here Are The 18 BEST Flat Bar Gravel Bikes For 2021

$
0
0

Over the years, I’ve made it pretty clear that for rougher terrain, I think many cyclists would benefit from flat handlebars. It should, therefore, come as no surprise that I’m very excited to write about flat bar gravel bikes!

Wait… aren’t these just hybrids, 1990s mountain bikes and rigid mountain bikes?

You could definitely argue that case, but ultimately, I don’t think it matters. These bikes have the latest bike technology, they are available in shops right now and they are a direct alternative to their drop bar gravel bike brethren.

Right, it’s time to go deep down the flat bar gravel bike rabbit hole…

Don’t miss my article about the BEST gravel bikes under $1000 HERE.

8 Reasons Flat Handlebars Are Great For Gravel

flat bar gravel bikes

1. You get better bike control thanks to the additional steering leverage (especially with any front luggage).
2. You have much more handgrip while braking on bumpy surfaces.
3. It opens gravel bikes up to MTB-specific components (brakes, shifters, derailleurs, in particular).
4. It’s easier to change/maintain gear and brake cables.
5. Flat bar grips are often more durable than bar tape.
6. Mountain bike parts are usually cheaper, resulting in great value gravel bikes.
7. Mountain bike parts have more suitable gear ratios for dirt roads (can be steep!).
8. There is more space for bikepacking handlebar packs and accessories.

I’ve got an in-depth article on the topic of flat handlebars HERE.


Flat Bar Gravel Bike Frame Geometry

A diagram showing the difference in frame geometry between a flat bar (white) and drop bar (black) gravel bike.

Best practice flat bar gravel geometry is not the same as drop bar gravel geometry.

The most obvious change is the length of the frame. As the grips are closer to your body on a flat bar bike, manufacturers often increase the length of their frames to ensure your hip, back and arm angles can be maintained.

The difference in frame reach is somewhere between 25mm and 50mm depending on who you ask. Salsa Cycles have a ~50mm difference in ‘reach’ between their frame types, Norco uses ~35mm, Specialized run ~30mm and Marin go with ~25mm.

The bike’s steering speed also requires amendment on a flat bar gravel bike.


To make a flat bar gravel bike feel nice and stable when we ride, we need to adjust the steering geometry of the frameset so that the bike turns slower than a drop bar bike. This is to help counter the additional steering leverage. With both quick steering and lots of leverage, you end up with a very twitchy handling bike (ie. it feels less stable at speed).

Bike designers typically slacken the head tube angle to account for the additional steering leverage.

We can get a good idea for how quickly a bike will steer by measuring the “trail” in millimetres. Less trail means faster steering, and more trail means slower steering. For a flat bar gravel bike, approximately 20% additional trail is enough to counter the higher steering leverage.

You can understand the basics of bicycle frame geometry HERE.
And understand advanced-level steering HERE.


Flat Bar Gravel Bike Conversions

There are a handful of drop bar bikes that could be great candidates for a flat bar conversion (if you don’t like anything below!). This is because they are built with a “progressive” frame geometry that already incorporates a longer frame reach and a slacker head tube angle.

Here are your options: Bjorn Recycled, BMC URS, Canyon Grail, Curve GMX+, Evil Chamois Hager, Fustle Causeway GR1, Knolly Cache, Liteville 4-ONE Mk1, Marin Headlands, Merida Silex, Nukeproof Digger, Rocky Mountain Solo, Saracen Levarg, Whyte Glencoe.


Scoring The Best Flat Bar Gravel Bikes

I have prioritised flat bar frame characteristics in my scoring because I think well-designed flat bar bikes should rise to the top (30% of the score). In particular, this list penalises bikes with short top tubes and quick steering.

Having appropriately low gear ratios is important for the steeper-than-typical gravel ascents – the gravel bike’s weight will also help here (both total 30% of the score). A few more points are up for grabs for frame features, value-for-money and tubeless compatibility (the remaining 40% of the score).

Frameset Quality (/4) – Based on frame features, fork material, cable routing, mounts and axle type.
Flat Bar Sizing (/3) – Flat bar frame length is 3 points, a bit longer than normal is 1 point, drop bar geo is 0 points.
Steering Speed (/3) – 70mm+ steering is 3 points, 65-70mm steering is 2 points and sub-65mm steering is 0 points.
Low Gear Ratios (/3) – Sub 23″ is 3 points, 23-26″ is 2 points, 26-28″ is 1 point, 28″+ is 0 points – learn more HERE.
Bike Weight (/3) – Sub-10kg is 3 points, 10-11kg is 2 points, 11-12kg is 1 point, 12-13kg is 0 points.
Value For Money (/3) – A subjective score based on my opinion of the frameset and specification.
Tubeless-Ready (/1) – An extra point for tubeless tyre compatibility.
TOTAL: /20

If you’d like to learn everything about gravel bikes, check out my in-depth book, The Bikepacking Bike Buyer’s Guide.

Ranking The Best Flat Bar Gravel Bikes

FLAT BAR GEOMETRY GRAVEL BIKES
19/20 – Marin DSX 2 – My favourite ‘affordable’ gravel bike. Deore 12-speed, 29×2.1″ clearance, carbon fork.
19/20
– Norco Search XR – A killer bike with low gear ratios, modern features and 27.5″ wheels for small sizes.
17/20 – Specialized Diverge Expert EVO – The nicest frameset here with an excellent array of components.
16/20
– Commencal FCB – A 29×2.0″ gravel bike that’s light enough, with all of the modern frame features.
16/20
– Surly Bridge Club – The highest-scoring steel bike, exceptionally low gears, very affordable.
15/20 – Giant Escape Disc – A very compelling $800 option which is available in shops all around the world.
15/20Kona Dew Deluxe – Another amazing sub-$900 bike option, with excellent gear ratios and 27.5″ wheels.

14/20 – Whyte Portabello V2
13/20 – Salsa Journeyman Sora
11/20 – Saracen Levarg FB

DROP BAR GEOMETRY FLAT BAR BIKES
16/20 – Rose Backroad Multicross – Super lightweight (8.7kg!), fully internal cables, nice GRX components.
14/20 – Specialized Sirrus X 5.0 – A best-kept secret, exceptionally well priced, 20mm of suspension, sub-10kg.
13/20 – Poseidon Flatbar X – Cheapest bike on the list ($599!), 10-speed components, carbon fork.
13/20 – Octane One Gridd Flat – Deore 10-speed, hydro brakes, carbon fork, reasonably light, sub-$1000

12/20 – Cube SL Road Race
12/20 – KTM Strada Glorious
10/20 – Obed Borough
9/20 – Genesis Croix de Fer 20


Flat Bar Gravel Bikes (Flat Bar Geometry)

2021 Marin DSX 2 – Global – $1099

flat bar gravel bike

19/20 – My favourite affordable gravel bike, Deore 12-speed, huge 29×2.1″ clearance, carbon fork. There is an $899 model too which ranks equally well!

Frameset Quality (4/4) – Lightweight aluminium frame, carbon fork, thru-axles, 29×2.1″ clearance.
Flat Bar Sizing (3/3) – Dedicated flat bar frame.
Steering Speed (3/3) – 81mm trail is appropriate.
Low Gear Ratios (3/3) – 22.9″ climbing gear is great.
Value For Money (3/3) – Exceptional value for a Deore 12-speed build.
Bike Weight (2/3) – Approximately 10.9kg without pedals.
Tubeless-Ready (1/1) – Tubeless compatible.

2021 Norco Search XR Flat Bar – Global – $1149

flat bar gravel bikes

19/20Excellent frameset with all of the modern features, great flat bar geometry, 650B wheels in the smaller sizes and perfect climbing gears. The 42mm maximum tyre size will be limiting for people heading into rougher terrain, so this will be more suitable on smoother gravel roads.

Frameset Quality (4/4) – Lightweight aluminium frame, carbon fork, thru-axles.
Flat Bar Sizing (3/3) – Dedicated flat bar frame.
Steering Speed (3/3) – 77mm trail is appropriate.
Low Gear Ratios (3/3) – 21.4″ climbing gear is fantastic.
Value For Money (3/3) – Excellent value build with all of the right features.
Bike Weight (2/3) – Approximately 10.9kg without pedals.
Tubeless-Ready (1/1) – Tubeless compatible.


2021 Specialized Diverge EVO – Global – US $2600

flat bar gravel bikes

17/20 – This is the bike that solidified the flat bar gravel category this year! It offers the nicest frame and fork here along with an excellent array of components. The front suspension, frame features and geometry make this a great pick, despite its price.

Frameset Quality (4/4) – Top-tier aluminium frame, carbon fork, 20mm of suspension, thru-axles, lots of mounts.
Flat Bar Sizing (3/3) – Dedicated flat bar frame.
Steering Speed (3/3) – 70mm trail is appropriate.
Low Gear Ratios (2/3) – 24.8″ climbing gear.
Bike Weight (2/3) – 10.7kg without pedals.
Value For Money (2/3) – Exceptional components and frameset quality, price is expensive but not unreasonable.
Tubeless-Ready (1/1) – Tubeless compatible.

2021 Surly Bridge Club – Global – $1099

16/20One of only a few steel bikes on this list, insanely low climbing gears, 47mm tyre clearance, hydraulic brakes and a great geometry for flat bar gravel riding. If you don’t mind a bit of extra weight the Bridge Club will make a really nice gravel rig.

Frameset Quality (3/4) – Sturdy steel frame and fork, quick-release axles, lots of mounts.
Flat Bar Sizing (3/3) – Dedicated flat bar frame.
Steering Speed (3/3) – 77mm trail is appropriate.
Low Gear Ratios (3/3) – 17.5″ climbing gear is insanely low (ride up anything!).
Value For Money (3/3) – Great value for a Deore 11-speed build and decent frameset.
Bike Weight (0/3) – 12.4kg without pedals.
Tubeless-Ready (1/1) – Tubeless compatible.


2021 Commencal FCB – Global – $1099

flat bar gravel bikes

16/20 – A 29×2.0″ gravel bike that’s light enough, with excellent frame geometry and all of the modern frame features. The only downside is the climbing gear ratio, which might be a bit high if you live around steep gravel roads (in Commencal’s defence, the FCB is designed for city riding).

Frameset Quality (4/4) – Lightweight frame, aluminium fork, thru-axles
Flat Bar Sizing (3/3) – Dedicated flat bar frame.
Steering Speed (3/3) – 75mm trail is appropriate.
Low Gear Ratios (0/3) – 29″ climbing gear is too high.
Bike Weight (2/3) – 10.9kg without pedals.
Value For Money (3/3) – SRAM Apex 11-speed, hydro brakes and decent wheels for the price.
Tubeless-Ready (1/1) – Tubeless compatible.

2021 Giant Escape Disc – Global – $800

flat bar gravel bikes

15/20 – A very compelling $800 option which is available in shops all around the world. The gear ratios are low enough and the components have all of the modern tech, including tubeless compatibility.

Frameset Quality (2/4) – Decent aluminium frame, carbon fork, flex seatpost, quick-release axles.
Flat Bar Sizing (3/3) – Dedicated flat bar frame.
Steering Speed (2/3) – 69mm trail is a touch quick.
Low Gear Ratios (3/3) – 22.8″ climbing gear.
Bike Weight (1/3) – Approximately 11.9kg without pedals.
Value For Money (3/3) – One of the cheapest bikes here, yet still with nice frame features.
Tubeless-Ready (1/1) – Tubeless compatible.


2021 Kona Dew Deluxe – Global – $899

15/20 – Another amazing sub-$900 bike option, with excellent gear ratios, 27.5″ wheels and Shimano Deore 11-speed.

Frameset Quality (2/4) – Aluminium frame, steel fork, quick-release axles.
Flat Bar Sizing (3/3) – Dedicated flat bar frame.
Steering Speed (3/3) – 72mm trail is appropriate.
Low Gear Ratios (3/3) – 20.6″ climbing gear is super low.
Bike Weight (1/3) – Approximately 11.9kg without pedals, fenders and the kickstand.
Value For Money (3/3) – Amazing price for Shimano Deore 11-speed, hydro brakes and a bunch of accessories!
Tubeless-Ready (0/1) – Tubes only.

2021 Whyte Portobello V2 – £799

flat bar gravel bikes

14/20

Frameset Quality (3/4) – Decent aluminium frame and fork, thru-axles.
Flat Bar Sizing (3/3) – Dedicated flat bar frame.
Steering Speed (3/3) – 72mm trail is appropriate.
Low Gear Ratios (1/3) – 27.7″ climbing gear is too high.
Bike Weight (1/3) – Approximately 11.5kg without pedals.
Value For Money (2/3) – Quite a well-priced package.
Tubeless-Ready (1/1) – Tubeless compatible.


2021 Salsa Journeyman Sora – Global – $1199

flat bar gravel bikes

13/20

Frameset Quality (3/4) – Nice aluminium frame, carbon fork, quick-release axles.
Flat Bar Sizing (3/3) – Dedicated flat bar frame.
Steering Speed (2/3) – 69mm trail is pretty good.
Low Gear Ratios (2/3) – 24.1″ climbing gear.
Bike Weight (1/3) – 11.3kg without pedals.
Value For Money (1/3) – A little bit expensive for a Shimano Sora build with entry-level crankset and brakes.
Tubeless-Ready (1/1) – Tubeless compatible.

2021 Saracen Levarg FB – £999

flat bar gravel bikes

11/20

Frameset Quality (3/4) – Lightweight aluminium frame, carbon fork, thru-axles.
Flat Bar Sizing (3/3) – Dedicated flat bar frame.
Steering Speed (3/3) – 74mm trail is appropriate.
Low Gear Ratios (0/3) – 29″ climbing gear.
Bike Weight (1/3) – 11.2kg without pedals.
Value For Money (1/3) – A little expensive for older series Shimano Deore 10-speed and basic cranks.
Tubeless-Ready (0/1) – Tubes only.


Flat Bar Gravel Bikes (Drop Bar Geometry)

2021 Rose Backroad Multicross – Europe – €2149

flat bar gravel bikes

16/20 – Despite losing 3 points for using drop bar bike sizing, the Rose scored incredibly well thanks to the nice frameset and spec, including a flex seatpost. The Multicross is ultra-light, has decent gear ratios and includes all of the modern gravel features.

Frameset Quality (4/4) – Ultralight carbon frame, full carbon fork, fully internal cable routing, flex post, thru-axles.
Flat Bar Sizing (0/3) – Drop bar frame with a flat bar installed.
Steering Speed (3/3) – 71mm trail is great.
Low Gear Ratios (2/3) – 24.9″ climbing gear.
Bike Weight (3/3) – 8.7kg without pedals, lightest bike here.
Value For Money (3/3) – Expensive but very good value when you consider the quality of everything.
Tubeless-Ready (1/1) – Tubeless compatible.

2021 Specialized Sirrus X 5.0 – Global – $1700

14/20Here is an industry secret: hybrid bikes aren’t as marketable as gravel bikes, so by choosing the Sirrus X, you can get 90% of the Diverge EVO for substantially less money! Just like the Diverge EVO, it has 20mm of suspension, lots of nice parts and all in a package that’s sub-10kg. The only downsides are that the geometry is a bit shorter than it should be and the gear ratios are a bit higher too.

Frameset Quality (4/4) – Lightweight carbon frame and fork, 20mm of suspension, thru-axles.
Flat Bar Sizing (0/3) – Drop bar frame with a flat bar installed.
Steering Speed (2/3) – 66mm trail is a bit quick.
Low Gear Ratios (1/3) – 27.3″ climbing gear.
Bike Weight (3/3) – 9.6kg without pedals.
Value For Money (3/3) – Amazing value for a carbon bike, with suspension and Shimano SLX gearing.
Tubeless-Ready (1/1) – Tubeless compatible.


2021 Poseidon Flatbar X – North America – $599

flat bar gravel bike

13/20 – This price almost seems too good to be true. It’s lightweight, uses 1X10 gearing and has some of the lowest gear ratios of all gravel bikes here.

You can see more pictures and the full specification on the Poseidon website HERE.

Frameset Quality (3/4) – Quite a decent aluminium frame, full carbon fork, quick-release axles.
Flat Bar Sizing (0/3) – Drop bar frame with a flat bar installed.
Steering Speed (2/3) – 66mm trail is a touch low.
Low Gear Ratios (3/3) – 21.5″ climbing gear is excellent.
Bike Weight (2/3) – 10.9kg without pedals.
Value For Money (3/3) – It’s almost too good to be true!
Tubeless-Ready (0/1) – Tubes only.

2021 Octane One Gridd Flat – Global – $999

flat bar gravel bike

13/20 – Deore 10-speed, hydro brakes, carbon fork, reasonably light, sub-$1000!

Frameset Quality (3/4) – Solid aluminium frame, carbon fork, front thru-axle.
Flat Bar Sizing (0/3) – Drop bar frame with a flat bar installed.
Steering Speed (3/3) – 74mm trail is great.
Low Gear Ratios (2/3) – 24.6″ climbing gear.
Bike Weight (1/3) – Approximately 11kg without pedals.
Value For Money (3/3) – Decent price for a Shimano Deore 10-speed build with hydro brakes.
Tubeless-Ready (1/1) – Tubeless compatible.


2021 Cube SL Road Race – Europe – €1200

12/20

Frameset Quality (4/4) – Ultralight aluminium frame, full carbon fork, internal cables, thru-axles.
Flat Bar Sizing (0/3) – Drop bar frame with a flat bar installed.
Steering Speed (2/3) – 68mm trail is ok.
Low Gear Ratios (1/3) – 27.3″ climbing gear is a touch too high for gravel.
Bike Weight (2/3) – 10.1kg.
Value For Money (3/3) – Nice frameset, excellent parts, lightweight.
Tubeless-Ready (0/1) – Tubes only.

2021 KTM X-Strada Glorious – Europe – €1549

12/20

Frameset Quality (3/4) – Unique step-through design, aluminium frame, carbon fork, thru-axles.
Flat Bar Sizing (0/3) – Drop bar frame with a flat bar installed.
Steering Speed (2/3) – 65mm trail is a bit quick.
Low Gear Ratios (2/3) – 24.1″ climbing gear.
Bike Weight (2/3) – 10.8kg without pedals.
Value For Money (2/3) – A decent Shimano GRX 10-speed build with hydro brakes.
Tubeless-Ready (1/1) –Tubeless compatible.


2021 Obed Borough – North America – $2349

flat bar gravel bikes

10/20

Frameset Quality (4/4) – Ultralight carbon frame, full carbon fork, internal cables, thru-axles.
Flat Bar Sizing (0/3) – Drop bar frame with a flat bar installed.
Steering Speed (2/3) – 67mm trail is ok.
Low Gear Ratios (0/3) – 34.4″ climbing gear is far too high for gravel.
Bike Weight (2/3) – Approximately 10kg.
Value For Money (1/3) – Nice enough frame but the spec could be smarter for the price.
Tubeless-Ready (1/1) – Tubeless compatible.

2021 Genesis Croix de Fer 20 – Global – £1199

flat bar gravel bikes

9/20

Frameset Quality (3/4) – Nice steel frameset, lots of mounts, quick-release axles.
Flat Bar Sizing (0/3) – Drop bar frame with a flat bar installed.
Steering Speed (2/3) – 66mm trail is a bit quick.
Low Gear Ratios (2/3) – 24.1″ climbing gear.
Bike Weight (0/3) – Approximately 12.1kg without pedals.
Value For Money (2/3) – A decent Shimano GRX 10-speed build with hydro brakes.
Tubeless-Ready (0/1) –Tubes only.

If You’d Like To Learn Everything About Gravel Bikes, Check Out My Book: The Bikepacking Bike Buyer’s Guide

The post Here Are The 18 BEST Flat Bar Gravel Bikes For 2021 appeared first on CyclingAbout.com.

40+ Solo Women Cyclists Who Have Epic Bicycle Touring Experience

$
0
0

Solo women cyclists are a rare breed, so it’s always an absolute pleasure to encounter them in the wild.

Their experience of cycling around the world is very different from mine. I am two metres tall and never have to deal with any physical or verbal confrontation. I don’t have to manage a period, politely turn down sex, discuss why I’m not married or think too much about my personal safety.

Not only that, but going on your first bike trip alone can be a nerve-racking experience, for anyone. The instinct is to team up with a partner or friend, but it’s not always possible – and personally, I’ve found that waiting for others has held me back from going on adventures.

Fredrika cycled for 1000 days around the world and wrote a book about it! Image: Fredrika Ek

In light of this, I’ve created this portal to provide women with enough resources and inspiration to go from dreaming about a bike trip, to building the confidence to get out there and explore the world on a bike! I believe that by understanding how to deal with various situations as a solo women cyclist, you can reduce any fears or anxieties you may have.

I haven’t listed any specific advice for women travellers here. Instead, click through the following links with the contact information for the solo women cyclists I’ve met, hosted, cycled with, read about and followed on social media.

These women are all great role models, and many have written on their blogs about how to deal with issues unique to being a travelling as a women. I hope this portal helps!


Touring Websites and Groups For Women Travellers

Heike Pirngruber in Image: PushBikeGirl

Women Cycle The World – A handful of profiles on solo women travellers
Bicycle Travelling Women – More profiles on solo women cyclists
Bicycle Travelling WomenFacebook Group with 6000+ members
Solo Women Cyclist Interviews – A series of interesting interviews by Heike Pirngruber


Around The World – Solo Women Cyclists

best dynamo lights

I shared a few days cycling with German cyclist, Mina along Australia’s Great Ocean Road.

Ann JohanssonMairawa – Cycled Sweden to Tajikistan and Sweden to Thailand
Anna KitlarBikexploringCycled North America, Asia to Europe, Africa
Anne Westwards
Anne Westwards1.5 years through Asia and the Middle East
Blanca FernandezBlanca on a BikeCycled London to Asia, now travelling Africa
BlandineKick The World – 5 years, 57000km, 37 countries
Barbara GrafCaretakerLong bicycle journeys all over the world
Cinderella ServranckxCycling Cindy – 50000km across 45 countries
Dervla MurphyFull TiltIreland to India on a bicycle… in 1963! Check out her book on the experience.
Dorothee FleckWomen’s Cycling Guide – 12 years, 98 countries, 180,000km by bike
Emily ChappellThat Emily Chappell – Europe to Asia, North America and currently focussing on ultra-endurance cycling
Ewa ŚwiderskaEwcyna – Travelling by bike around the world since 2013
Fredrika EkThe Bike Ramble – 1000 days around the world, 51000km, 45 countries, 25 years old
Genevieve FortinOn The Bike AgainHas cycled dozens of countries since 2006
Heike PirngruberPush Bike Girl – Travelling by bike around the world since 2013, an amazing photographer
Helen LloydHelen’s Take On – 45 countries, 45,000km, four continents
Hyojin “Jin” Jeong – Universe With Me – 80000km around the world since 2011
Ishbel HolmesWorld Bike Girl – Cycled 20 countries over three years
Joanna KaszewiakOn By WaysEurope to Asia by bike, bus and plane
Josie DewJosie Dew – 35 years of solo adventures, author of seven bicycle touring books
Jude & AstridFoons On Bikes – Australia to the UK, then the UK to South Africa
Juliana BuhringJuliana Buhring – Around the world in 152 days, ultra-endurance extraordinaire
Kate LeemingBreaking The CycleLots of big bike expeditions since 1993
Lael WilcoxLael WilcoxExtensive touring experience with her ex-partner, more recently has won ultra-cycling events solo
Leana NeimandLeana Neimand – Around the world since 2007, 89 countries, seven continents
Loretta HendersonSolo Female Cyclist – Cycled five continents, 51 countries, author of a book for solo women cyclists
Lydia LeibbrandtLydia Leibbrandt – The Netherlands to China as a 20-year-old
Mareike DorfMina Travels The World – Cycled Europe, the Americas, Asia, Australia and NZ
Marielle Jauring – The Biking Viking – 39000km across Australia, NZ, USA and Canada
Martina GeesColorfishFive years, 25 countries, 60,000km in multiple continents
Mirjam WoutersCycling Dutch GirlCycling all over the world, now with a toddler!
Nicole HekerUnlearning By Bike22 countries, 377 days, Thailand to Spain
Phoebe TanRiding CycletteNorthern Europe to South East Asia
Snezana RadojicicSnezana RadojicicCycling around the world since 2011
Tara WeirMargo Polo21 countries, 37,000km, extensive travels through Asia in particular, but also Aus, NZ & N.America
Valentina BrunetValentina On Wheels – 25000km from Vietnam to Italy


The Americas – Solo Women Cyclists

Wiebke cycling across the famous Salar de Uyuni. Image: Wiebke Lühmann

Anna McNuffAnna McNuffBolivia to Patagonia and 50 states of the USA
Anna-Luisa BeckeRadmaedchen – Canada to Guatemala, 10000km, 10 months
Cynthia ValladaresEn Bici al Fin del Mundo – Ecuador to Patagonia as a 24-year-old
Hilde GreenWorking On My Calves –  30,000km bike trip from Alaska to Argentina
Juli HirataJuli Hirata – Alaska to Argentina
Kate RawlesCarbon Cycle Kate – Brazil to Patagonia on a bamboo bicycle she made herself
Leah ManningCycle South Chica – Cycled from the USA to Argentina
Maria GarusSolo Woman Cyclist – Alaska to Argentina, 24000km, 33 months
Stefania CioldiShe Is Around – Cycled about South America with a very cute cat
Sissi KorhonenStrangerlessArgentina to Mexico over three years
Wiebke LühmannPack and Tri – Colombia to Argentina over six months as a 23-year-old


The Big Women On Wheels Book

There is a book you can buy that has personal accounts from more than 100 solo women cyclists.

I personally have a copy, and it has opened my eyes to the myriad of techniques women have to employ to travel the world on a bicycle. One technique that sticks in my mind is to not smile at men in various parts of the world, as it implies you’re open to sex.

Big Women On Wheels is US $8.50 and you can get a copy HERE


Am I Missing Any Women Who Have Conducted Big Solo Bike Adventures?

My criteria for this list (just to keep it somewhat exclusive):
– The rider has completed one or more solo 10,000km+ bike journeys.
– The journey is across multiple continents (eg. Europe to Australia, South Africa to Europe, North & South America).

The post 40+ Solo Women Cyclists Who Have Epic Bicycle Touring Experience appeared first on CyclingAbout.com.

Is It REALLY Too Dangerous To Cycle Across Mexico? (Video)

$
0
0

I took my Mexican friend Gerardo on his first bike adventure! 🏆

Like my videos? Patreon supporters get early access to my films and exclusive access to my Q&As:
PATREON (Monthly rewards!)
PAYPAL (One-off donation to replace broken camera gear!)

🔥 INSTAGRAM: HERE
🌎 FACEBOOK: HERE

MY BIKE: KOGA WorldTraveller-S 2.0
MY GEAR LIST: https://bit.ly/2C1BCKF
MY ROUTE: https://ridewithgps.com/routes/34546514
MY CAMERAS: Panasonic G9 + 14-140mm Lens + GoPro Hero 6 + DJI Mavic Air
MUSIC: Boothill (Wastelander), Devil’s Doorstep (Wastelander), Grit (Wastelander), O Brother (Wastelander), Brushes (Pete Stewart), Hand to God (Clark Adams)

trans mexico bikepacking route

The post Is It REALLY Too Dangerous To Cycle Across Mexico? (Video) appeared first on CyclingAbout.com.

Viewing all 446 articles
Browse latest View live